

How adorable are these Artesprix Iron on Patches?!?! These are the blank of the month for July over at Artesprix and they have SO MANY possibilities. I decided to go beach themed. These patches are sublimation ready. With some simple supplies you can create endless projects!

I used the new Sublimation Coloring Books from Artesprix. They are sublimation ready - if you don't want to color them, you don't have to! You can simply transfer the black design to the blank of your choice. How cool is that??
Supplies used for this project:
- Sublimation coloring book Summer and Travel - I used the medium and the small
- Iron on Patches
- Artesprix Sublimation Markers
- Heat Tape
- Protective Paper
- Heat press or iron
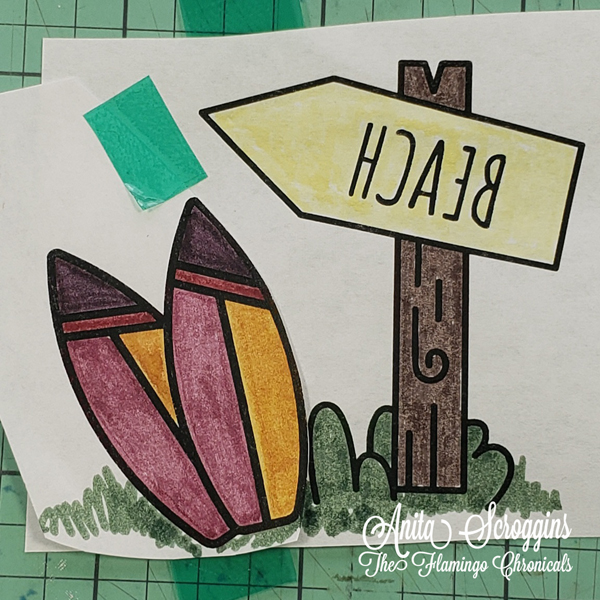
Forthe first patch I used images from both the Medium coloring book (the beach sign) and the small (the surf boards). I colored them in using a variety of sublimation markers. I used a tiny piece of heat tape to adhere them together - be sure not to cover any part of your design!

And the after! I made these for the princess - so I haven't actually adhered them to anything yet. I am waiting on her next visit so she can pick out what she would like to put them on!

I made a second patch using the starfish from the medium coloring book.

This is such a fun and easy craft project!
- Pick your designs and color with sublimation markers
- Position your design face down on the blank and adhere with heat tape
- Wrap in protective paper
- Use a heat press to transfer your design
Easy peasy!
Be sure to get these Iron On Patches before they are gone - they are only available for the month of July at Artesprix

I hope you give these a try - it's a great summer kid's craft and so much fun!


