Showing posts with label Artesprix. Show all posts

Beach Themed Subimation Iron on Patches


How adorable are these Artesprix Iron on Patches?!?! These are the blank of the month for July over at Artesprix and they have SO MANY possibilities. I decided to go beach themed. These patches are sublimation ready. With some simple supplies you can create endless projects!

Sublimation coloring books

 I used the new Sublimation Coloring Books from Artesprix. They are sublimation ready - if you don't want to color them, you don't have to! You can simply transfer the black design to the blank of your choice. How cool is that?? 

Supplies used for this project:


Forthe first patch I used images from both the Medium coloring book (the beach sign) and the small (the surf boards). I colored them in using a variety of sublimation markers. I used a tiny piece of heat tape to adhere them together - be sure not to cover any part of your design!


 And the after! I made these for the princess - so I haven't actually adhered them to anything yet. I am waiting on her next visit so she can pick out what she would like to put them on! 

I made a second patch using the starfish from the medium coloring book. 


This is such a fun and easy craft project!

  1. Pick your designs and color with sublimation markers
  2. Position your design face down on the blank and adhere with heat tape
  3. Wrap in protective paper
  4. Use a heat press to transfer your design

Easy peasy! 

Be sure to get these Iron On Patches before they are gone - they are only available for the month of July at Artesprix  

I hope you give these a try - it's a great summer kid's craft and so much fun!


Beware Sequin Zip Case


Halloween Beware

Have you tried Artesprix Iron on Sublimation Markers yet? If you haven't.. what are you waiting for?? It's the most fun ever. It's even great for kids - it's as easy as coloring!  This Beware Sequin Zip Case uses the blank of the month from Artesprix - the Sequin Zip Case. This is a great size for so many things - I gave this one to my princess for a pencil bag and she loves it!  It's only available for the month of August, so be sure to gram some before they are gone!!


Supplies:


Beware Silhouette Studio

I started my project in Silhouette Studio. I had this file saved and I knew it would look perfect on this bag. I grouped the image and shadow together, then turned the opacity down before I printed. Be sure to mirror your image if it has text. I swear I always forget the first time around! Print on regular copy paper.

Artesprix Iron On Ink Markers
I used the Basic Chisel and Basic Fine markers, Orange, Black, and Red. It's as easy as coloring your image and then you are ready to press!
 

Sublimation Prep

Trim your copy paper to fit your blank, then use Heat Resistant Tape to hold it in place. Cover with Protective Paper before pressing. Press at 385° for 45 seconds. Be sure to do the peek test before pulling your image off the blank!

Sublimated Sequin Bag

 Ta-da! Now it's time to admire your finished project. This turned out so cute! 

Hop on over to the Artesprix page for some fabulous inspiration and find 

all the supplies you need to create with.


Please Close The Lid Bathroom Decor


Please Close The Lid

How cute is this sign I made for our pink guest bath? One of our Wolfhounds has a serious drinking problem, and we sometimes forget to tell guests. So Please Close the Lid!  I used the Decorative Sign with is the Blank of the Month from Artesprix. It's only available this month, so be sure to grab it while you can. So many great ways to use this blank!


After Weeding

I started with the Heat Resistant Sublimation Mask. This is a full 8.5 x 11 sheet and it cuts beautifully on my Silhouette Cameo. There are instructions on cut settings included with the product. After cutting I weeded out the area I wanted to sublimate and left everything else intact. It comes on a very sturdy backing sheet. PLEASE NOTE - do not mirror your text when using these masks.

Transferring Heat Mask

Since my font had small pieces that would be lost if I just peeled the backing off the mask sheet, I used some transfer tape over the top of the mask. This way when I peeled the backing off, all my bits and pieces stayed in place and intact. Then I applied the mask to the blank and removed the transfer tape. 


Preparing to heat press

So, I wasn't thinking about color overrun when I cut the piece of heat mask to a small size. So I used some bits and piece I had left over from other projects to cover the rest of the area on the top of the blank. 


Sublimation Paints

Have you tried the Sublimation Paints from Artesprix yet? They are pretty cool let me tell you! It made this project so much easier. Instead of trying to color each little letter I just painted the pink paint on plain copy paper and let dry. Once dry, I used more heat tape to adhere it to the top of the blank, paint side down, then made a sandwich out of Protective Paper. The sandwich makes sure that you don't inadvertently get ink onto something you didn't mean to! 

Please Close The Lid

 I added some 3D flamingo stickers that I had on hand, and some pom-pom trim top finish my project off. Everything in life is better with pom-pom trim!  The Decorative Sign comes complete with a ribbon for hanging, but I switched it out for a matching pink one. 


Artesprix Iron-on Ink

You can find all the supplies I used for this project, plus so much amazing inspiration, on the Artesprix website, so be sure to check them out. Don't forget to grab your Decorative Sign before the end of July when they are gone! 


Imagine Sublimation Trivet


Artesprix Trivet
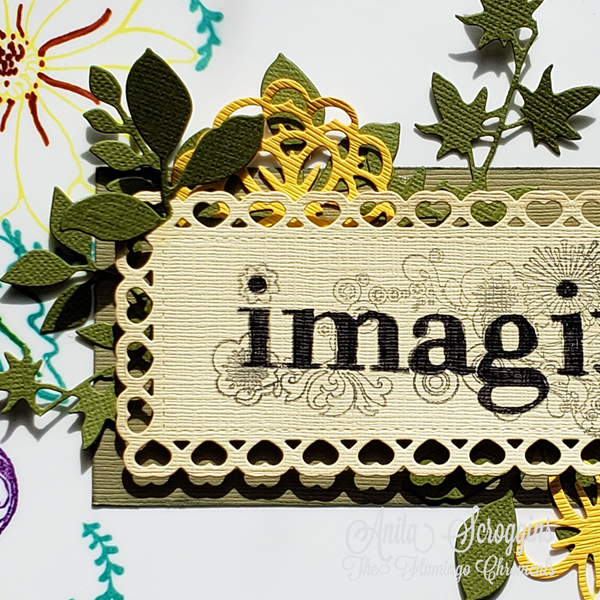
The Artesprix Blank of the month is a fantastic trivet. There are so many possibilities with this blank! I decided to so some stamping along with the sublimation and make this Imagine art piece for the princess' bedroom. She loves to make art and I hope this inspires her!

Sublimation Markers and Stamp Pads
 

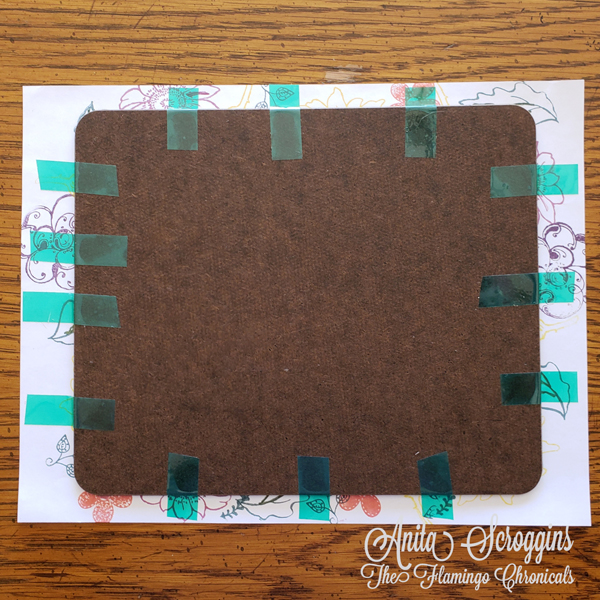
I started by using the Iron-on-Ink stamp pads in a variety of colors to stamp flowers and foliage around the edges. Then I used the markers to add some additional details to the stamped images. Remember,, plain Jane copy paper is what you use for your base - trace the outline of your blank onto the copy paper and then you are ready to decorate.

Supplies:


How to Fix Sublimation Mistakes

See that little tiny orange fingerprint that I managed to get in the middle of my copy paper while I was stamping? That will 100% transfer to your blank when you heat press it!!!!  Place a small piece of heat resistant tape on the copy paper to cover it up. Learn from my mistakes young Jedi!

Sublimation Ready to Press

 Once your have your design to your liking,, place your blank face down onto the copy paper and secure with Heat Resistant Tape.  Use enough that your blank has no chance of shifting. Trust me- you would rather use a few extra pieces of tape than ruin a project!

Sublimated Trivet

Ta-da! Your design is now permanent and won't wash or rub off. Now it's time to embellish my trivet to put in my Princess' room. 

Imagine pape piecing

I used a variety of stamps, dies, and card stocks to add this centerpiece in the middle of my trivet. This will make a fabulous addition to her art table in her room!


The Trivet is the Blank of The Month for February so be sure to grab them before they are gone. There are SO many uses for this blank. Check out some more fabulous ideas at the Artesprix Blog

Artesprix Iron on Ink
 

Thanks so much for stopping by. You can see this project and other fun sublimation 

projects on my Pinterest boards.  


Sublimation Wine Stopper DIY - Easy and Fun


Sublimation Stamp Pads Wine Stopper

Now that Christmas is behind us my thoughts are turning to spring and all the fun crafts that brings. Valentine Day is not a huge deal for us, because our wedding anniversary is that same week. But, I still like to mark the occasion - and wine is a must! 


This month the Wine Stopper is the Blank of The Month at Artesprix and it is adorable y'all. You really need to grab one - or a couple - before they are gone. They are HEAVY too - much more than I expected. AND- they each come with 4 sublimation ready gloss white inserts - so you can change them up if you wanted to!


Artesprix Wine Stopper Sublimation

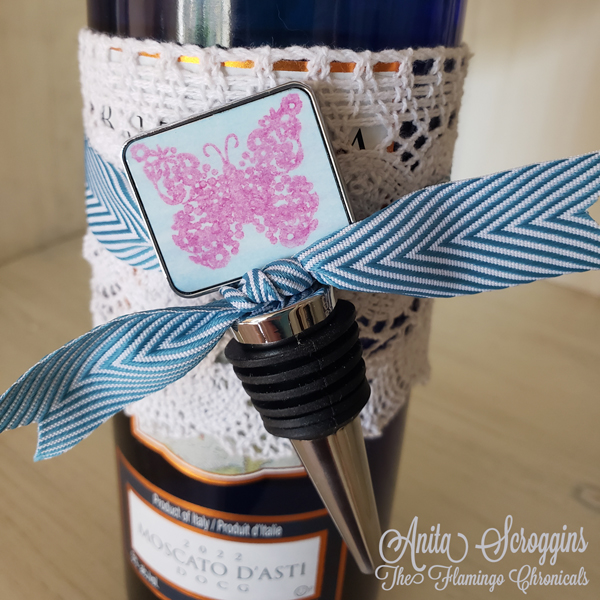
I grabbed a bottle of wine - Moscato is my favorite - added some lace to dress it up, and tied a matching ribbon to hold the wine stopper in place.  

Supplies:

Artesprix Wine Stopper 

Artesprix Sublimation Stamp Pad - I used Pink

Artesprix Sublimation Marker pack

Artesprix Heat Tape

Artesprix Protective Paper

Heat press - I like this one. It is easy to travel with and doesn't take up a ton of space!

Copy Paper

Pencil

Scissors

Stamps and stamping block

Sublimation Step by Step

Step 1 : trace the blank onto copy paper using a pencil. Never a pen! Pencil will not transfer onto the blank, but a pen will.

Step 2 : stamp your design on the copy paper using clear acrylic stamp and Sublimation Ink Pad. Remember- the color of the ink changes dramatically when it is heated!

Step 3 : I used a marker and colored over the stamped image to fill the entire outlined space. 

Step 4 : place the blank face down onto the design and secure with heat resistant tape. NOTE: this blank has a protective top sheet that must be removed prior to pressing. Don't be like me and forget that step the first time!

Step 5 : (not shown) make a "sandwich" with the protective paper enclosing the blank inside, with the copy paper UP. 

Heat press - for the wine stopper it is 385° for 45 seconds. Carefully remove from protective paper and peel one side of the copy paper back to make sure everything looks great before removing it completely. 

Ta-da! You have a beautiful sublimated blank. Add to the actual wine stopper using the double sided adhesive already in place, just remove the paper covering and press the sublimated blank into place. 

DIY Sublimation Wine Stopper

 Look how adorable this is! Everyone on your list is going to love getting one of these.


DIY Cheerleader Style Bow with Sublimation Markers


Little Girls Bow
Yes, I know we are barely past Valentine's Day, but as a crafter I am already looking ahead to St Patrick's Day. Have you ever wanted a way to dress up a cheerleader style bow? I have! So I grabbed some Artesprix Sublimation Markers and got to work. This project was a lot of fun and the little hands helping me out loved it too. 

DIY St Patty's Day Bow

 Supplies Needed:

Sublimation Markers
 

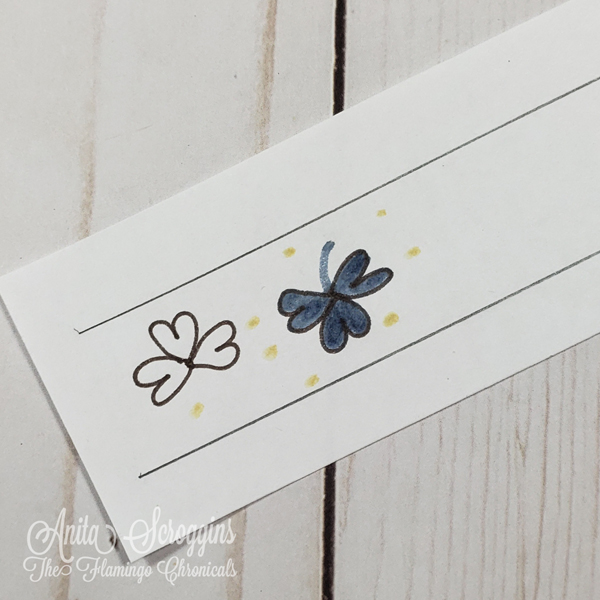
Start by cutting the copy paper to 2.5 inches. Mark off the design area using a pencil. (Don't use a marker- it might transfer when pressing). 

Use the Black Fine Tip Sublimation Marker to draw the clover design, then fill in with the Clover Green. Add random dots in the design area using the yellow marker. 

Getting ready to heat press

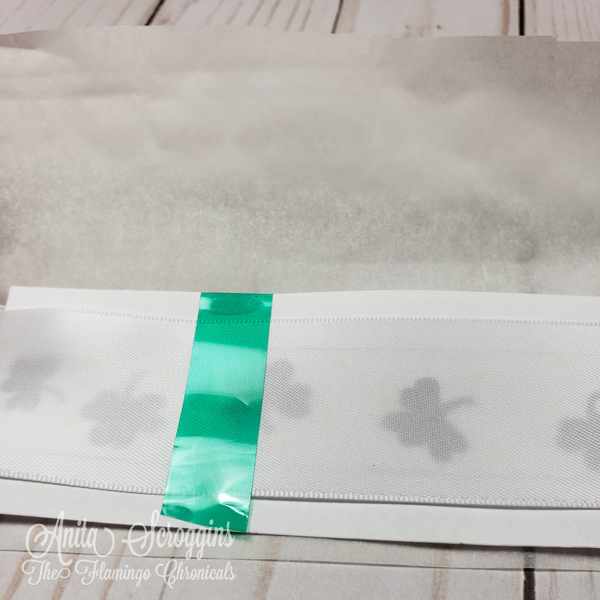
Use the Heat Tape to adhere the ribbon over the design area. Cut a piece of protective paper wide enough to fold over the copy paper making a "sandwich". Make sure both sides are covered. Flip this over so the copy paper is now on top of the ribbon (closest to the heat plate).

Press with your heat press of choice. 

DIY Cheerleader Bow

There are lots of ways to make a cheerleader style bow. This video is my favorite- she shows just how to do it! It's kind of awkward the first couple of times you try, but it is really pretty easy with a little bit of practice!

Sublimation Ribbon

So, trying to get a great photo of a hair bow on a wiggling 7 year old is hard y'all! This was the best out of about 40 shots! She is so silly!


 Do you love ribbons like I do? Gwen Studios Ribbons are available at Wal-Mart.