To see the entire Deconstructed Layout Series hop on over to this page.
It has been a while since I cut a photo up into strips, and I have been itching to do it. I have soooo many photos from my recent trip from the Caribbean- beautiful photos that I really want to showcase on my layouts.
Being an engineer by trade, measuring and having everything straight is right up there on my list!
I used a piece of washi tape across the top of the paper - it is hard to see in the photo because it is very light. I placed it two inches down from the top of the page and used my ruler to make sure it was level.
Next up I marked the center of the page and then marked 1" on either side of the center- remember the strips are 2" wide. I wanted 1/8" between the photo strips, so working from the center of the paper towards the edges, I measured 2" then 1/8". Repeat on the other side, again working from the center towards the edge.
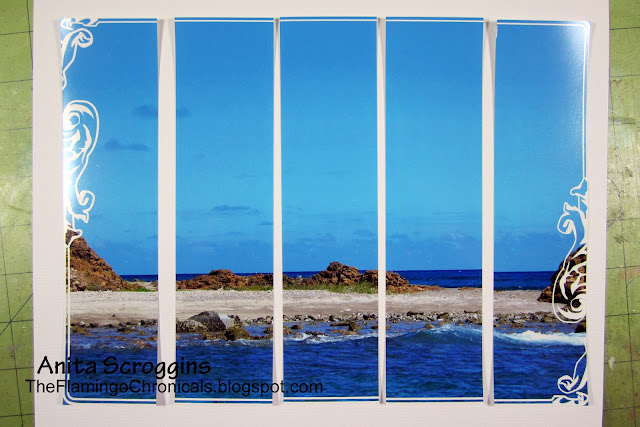
Here is what my page looks like after I have everything measured. Adhere the photo strips using the pencil lines as a guide.
I started with an 8x10 photo and I cut it into five 2" wide strips. I added a frame in PSE before printing to give it a little something more. Adhere the photo strips using the pencil lines as your guide. Once you have everything in place, trim the cardstock with a 1/8" margin on all sides then erase any visible pencil lines.
Mat it on a dark blue cardstock, again with a 1/8" margin then adhere to the background paper. I used the Everyday Moments stamp set from Elle's studio to add detail to the upper corner of the photo. I stamped it with white StazOn, then traced over the words with a Signo White Pen..
I finished the layout off with two smaller photos at the bottom, a few embellishments, and some journaling.
I hope you are enjoying my set of tutorials- I am having a lot of fun putting them together.
I would love your feedback too- please leave me a comment and let me know what you think!
Thanks for stopping by today!


Awesome page and tutorial Anita!!!!
ReplyDeleteThanks for joining us at CMS :-)
great layout!! Thanks so much for joining us at Scrap & Play and Color Me Scrappy!!
ReplyDeleteA stunning page - many thanks for sharing with us on Pixels and Paper (and yes we love our blue sheep too!)
ReplyDeleteGreat layout! So precise! Glad I am not the only one who measures everything! Just have to learn to glue straight lol! A pleasure to look at! Having been to Antigua I share your love of the place! All the best from SATW! :)
ReplyDeleteWonderful layout - so beautiful! Thank you for playing along with us at Berry71Bleu!
ReplyDeleteWhat an amazing page!! Thanks for playing along with us at Scrap and Play!!
ReplyDeleteVery cool page, Anita! I love the way you cut the large photo and added the stamped image to it! Thanks for joining us at Scrap & Play
ReplyDeleteStunning photo and love the design of your page! Very clever and super creative! Thanks so much for playing along with us at Berry71Bleu! ;-)
ReplyDeleteLove the big pic cut in strips, looks great x
ReplyDeleteGorgeous page love how you really made your photo pop!looks stunning! Thanx for joining us at Scrap and Play! And Color Me Scrappy!
ReplyDeleteWhat a great idea to use one large photo cut into strips--such a simple touch but it adds a great artistic flair! Excellent work--thanks for joining us at Berry71bleu...
ReplyDeleteLove the cut photo. Thanks for playing with us at Pixels and Paper!
ReplyDeleteWhat a fantastic take on the challenge(s) I love how you used the gorgeous photo. Thank you for playing with our challenge at Pixels and Paper :) hope to see you creations again
ReplyDeleteLovely idea! :) Thank you for playing with us at Scrap Around The World :)
ReplyDeletewhat a great take on so many challenges.. WTG! THANK you for playing along over @ SATW this month... :)
ReplyDeleteGorgeous page! Thanks for joining us at Scrap & Play!
ReplyDeleteGreat idea!! fantastic tutorial....thanks for playing with us at Scrap Around The World!
ReplyDeleteBeautiful layout ! The picture is fantastic !! Thank you for joining at Scrap Around The World !!
ReplyDeleteLovely page! Thank you so much for joining the SATW challenge this month!
ReplyDeletewow love how you broke up the photo!!!! Thanks for playing along with us at Scrap & Play!!
ReplyDeleteCool take on he sketch! Thanks so much for joining us at Berry71Bleu.
ReplyDeleteGreat work with the picture ! Thank you for playing at CMS !
ReplyDeleteSimply gorgeous! Thanks for playing along with CMS!
ReplyDeletee.
Gorgeous page! I love how you cut and embellished the large photo. Thanks for joining the Berry71Bleu Challenge! :)
ReplyDeletewow…. beautiful photo! Great job on the challenges! Thanks for playing along with CMS! :)
ReplyDeleteThis is a great page. I love how you've incorporated your photos and embellishments. Thank you for joining us at P & P. I look forward to seeing more of your art. Cheers, Di
ReplyDelete