Start by cutting strips of the Petal Paper to match the size of the petal you want to end up with; then fold the paper in half. I wanted my petals to be about 5" in length and about 4" wide. So I cut my strips 11" long and 4.5" wide. When folded in half they are 5.5" in length and 4.5" wide. Be sure you pay attention to the grain of the paper! You want the grain to run up and down - NOT side to side.
Cut from the folded edge.I free hand cut these, so they are very natural looking! I didn't worry too much about making them all the exact same, I just cut the base a little more narrow than the top and made sure I had a nicely rounded top edge. Seriously, don't go crazy over this, you are going to shape the petals anyway! I made eight large pink petals for this flower.
Use your thumbs to slightly stretch each petal side to side, about 1/4 of the way down from the top. Remember, there are two petals here, because we cut from the fold. So be sure to stretch each petal individually.
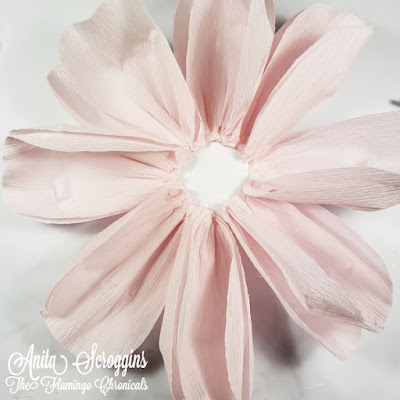
Here is the view from the top. Notice the petals are gathered at the bottom- I folded them accordion style and kind of squashed them together. When the gathers are released it will give the petals a lot of extra shape.
Punch (or cut) a large circle about 4" across. Using hot glue attach the petals one at a time, overlapping slightly.
Here is your outer ring of petals! You are halfway there!
Add an inner ring of white petals using the same method. I made mine 2" in length by 1.5" wide. I managed to shove 7 of them in there- so it is rather full.
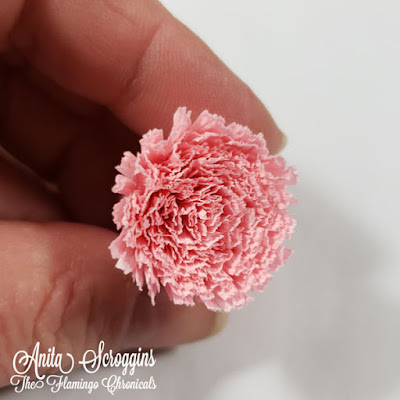
To make the center I cut a piece of the Petal Paper 6.5" wide by 2" tall. Fold it in half so it is now only 1" tall. Apply a strip of 1/4" wide tape next to the fold. Cut very narrow strips from the top almost to the tape. Remove the tape and roll up tightly.
Use hot glue to adhere in the center of the flower.
Here is a view from the side. Separating the petals gives it more volume and makes it look realistic.
I used a fan brush and some pink ink to add details to the very center of the outer petals, then gave the whole flower a light spray with mica spray. Done! I made several flowers in a variety of sizes for my Easter tree and they are perfect for it!
I hope you have enjoyed my Easter Tree. I have so much fun putting this together. The princess loves it! I have several more posts coming this week on how I made all the decorations for the tree - so be sure to check back!
The - Easter Tree
The - Glittered Easter Egg Garland
The- DIY Easter Ornaments
The - Upcycled Candlesticks


So pretty!
ReplyDeleteThank you Steph!
ReplyDelete