Showing posts with label Ann Butler. Show all posts

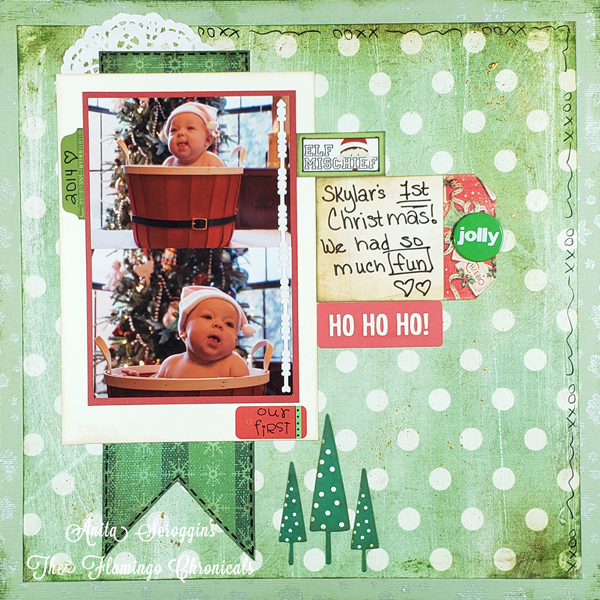
Baby's First Christmas Layout

The Princess' first Christmas. We had such a great time that year. Holidays are so much more fun when you have a little one in the house. Good memories.


For this layout I pulled out some hoarded vintage Daisy D's papers. Y'all know how much I covet those. I also used stamps, inks, and paint from Ann Butler Designs.I have been trying hard to make my layouts less "fluffy" - flat is my objective! I want to be able to put more layouts in an album.


I started by stamping all around the edge of my base cardstock. I used  the Snowflake Frenzy stamp and Sheer Pearl Iridescents. Apply a light coat of the iridescents to the stamp using a foam brush. I stamped around the entire edge of the cardstock - going about " in. I inked the edge of the cardstock using Evergreen Crafter's Ink from Colorbox.

I added a little bit of sparkle to the second layer of paper using Treasure Gold Paint by FolkArt. I used an old toothbrush to splatter the paint in several places.

More from my Daisy D's stash - this fun journal card is from forever ago. I still have a few left! I also used stickers from Bo Bunny and Doodlebug Design.

I always add a bit of faux stitching to my layouts. I love the texture it adds, without any added bulk.  My favorite pen for this is my Tombow Monotwin - it has two tips so I can vary the size of the "stitches" I am adding. And it lasts forever too! I used the same Evergreen ink on the edge of the second layer of paper too.

Be sure to hop over to Ann's blog to see more great ideas.


Laugh Out Loud Layout with Ann Butler Designs

The hubs' sure does love this little girl. She has him wrapped around her little, tiny fingers. She loves her Gramps - and takes every chance she can get to hang out with him.

Together Layout
For this layout I used Ann Butler Crafter's Inks and stamps. These inks are great- they are so opaque, and they have great coverage on fabric, paper, chipboard, and many other surfaces. Since they are a fabric ink, they need to be heat set when using on paper. On the paper strip behind the photo I used the Ann Butler Stamp by Unity: 2: Square, Doily

This post may contain affiliate links. Please see my Disclosure


Crafters ink
 I started by coloring a piece of natural colored lace with the Berry Colorbox Crafter's Ink. I used a heat gun to set the ink. Yes, I use an old phone book to stamp/paint/and make messes on. It's FREE and works great!


Colored chipboard
I used the same Berry ink to color my chipboard title, then heat set.


layered paper
I inked the edges of my papers using DewDrop VersaMagic Inks from Imagine Crafts. I have always loved the way that it differentiates the different layers of paper and adds so much visual texture to my projects.  I adhered the piece of lace using my SureBonder® Low Temp glue gun.


heart punches
I used an older Fiskars paper shaper and a LittleB die to punch hearts from coordinating papers, then inked the edges with Petal Pink VersaMagic ink.


embellishments
I added some die cut stickers from Webster's Pages (I know! From way back in the day!) and Kaisercraft.  My title chipboard is from a Melissa Frances set of chipboard pieces; Creativity.  I added some faux stitching around the edge of the papers using a fine line black pen.

Be sure to check out Ann's blog for more great ideas on her products.


The Princess' First Birthday Layout

First birthday layout

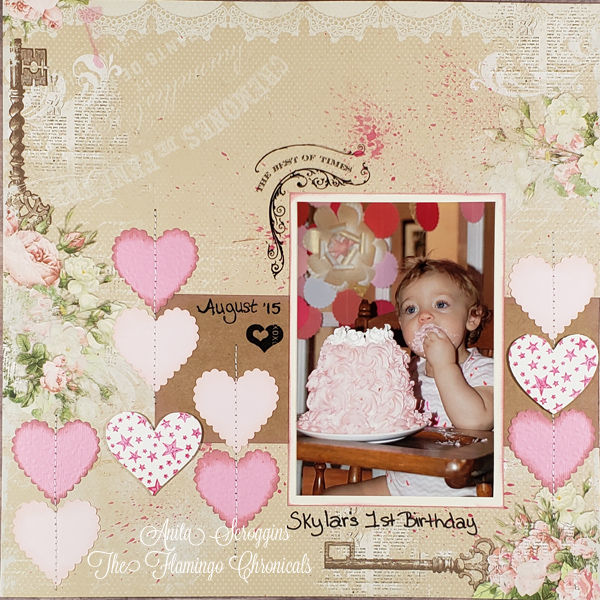
This photo always makes me smile. My sweet princess on her first birthday. What a fun time we had that day! We had plenty of cupcakes and treats, but of course the princess needed her own little cake to tear into. Let me just say that having a grand little is the best thing ever. We have had so many good memories since she was born. If you don't have grand children yet- just wait! it is the best thing ever.

https://annbutlerdesigns.com/
This layout was created for the Ann Butler Designs Creative Team. Ann has designed some lovely stamps and her inks are so rich and robust. Please make sure you check them out!


http://www.pagemaps.com/pdf-archives
Y'all I love page maps. I have been using them for years. I have about 12 years worth of maps printed out and stored in a 3-ring binder. It is SO easy to flip through the years and find a map for my current project. If you have never used page maps for your projects be sure you take a look at their site. You can even print out archived maps! For this layout I used a map from October 2010.

Smash cake

Look how cut my little princess is. She is the delight of my life - I just can't express how much joy she brings me.  It is so hard to believe that she will be starting kindergarten this year. Where has the time gone? It just doesn't seem possible that she is almost 5 years old already.

Paint splatter


Colorbox Ink


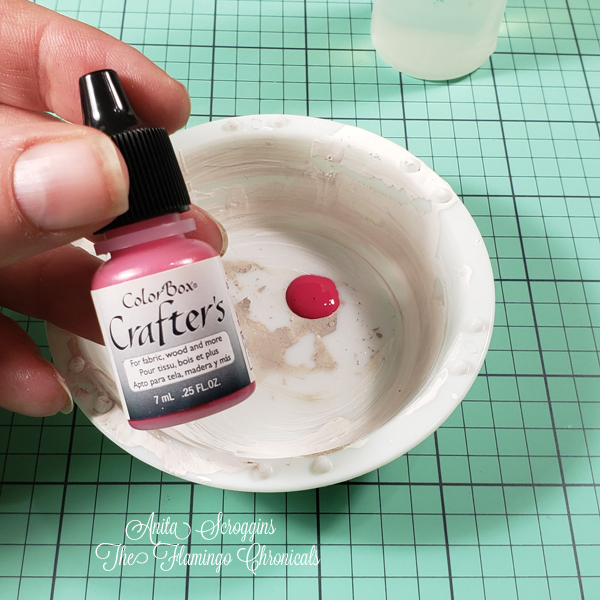
I started by creating a splatter background on my layout.  Mix the Berry Crafter's Ink Refill with some water to thin it out. I then grabbed an old toothbrush to splatter the ink on the page. I like to place my photos and main elements on the page and mark where they will lay using a pencil. This way when I splatter I can be sure I am not putting it where I am going to over it up. This is some thick ink which gives amazing opaque coverage on fabric and other porous surfaces.  Since I work mainly with paper I use a heat gun to dry the ink.  Speaking of paper- the patterned paper here is Bo Bunny from the Soiree line. Yeah, I've had it a while. Don't judge.

Folk Art Paint


Chipboard Embellishments

To add a little texture to my layout I used chipboard for a few of the hearts. I gave them two coats of FolkArt by Plaid acrylic paint in Wicker White, allowing the paint to dry between coats. Have you tried the new Plaid Paintbrush sets? They are amazing!! Stamp the dried chipboard using the Berry Crafter's Ink and Ann Butler Stamp by Unity: Star Burst. Since I wanted to make sure that I stamped exactly where I wanted on the chipboard I placed the inked stamp face up and then put the chipboard on it.

Sewing on paper
Do you sew on your layouts? I love the texture and visual weight it adds to my layouts, but it does NOT add a lot of bulk. For this layout I lightly adhered the hearts - because I don't want to get adhesive on my sewing needle. This chunky thread is Button Thread - which is way thicker than regular sewing thread. I love the way it looks on my layouts. This thread does take some getting used to and you will have to use a different needle on your machine. Once you get the hang of it though it will add so much to your projects!! I use my Brother Designio machine for all my sewing - from paper to quilting.

Stamped embellishments


Be sure to check out Ann's social media pages to see more amazing ideas using her line of products.


Snow Baby Layout

This post may contain affiliate links.


Today I want to share a layout with my beautiful Snow Baby - how cute is she??? She has changed so much since this photo was taken. I mean, she was super cute then, and she is super cute now, but it is so hard to process how this time has passed so quickly!

I have been working really hard to use the stuff I already own- so I pulled out some older paper from KaiserCraft - the Silver Bells line. I LOVE that they had pinks in their Christmas papers that year- non traditional yes, but beautiful!

I started by trimming a piece of Bazzill French Vanilla (my all time favorite) and using a Fiskars  border punch all the way around it. I inked the edge of the paper, then adhered it to the background paper. My Scotch ATG is one of my favorite tools for adhering large pieces of paper. I roughed up a few of the punched edges to give it some texture. 


In the upper corner I tore the paper and folded it back. I grabbed a metal accent from my stash to finish the corner. 


These beautiful chipboard pieces are by Blue Fern Studios. I inked them using Ann Butler Crafter's Ink by Colorbox in Aguamarine. I used a sponge applicator - this is so much easier than trying to hold a tiny piece of chipboard and ink your fingers in the process. I used a heat gun to dry the ink (it's a crafter's ink, not a paper ink) and then applied a layer of Iridescent paint in Snow, also by Ann Butler. Look how sparkly it is!!


This piece of chipboard is SUPER old- it's from Close To My Heart - it matches one of their older Cricut Cartridges. I love that is is pure white! I stamped it using the same ink as above, heat set it, than painted with the Snow Iridescent paint. The little silver trim is from Kreinik. 


How amazing is this stamp from Ann Butler? It is available from Unity Stamp Company. This is a large background stamp - Snowflake Frenzy. These stamps are unmounted, red rubber and they make beautiful impressions. 


How to create a simple layout with a lot of punch

These days I have been trying to create with a lot less fuss. I want to get more layouts in my albums and I want the pages to lay FLAT. This simple layout was so fun to create with my new Flourish Wonder stamp from Ann Butler by Unity Stamp company. I LOVE this stamp and I can see myself using it on tons of projects.


I really wanted to start with a neutral background. French Vanilla cardstock by Bazzill is my favorite cardstock ever! I began with the paper strips on the left side and matting my photo. Once I had that I placed them out on the page and lightly marked where they were going to lay. Then it was super easy to stamp in just the areas I wanted.


I used the Ann Butler Crafters Ink in Berry and lightly rubbed it across the surface of the stamp. I did not ink the entire stamp because I wanted to avoid hard lines.

The paper strips were cut from a variety of paper lines - I had a stack of pieces from a previous project and I picked a few coordinating pieces from the stack. I adhered them in layers to the background, inking each piece first. The punch is an old Fiskars border punch. Like waaaayyy back in the day old. I am sad to say it is nearing it's final days.  The pearls are from Want 2 Scrap and I cut the full piece into smaller sections to get the look I wanted .


I used a glitter pen to highlight a few places in the background. This, of course, made it the very devil to photograph. I have got to remember that!


To finish off the project I added some die cuts (I can't remember who made these - they came in a kit), a little piece of ribbon, and a journal tag from My Mind's Eye. Faux stitching around my photo mat finished the page off.


Last Minute Christmas Tags

Y'all. It is ONE week until Christmas. Are you running behind like me? It seems like every year I have grand plans for what I am going to get done at Christmas and only about half gets finished each year. So of course I am making last minute Christmas Tags for my gifts. If you need some last minute tags yourself, these were fun to make (no stress) and were pretty quick all things considered.

I started heat embossing randomly on the background of my tags. Look how crisp and clean that looks!  I used Ann Butler Background Basics Stamp in Double Diamonds. I love this stamp it is so versatile!


Heat emboss as normal and look how shiny it gets. I am going to be using this as a resist so I used a clear embossing powder from ColorBox.


Now we want to add some color. I used Ann Butler's Crafter's ink by ColorBox in Limelight and Aquamarine. Using a dauber I applied one color at a time, randomly, until th entire tag was covered. I blended the inks just a bit where they overlapped, but be careful you don't over blend - that just makes mud.

Then just add your embellishments! I used some vintage sheet music torn into strips, chipboard pieces, and other random things I had in my Christmas embellishment box.


I love using stick pins on my tags. To see how I made this one check out my tutorial here.


Look how amazing the background is using the resist technique and then adding your inks.  I hope you give this a try!


How to Create a Layered Background using Stamps

Look at my sweet princess! She was so cute and roly poly!  I love the look of layered backgrounds on my layouts. I don't like bulky pages that warp once I put them in my albums. Using stamps, inks, and stencils is a great way to create a detailed background. So much texture but no bulk!

My first step is to use a stencil, ink, and a dauber to add a layer of color randomly on the background. Here I am using ColorBox Crafter's Ink by Ann Butler Designs (Desert Sand). This is a nice opaque ink - I love it! Remember if you are using a multi surface ink on paper you need to dry it.


What do you do when you love the design of a stamp but not the shape? Make a mask!! I used a punch and a scrap of cardstock here and then stamped through the mask. This gave me a very random pattern which is exactly what I was looking for. This stamp is Ann Butler Stamp by Unity: Doily.


Here is a look at the result. Isn't that cool??

I used more Ann Butler ink to cover my chipboard (this time in Berry) and used a clear embossing powder over it. Heat set for a sparkling finish.

The last detail for the background is some tiny hearts scattered randomly around the photos. Because I wanted them to blend in I stamped them on a piece of scrap paper before stamping on the layout.

Here's another look at the chipboard pieces. I love how the clear embossing powder gives them a sparkly finish.


This journal card is from my stash - I swear I have had it forever. It's from Creative Imaginations.

Here's another look at the finished background. It gives some visual weight to the layout, but it doesn't take over the layout. I want my photos to stand out - not the embellishments!


For more great ideas using Ann's amazing products be sure to check out her social pages.