I am super excited about this new class I have coming up in April at The Crafty Scrapper in Waxahachie, TX. I have used the fun new My Minds Eye Papers on a Heart Of Texas Studios blank Album.
The Class is April 16th 10:30 - 1:30pm. To register or purchase a kit please contact the store directly at 972-923-3151 or hop over to the blog.
Not local?? No problem! You can have a kit shipped right to your door. Kits include all class supplies and full color instructions.
Showing posts with label My Minds Eye. Show all posts
Summer Fun Welcome Banner
Summer is here- let's bring on the BBQ, family, and fun times. This mounth out theme for Deflecto Craft is Summer Fun.
We always seem to have people in the house all summer long, which I love. I wanted something special for the little table in my entry way to welcome everyone in and this is what I came up with.
I am in love with these VersaGrip Magnetic Sign holders- they have so many uses. For this project I added them to my Ikea candle holders to hold my banner. The grip sign holder at the top is so great for holding little odds and ends!
I added bows and buttons to the front of the VersaGrip holders.
I decorated the candle holders with punched stars, some of which I added pop dots under.
I decorated two of the Slanted Sign Holder 3x4" and added to the display, using coordinating papers, ribbons, and the cutest lady-bug buttons taken off of a sweater from years ago.
Be sure to check out the Deflecto Crafts Facebook Page and our new blog for amazing ideas!
We always seem to have people in the house all summer long, which I love. I wanted something special for the little table in my entry way to welcome everyone in and this is what I came up with.
I am in love with these VersaGrip Magnetic Sign holders- they have so many uses. For this project I added them to my Ikea candle holders to hold my banner. The grip sign holder at the top is so great for holding little odds and ends!
I added bows and buttons to the front of the VersaGrip holders.
I decorated the candle holders with punched stars, some of which I added pop dots under.
I decorated two of the Slanted Sign Holder 3x4" and added to the display, using coordinating papers, ribbons, and the cutest lady-bug buttons taken off of a sweater from years ago.
Be sure to check out the Deflecto Crafts Facebook Page and our new blog for amazing ideas!
Birthday Album for a Princess
Howdy everyone! Today I have a pretty little mini album to share. I made this last month for a sweet little girl turning 5 years old.
Warning: Lots of photos! :)
I used some vintage textured K&Co floral paperthat I hoarded for years. I made the title piece for the front using my Silhouette Cameo and the Cut and Print feature. I used my Cinch to bind the album.
The mom wanted lots of pockets and tags so that people at the birthday party could leave messages.
The birthday girl's name is Princess- so we needed lots of bling, lots of flowers, and lots of pink!
On the inside of the album I used quite a bit of My Mind's Eye patterned papers, punches, ribbons, and Prima Flowers.
I think I used 10 yds of ribbon in this book!
I loved making this little book, and I was so happy with how it turned out! I hope you enjoyed my book. I would love it if you left me a comment to tell me what you think!
Have a wonderful week!
Warning: Lots of photos! :)
I used some vintage textured K&Co floral paper
The mom wanted lots of pockets and tags so that people at the birthday party could leave messages.
The birthday girl's name is Princess- so we needed lots of bling, lots of flowers, and lots of pink!
On the inside of the album I used quite a bit of My Mind's Eye patterned papers, punches, ribbons, and Prima Flowers.
I think I used 10 yds of ribbon in this book!
I loved making this little book, and I was so happy with how it turned out! I hope you enjoyed my book. I would love it if you left me a comment to tell me what you think!
Have a wonderful week!
Merry Christmas - Layout with Sparkle N Sprinkle
Good evening everyone, I hope you have had a wonderful crafty weekend and are ready to greet the week with cheer! Today I have a layout made with some wonderful products from Sparkle N Sprinkle.
My papers are My Mind's Eye, a collection from a couple of years ago. I pulled some chipboards, flowers and ribbons from my stash to put my layout together.
I applied 2 1/2" Tear-ific Tape to cardstock, cut my sentiment on my Cameo, applied Japanese Lacquer EP and heat set.
After coloring my large star from Technique Tuesday with Gelatos, I randomly stamped it with the Journal Mixed Media stamp set and VersaMark, and heat embossed with Pear Star EP. The sentiment here is from Camera Life, and I have heat embossed it with Black Detail EP.
I love adding little bits of lace and ribbon to my layouts, and these styles that are new in the shop at Sparkle N Sprinkle are perfect for my style!
To see all the details on this layout, visit My Gallery at Sparkle N Sprinkle.
Thanks so much for stopping by today, and have a wonderful week!
My papers are My Mind's Eye, a collection from a couple of years ago. I pulled some chipboards, flowers and ribbons from my stash to put my layout together.
I applied 2 1/2" Tear-ific Tape to cardstock, cut my sentiment on my Cameo, applied Japanese Lacquer EP and heat set.
After coloring my large star from Technique Tuesday with Gelatos, I randomly stamped it with the Journal Mixed Media stamp set and VersaMark, and heat embossed with Pear Star EP. The sentiment here is from Camera Life, and I have heat embossed it with Black Detail EP.
I love adding little bits of lace and ribbon to my layouts, and these styles that are new in the shop at Sparkle N Sprinkle are perfect for my style!
To see all the details on this layout, visit My Gallery at Sparkle N Sprinkle.
Thanks so much for stopping by today, and have a wonderful week!
Deconstructed Layout #5 - Then and Now
Hi blogging buddies! Today
and I have another Deconstructed Layout to share with you!
Today we are going to talk about adding background texture to your layouts
using stencils, stamps, paste and colors.
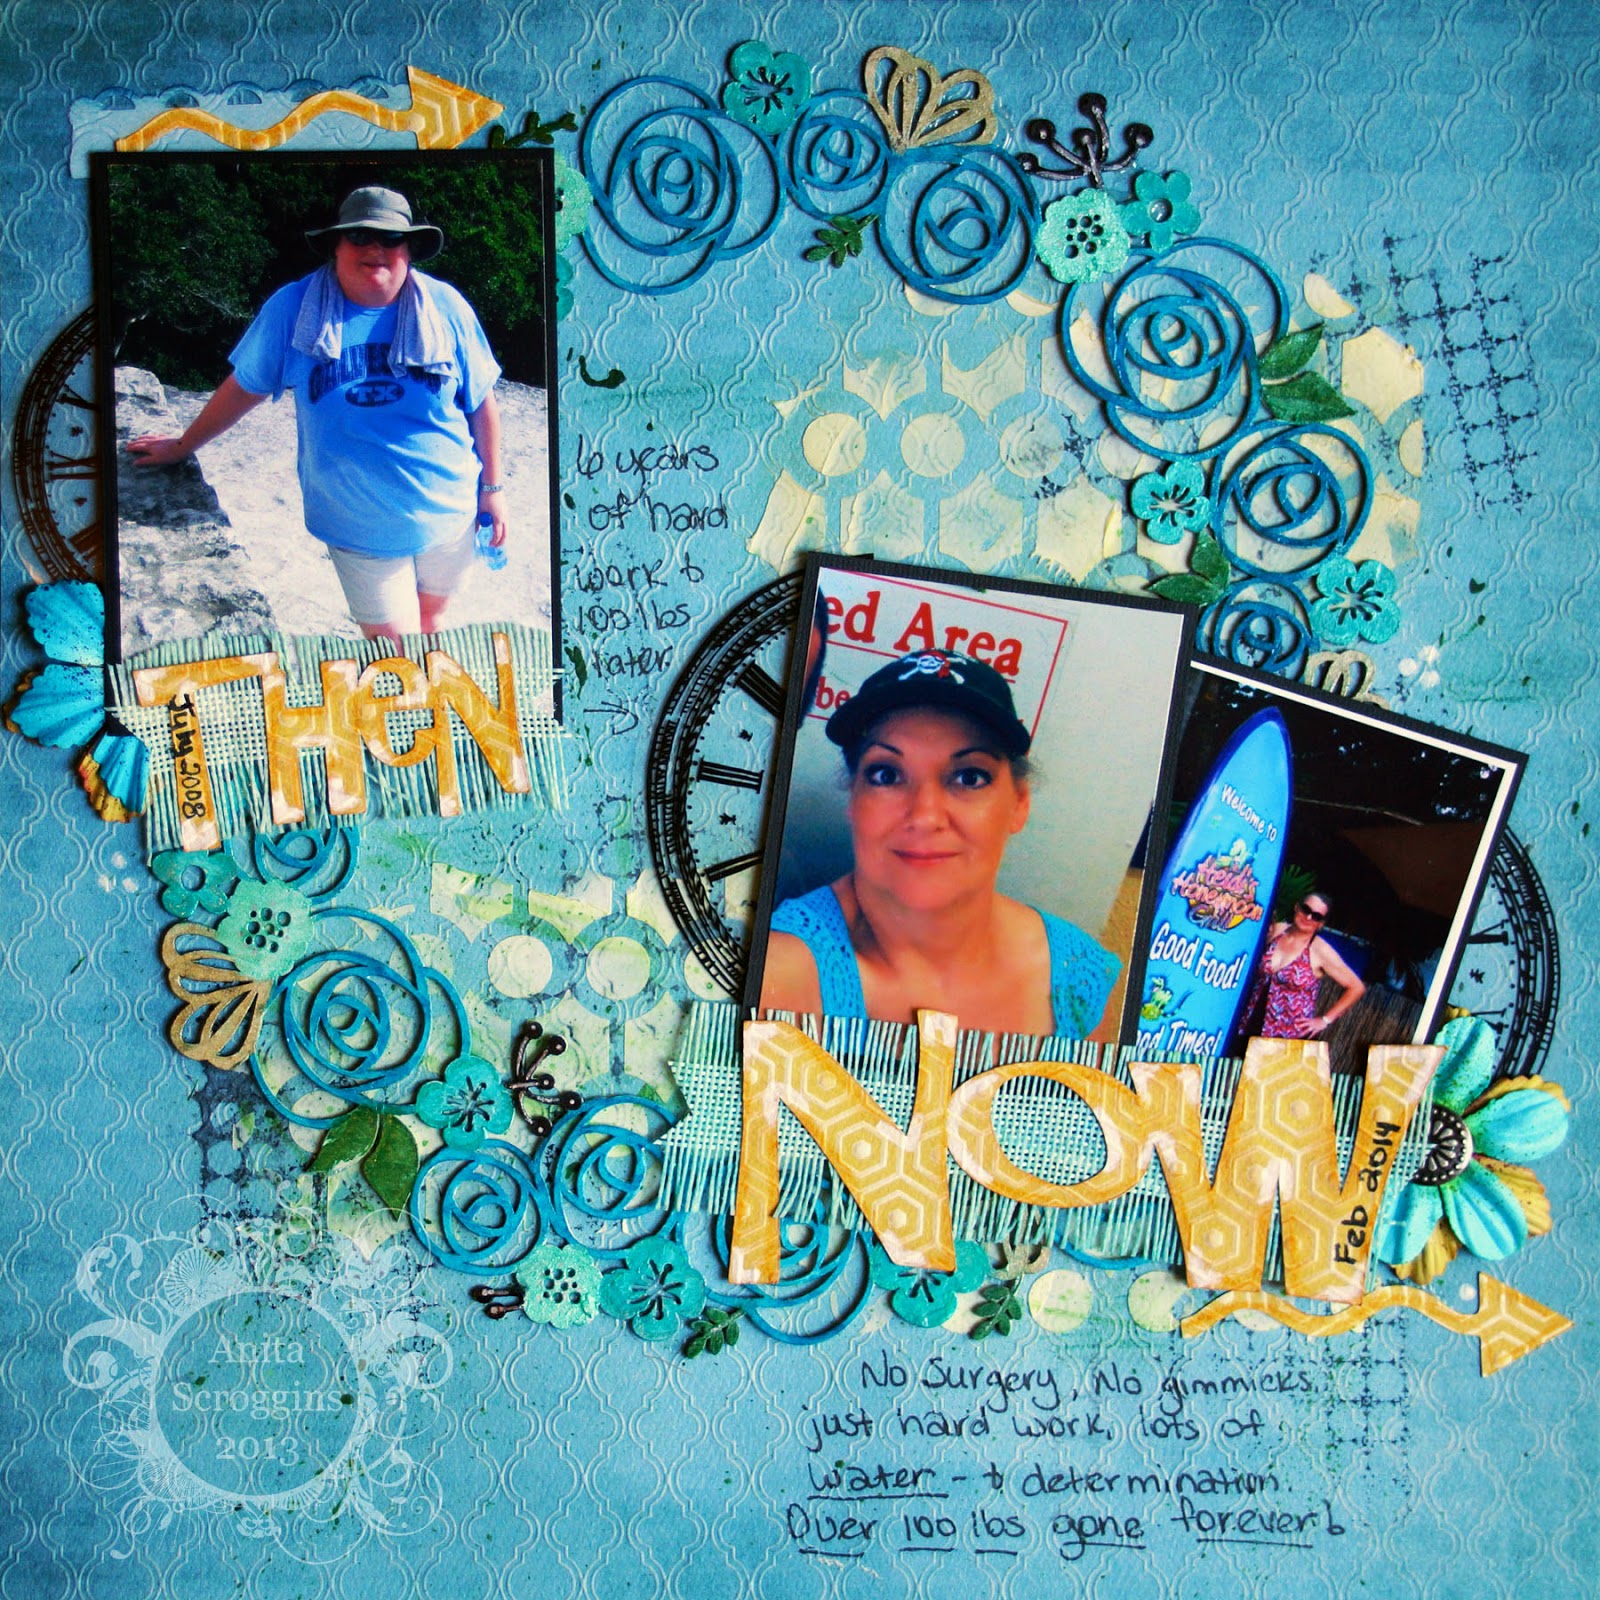
Here is a look at my layout
and, yes, that is me in the layout- both before and after. Quite a change, isn't it!
Now, you know I like to have a lot of "stuff" on my layouts, but I
am really trying to make them more flat so I can get more than 10 in an album!
So I added a lot of texture to this layout without adding a lot of bulk.
I have used My Mind's Eye papers, lots of Faber-Castell® products,
my Cameo, Wendy Vecchi Stamp, Maya Road Ribbon.
Start out by stamping randomly on the page, I inked my stamp
with a Stampers Big Brush Pen in black, then misted it with water before stamping.
I only inked a small part of the stamp each time. You can see that the image is dependent on
how much water you mist onto the stamp, less water equals a cleaner impression, more
water equals a messier impression- totally up to you.
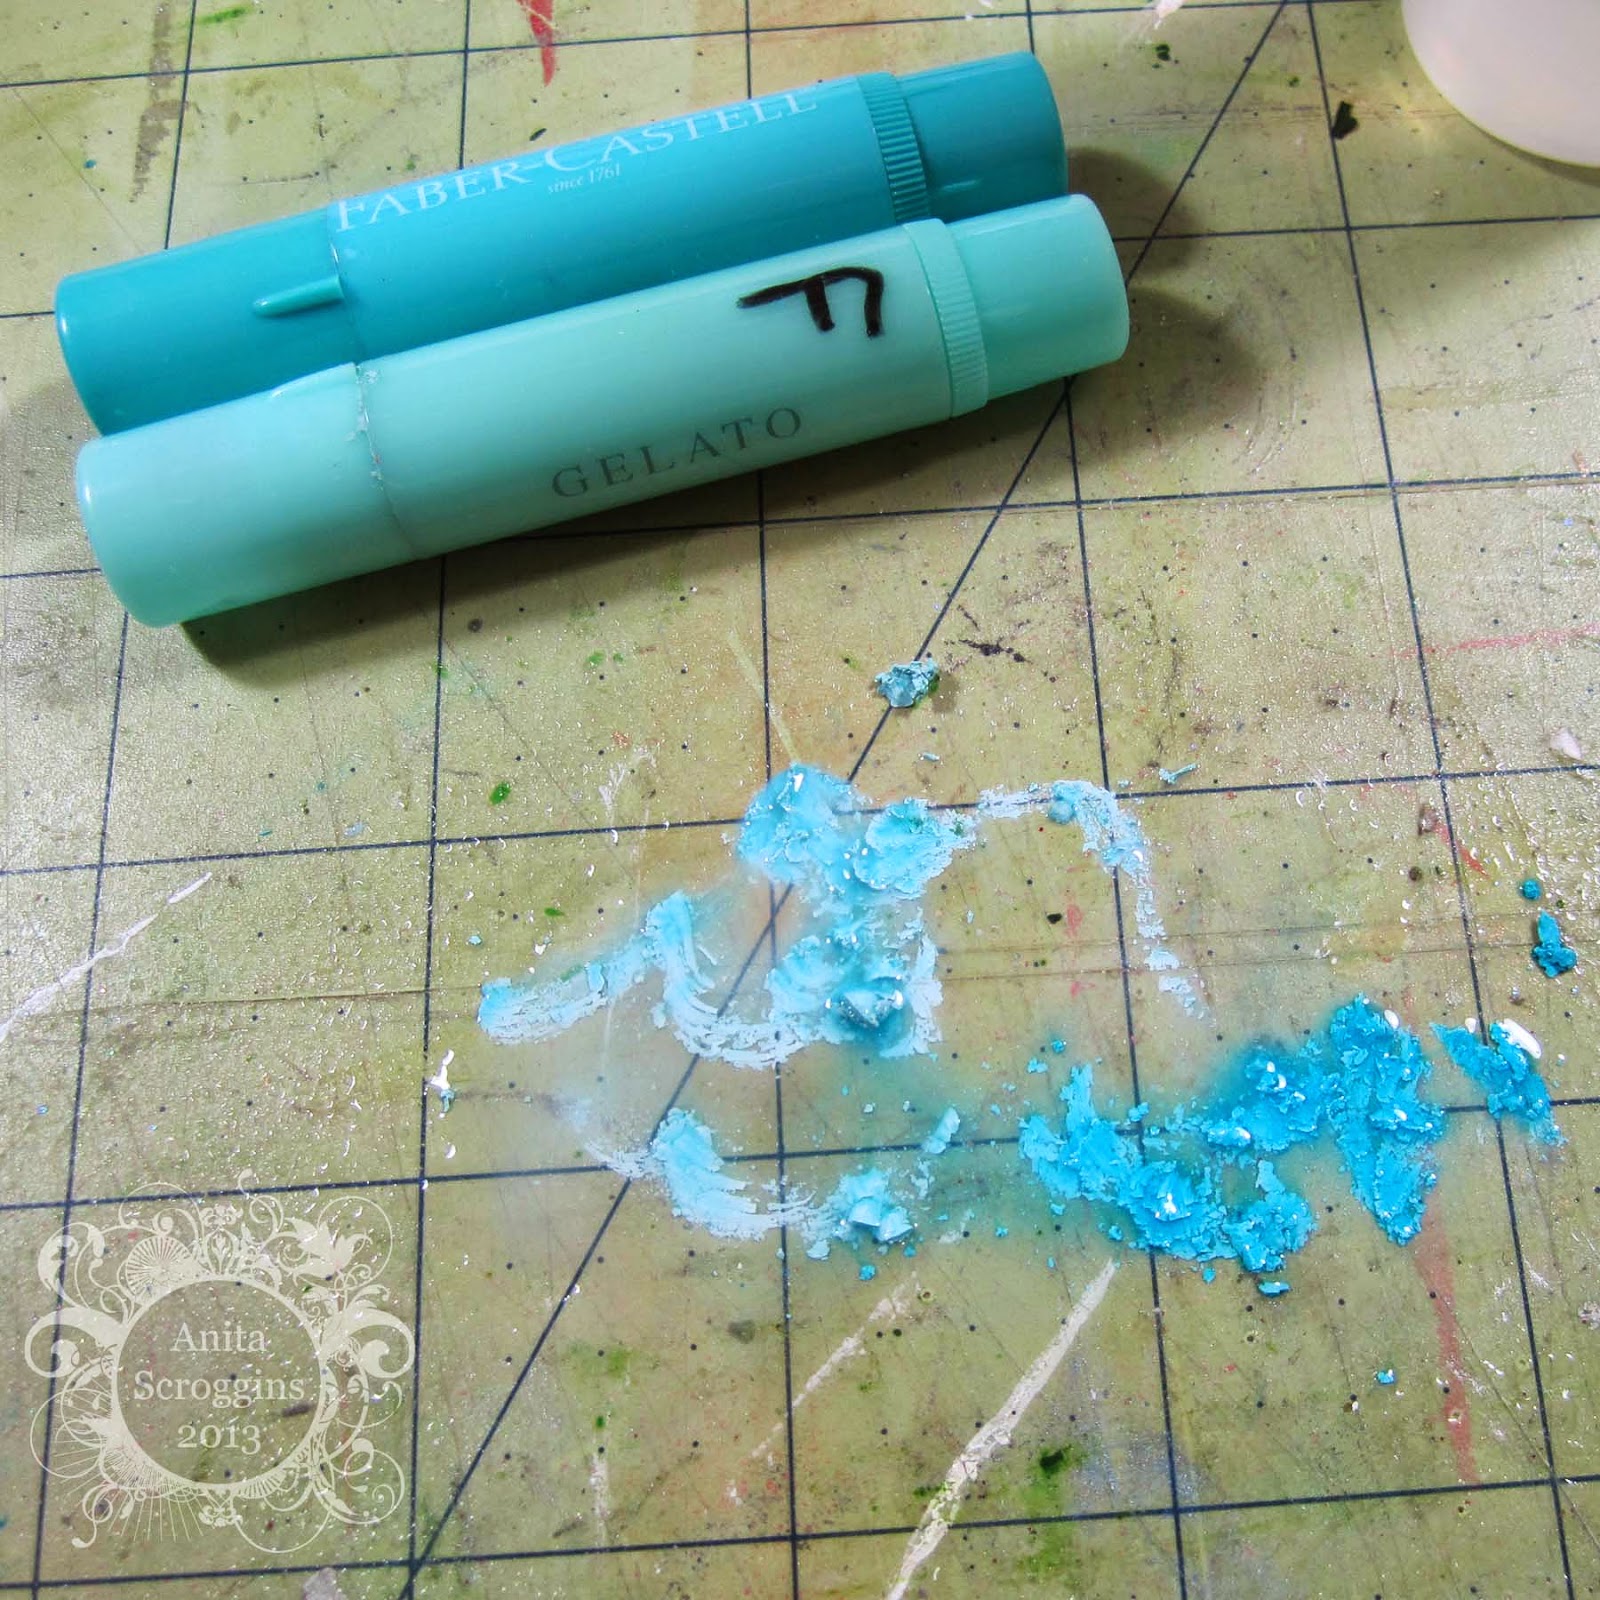
Next up, I cut a small slice off the end of my Gelato® stick and added water
(I normally use a craft mat, but here I was working on a large piece of clear plastic that my
die cut chipboard came in, you just can't see it in the photo)
Mix the Gelato and water into a thin, runny paste, and flick it onto the layout using
a stiff paint brush.
Next use a stencil and Modeling paste to add another layer.
I have no idea why I have no photo of this!
While your paper is drying, grab a large Die Cut Chipboard piece and apply a coat
of gesso. (I didn't apply the gesso on this cardstock, I just used the cardstock to get a better photo)
This chipboard is Blue Fern Studios.
When I apply paint, gesso or whatever to a large piece, I always get a bunch on the bottom
of the piece, so I take the chipboard and put it onto a plain piece of cardstock- this will take
the excess gesso/paint off the bottom of the chipboard AND start another background page
I can use later.
I colored some of the flowers with my PITT® Pastel Pencil, I put down a HEAVY coat
without smoothing it out in any way. Notice how grainy the texture is here.
I then used a small paint brush and baby oil to smooth the color out.
It seriously looks about 100 times better in person- I could not get my camera to
take a good photo of this. It has a sheen to it, and it is a little darker once you add the oil.
I colored some of the flowers with my PITT® Pastel Pencil, I put down a HEAVY coat
without smoothing it out in any way. Notice how grainy the texture is here.
I then used a small paint brush and baby oil to smooth the color out.
It seriously looks about 100 times better in person- I could not get my camera to
take a good photo of this. It has a sheen to it, and it is a little darker once you add the oil.
I used a variety of mediums to color my chipboard when it was dry; Stampers Big Brush Pens,
PITT® Pastel pencils, Metallic PITT® Artist Pens, and Gelatos®.
Rub a little bit of your Gelatos directly onto you work surface, mist it with water and combine to
form a workable paint. Using a paintbrush you can paint the smaller pieces. I used Gold Gelatos to paint the bows on the chipboard in this same manner.
Once I had everything colored the way I wanted it, I added a coat of Faber-Castell® Glaze to
the entire piece.
Once I had everything colored the way I wanted it, I added a coat of Faber-Castell® Glaze to
the entire piece.
Mix more Gelatos® with water- you want this one pretty runny
Use your ribbon to soak up the color- using this technique you can color your
ribbon any color you need to match your layout.
I used my Cameo to cut my title, then I added white accents. I also
used a Pastel Pencil to add more depth to the edges- a Watercolor Pencil will
work in the same manner for this technique.
Here are a couple of close ups of my layout
Here you can see the modeling paste I applied- when it was dry I used a sponge to apply
Gelatos® directly to the paste to give it a light color.
I thought it would be cute to add my dates to the titles of each photo-
just another way to show the passing of time.
I am linking up at the following challenges:
Lasting Memories- Make your own background
Scrap Our Stash- Something old,, something new (paper is older than 6 months, chippie is new,
title is fussy cut and I used the color blue!)
Stuck! Sketches- sketch challenge
(I rotated the sketch and added another photo instead of journaling)
Thanks so much for making it to the end of the post today!
To see more details on this layout, check out my blog.
Pretty As A Picture - TCS April Challenge
Hi everyone!
Spring has sprung here in Dallas and I am super happy about it!
I love spring time, new flowers, new babies in the yard,
new everything!
Today I have a new project for The Crafty Scrapper
our April Blog Challenge is to use BLACK on your layout/project.
You can use black in any way EXCEPT for black ink- that doesn't count!
Here is a look at my project
I have used new MME papers - love them! I don't normally use black on a layout,
so this is pretty unusual for me!
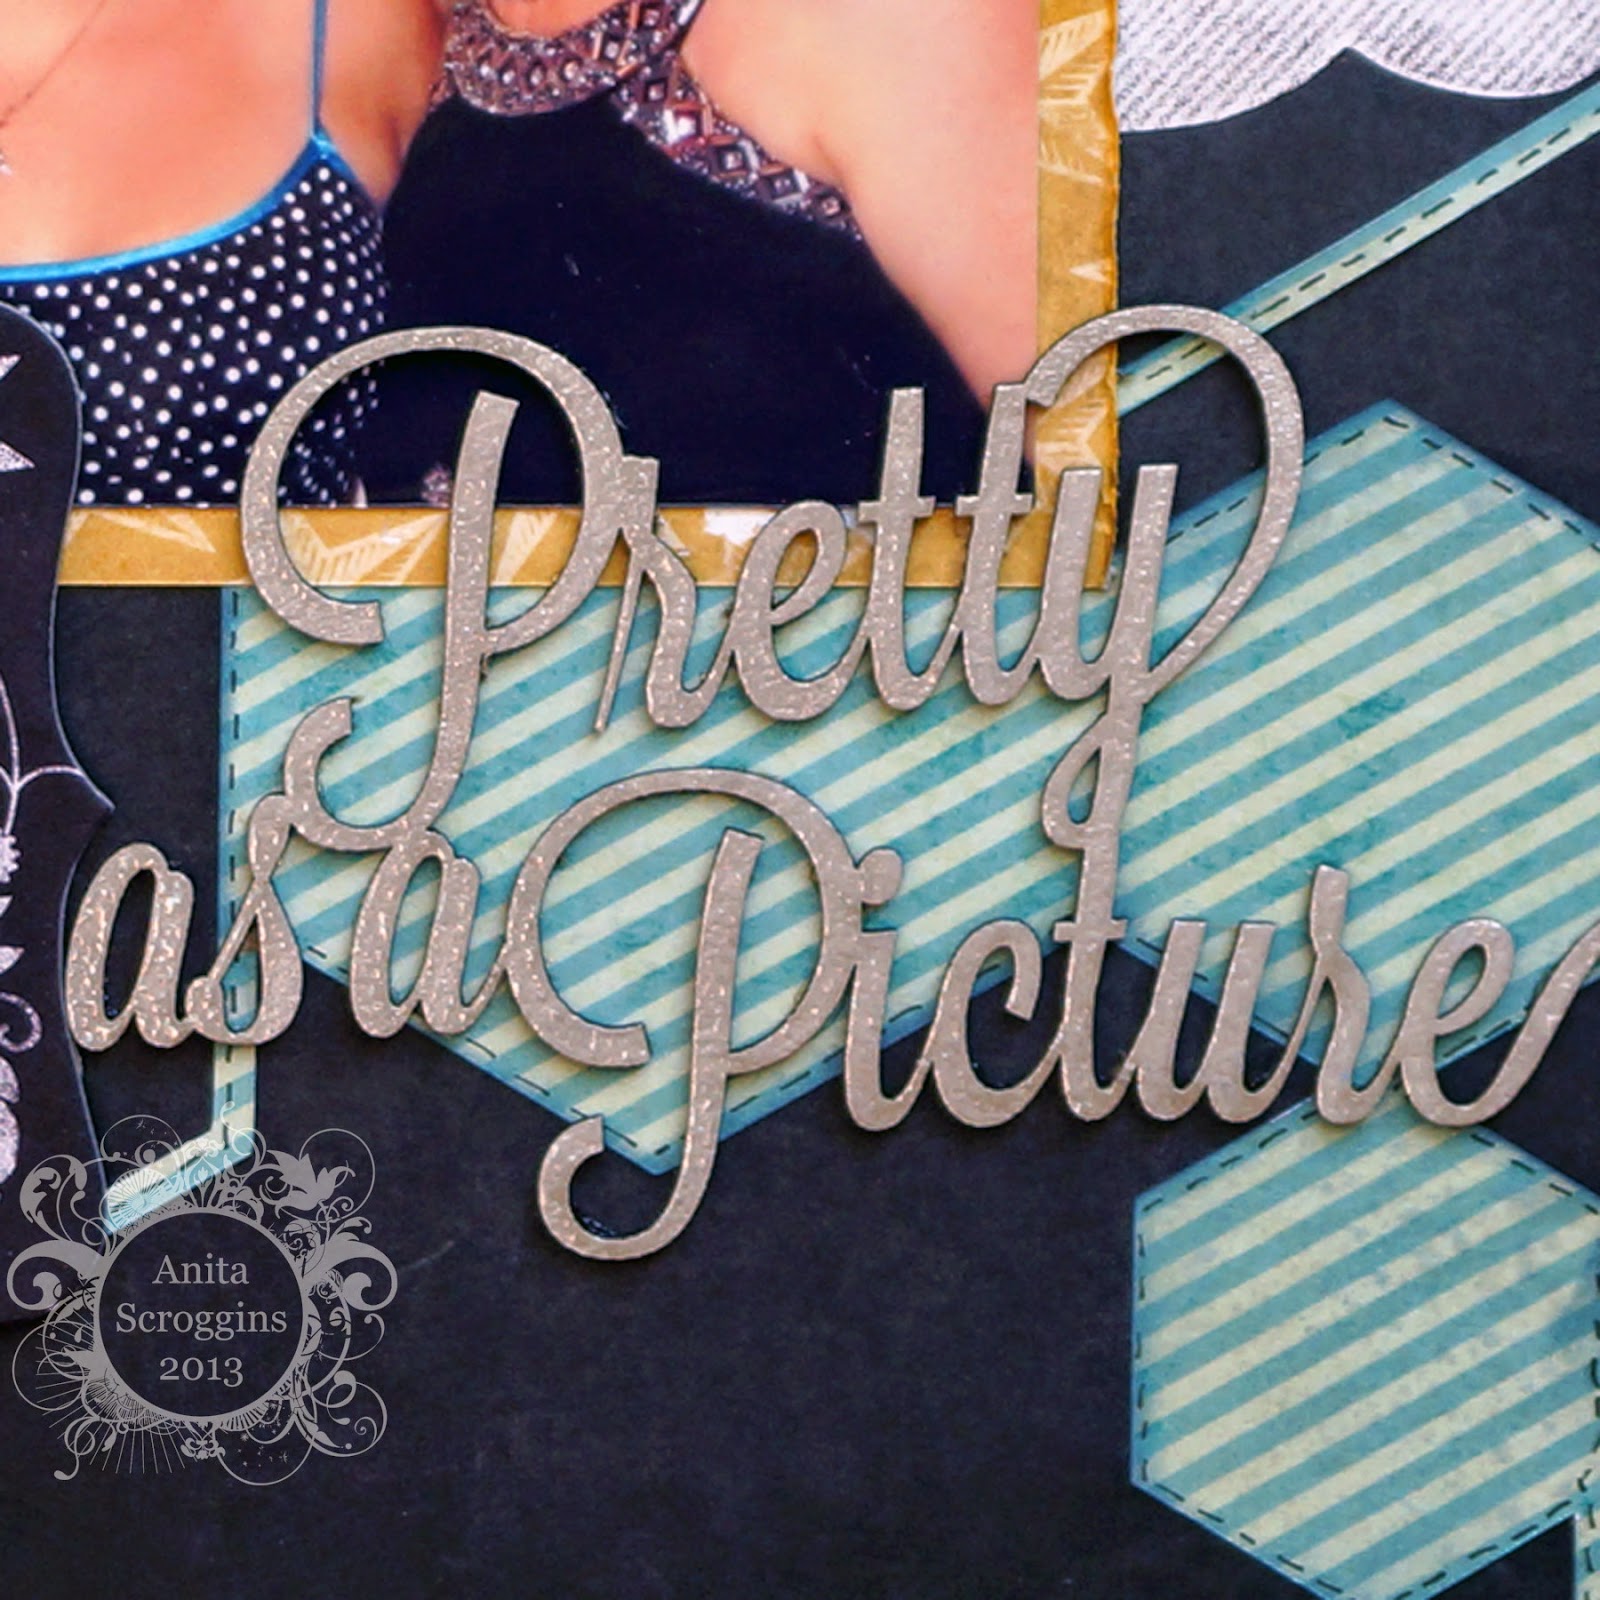
I used one of the matching chipboard frames, and to fill in the space I applied
2 1/2" Tear-ific Tape to the back, and burnished with Twinkling Clouds Sparkle n Soft.
I also added Prima Flowers, May Arts ribbon, and Maya Road Pins.
My chippie here is from Blue Fern Studios and I inked it white and heat embossed with
Shimmer EP from Sparkle N Sprinkle.
The hexagon background piece I cut using my Cameo.
I added more Prima flowers and some buttons from my stash in the upper corner.
For more details on the challenge hop over to
Thanks for stopping by today!!
I am linking up at the following challenges:
Scrap Around The World- Mood Board- THE COLORS!!
Use Your Stuff- Die Cut Hexagon Mat
Southern Girls Challenge- Flower Frenzy
Scrap Around The World- Mood Board- THE COLORS!!
Use Your Stuff- Die Cut Hexagon Mat
Southern Girls Challenge- Flower Frenzy
May the Flamingos Be With You!
Subscribe to:
Posts (Atom)