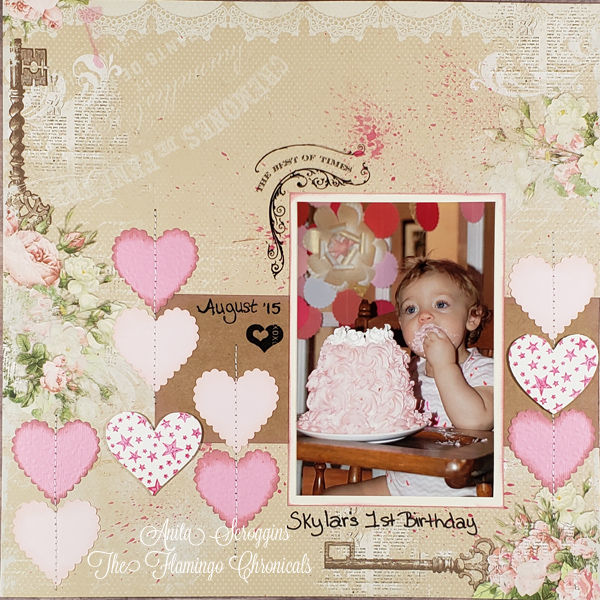
The Princess' First Birthday Layout
This photo always makes me smile. My sweet princess on her first birthday. What a fun time we had that day! We had plenty of cupcakes and treats, but of course the princess needed her own little cake to tear into. Let me just say that having a grand little is the best thing ever. We have had so many good memories since she was born. If you don't have grand children yet- just wait! it is the best thing ever.
This layout was created for the Ann Butler Designs Creative Team. Ann has designed some lovely stamps and her inks are so rich and robust. Please make sure you check them out!
Y'all I love page maps. I have been using them for years. I have about 12 years worth of maps printed out and stored in a 3-ring binder. It is SO easy to flip through the years and find a map for my current project. If you have never used page maps for your projects be sure you take a look at their site. You can even print out archived maps! For this layout I used a map from October 2010.
Look how cut my little princess is. She is the delight of my life - I just can't express how much joy she brings me. It is so hard to believe that she will be starting kindergarten this year. Where has the time gone? It just doesn't seem possible that she is almost 5 years old already.
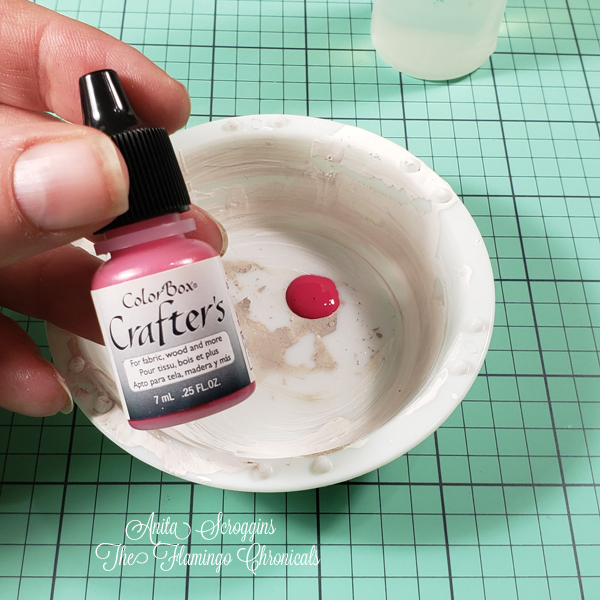
I started by creating a splatter background on my layout. Mix the Berry Crafter's Ink Refill with some water to thin it out. I then grabbed an old toothbrush to splatter the ink on the page. I like to place my photos and main elements on the page and mark where they will lay using a pencil. This way when I splatter I can be sure I am not putting it where I am going to over it up. This is some thick ink which gives amazing opaque coverage on fabric and other porous surfaces. Since I work mainly with paper I use a heat gun to dry the ink. Speaking of paper- the patterned paper here is Bo Bunny from the Soiree line. Yeah, I've had it a while. Don't judge.
To add a little texture to my layout I used chipboard for a few of the hearts. I gave them two coats of FolkArt by Plaid acrylic paint in Wicker White, allowing the paint to dry between coats. Have you tried the new Plaid Paintbrush sets? They are amazing!! Stamp the dried chipboard using the Berry Crafter's Ink and Ann Butler Stamp by Unity: Star Burst. Since I wanted to make sure that I stamped exactly where I wanted on the chipboard I placed the inked stamp face up and then put the chipboard on it.
Do you sew on your layouts? I love the texture and visual weight it adds to my layouts, but it does NOT add a lot of bulk. For this layout I lightly adhered the hearts - because I don't want to get adhesive on my sewing needle. This chunky thread is Button Thread - which is way thicker than regular sewing thread. I love the way it looks on my layouts. This thread does take some getting used to and you will have to use a different needle on your machine. Once you get the hang of it though it will add so much to your projects!! I use my Brother Designio machine for all my sewing - from paper to quilting.
Be sure to check out Ann's social media pages to see more amazing ideas using her line of products.
Subscribe to:
Post Comments (Atom)


No comments:
Post a Comment