Showing posts with label Layout. Show all posts

America the Beautiful Layout


Anerica The Beautiful
Several years ago my daughter had a few days off from school and we grabbed a last minute flight up to DC. We had the best time! One of our favorite pieces of the trip was a Bike the Sights at Night tour. It was great. They provided the bike, water, snacks, and a tour guide. We rode from monument to monument, the guide would give us information on it, then we would have 15 minutes or so to take photos before moving on to the next one. We hit all the major monuments in one evening! 

America The Beautiful Layout

I am using an older line of Authentique papers here- Stay Anchored. I bought a bunch of these because I loved how versatile they were. I love this photo of my daughter!! From a technical standpoint, it is not great, but I love it all the same. The title was stamped on patterned paper, trimmed, matted, cut out, then popped up with foam tape.

America The Beautiful Layout

I cut this star border using double sided adhesive paper from Silhouette. I burnished it with Sparkle N Sprinkle Cobalt Glaze Glitter. The stars on top are Scrapbook Adhesive 3D Foam Stars, also double sided adhesive. I used Sparkling Clouds glitter on these. 

America The Beautiful Layout

I used a Maya Road envelope and cut it down to size to make my pocket. I layered paper pieces onto the front along with my stamped sentiment. The chippies are from Want2Scrap and they are heat embossed then inked. 

America The Beautiful Layout

For my journal cards I used 3 library tab cards from 7 Gypsies, added more patterned paper from the Stay Anchored line, and journaled on both sides. 

America The Beautiful Layout

To finish the background off I stamped words from a variety of stamp sets, then added doodling. 

I am joining in the fun with Team Creative Crafts to share Patriotic Crafts! Be sure to click the graphic below to see the amazing projects being shared.
Island Hopping - The Baths at Virgin Gorda

Virgin Gorda
Hey y'all,,, yes I am still working on that huge Caribbean Crawl album. Today I am using some new dies provided to me by Makers Movement. Have you checked out all the fun stuff they have available? There are some awesome die and stamp sets on their site!

This post may contain affiliate links. Please see my Disclosure*


Look how cute these Nested Stitched Squares are! These are going to be great for photo mats. I almost always scrap with square photos on my layouts- I just like the way it looks. The largest of the set is 4.5 x 4.5 and that is what I used on my layout today to mat my photos.

Island Hopping

I print almost all of my photos at 4x4 from Persnickety Prints. They have amazing quality and they are actually processed rather than ink printed. The mats are cut from French Vanilla Cardstock and inked with Sahara Sand VersaMagic.

Layout in progress
Am I the only one who does this? I mark out where my photos are going before I do any background work.  These fun papers are from P13 - I was so lucky to meet the ladies from this fun company at Creativation and I fell in love with their papers and embellishments! The paper are so heavy and I love that.
For this layout I also used a stencil from TCW from years ago and the Light & Fluffy Modeling Paste.

Modelling paste
I love that the Light & Fluffy Modeling past dries SO fast! No waiting around for half an hour to move on to the next step! I colored the dried paste with Mustard Seed Distress Ink by lightly rubbing the ink pad over it.  These cute little tickets popping up from inside the folder have been hanging around in my studio forever.  I tore strips from another sheet from the Awakening collection, inked the edges, and adhered them in layers.

Makers Movement
I used the Mini File Folder Set to cut this cute embellishment - the folder and the tag strips on top that I journaled on.  I cut the folder from P13 Sunshine Collection of papers and the journal strips using French Vanilla from Bazzill.

P13 Paper
I used the small arrow die from the Mini File Folder set and plain white cardstock to make some extra accents for the page. The printed flag is from P13 - the Awakening collection.


Look at all the possibilities this die set has! I am super excited to add it to my collection. Check out this set and all the others are Makers Movement.

To see more of my layouts be sure to follow me on Pinterest. 


Blue Eyed Baby Layout using Foil Quill

Baby Layout
It's World Card Making Day and I am sharing a layout using a FREE cut file from Scrapbook.com, my CAMEO® 4, and the new WRMK Foil Quill.  I just can't get enough of this little blue eyed baby! After 5 years here eyes are still this blue!

This post my contain affiliate links. Please see my Disclosure* 

Free cut file

OMGoodness - Scrapbook.com is going to be selling cut files!!  This is the first one and I was able to get an advance copy to play with. So, instead of actually cutting the file, I wanted to play with my new Foil Quill attachments from WRMK. I **LOVE** how it came out. Have you tried out the Foil Quill yet? If you have a CAMEO® or other electronic die cutter you will love what it can do.

Foil Quill WRMK
Excuse the bad lighting - I took this photo on the fly- but look how amazing the foil looks on this Raven cardstock from Bazzill. It was super hard to get a photo that showed how shiny it is. I was worried that it would not give a good transfer on textured cardstock (because that's all I use) but it worked beautifully. It's shiny and crisp.

VersaFine Ink
I dug through my stash and found some round, white, chipboard pieces that were the perfect size to fill in the larger openings. These are from Technique Tuesday, but they no longer make these. Which makes me super sad because I love them so much! I stamped the circles using various stamps and VersaFine ink - my all time favorite. 

Silver Foil

I inked the edges using Wheat VersaMagic Dew Drop ink. I added some fine details with a Sakura white pen in Bold. Just a few scattered doodles here and there, then followed those up with a few tiny silver pearls.

Blue eyed baby

I used several layers of paper - mostly Basic Gray and Kaiserkraft - under my photo. I matted the photo using Tutu Pink Bazzill cardstock. Look how beautiful those eyes are!! Yes, they still look like this!

Layered Layout

I broke out the sewing machine and added a layer of stitching around one of the mats. Do you outline your diecuts or punched pieces? I love the extra dimension it gives and it just makes it pop right off the page. The Stabilo Fineliner in black is my favorite. I buy the a dozen at a time!

Stamping on layout
I have really been on a kick of adding small stamped accents to my pages lately. I like how it looks - it's very basic but adds a lot to the layout. This stamp is from an old CTMH set and I used VersaFine Black to stamp it.


There are so many things on sale this week at Scrapbook.com for World Card Making Day. You can get a FREE GIFT with a purchase this week - see the sight for details. There are new sales everyday ALL WEEK LONG! Be sure to check it out!

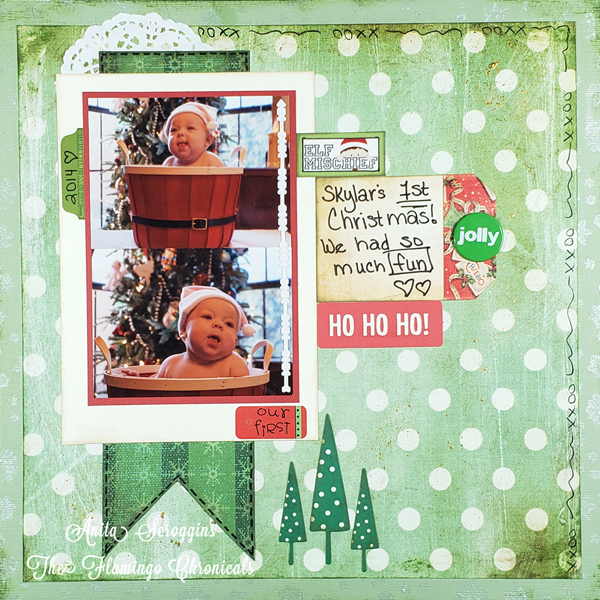
Baby's First Christmas Layout

The Princess' first Christmas. We had such a great time that year. Holidays are so much more fun when you have a little one in the house. Good memories.


For this layout I pulled out some hoarded vintage Daisy D's papers. Y'all know how much I covet those. I also used stamps, inks, and paint from Ann Butler Designs.I have been trying hard to make my layouts less "fluffy" - flat is my objective! I want to be able to put more layouts in an album.


I started by stamping all around the edge of my base cardstock. I used  the Snowflake Frenzy stamp and Sheer Pearl Iridescents. Apply a light coat of the iridescents to the stamp using a foam brush. I stamped around the entire edge of the cardstock - going about " in. I inked the edge of the cardstock using Evergreen Crafter's Ink from Colorbox.

I added a little bit of sparkle to the second layer of paper using Treasure Gold Paint by FolkArt. I used an old toothbrush to splatter the paint in several places.

More from my Daisy D's stash - this fun journal card is from forever ago. I still have a few left! I also used stickers from Bo Bunny and Doodlebug Design.

I always add a bit of faux stitching to my layouts. I love the texture it adds, without any added bulk.  My favorite pen for this is my Tombow Monotwin - it has two tips so I can vary the size of the "stitches" I am adding. And it lasts forever too! I used the same Evergreen ink on the edge of the second layer of paper too.

Be sure to hop over to Ann's blog to see more great ideas.


Roomies- Frosted Designs Season Of Stars Kit

Good morning everyone in blogland! 
Today is day #11 of The Caribbean Crawl and I am in St. Croix today
 doing some shopping and some snorkeling! 
My favorite kind of day!

I have a layout to share with you using the Season of Stars Kit from

Here is a look at my project

Soooo, it is pretty rare that I make a layout with this much white space on it! 
I have had this sketch saved in my ideas folder for YEARS and I am just
now getting around to using it!

I inked the chippies with a sand color ink, then highlighted the edges
with the white pen and faux stitching.

Love these little journal cards that were included in the kit!
My background stamp is Wendy Vecchi.

Thanks so much for stopping by today!

Have a wonderful week


At the Beach with Sparkle N Sprinkle

Good morning everyone! 
As you are reading this, I am waking up in Tortola, B.V.I.
The Hubs and I are in the Caribbean for 16 days island hopping
to celebrate our 25th Anniversary. 
I will have plenty of picks when I get back!

Today I want to share a project for Sparkle N Sprinkle
You know, I am just a little obsessed with glitter. 
I love my sparkle!

This layout is from our last cruise two years ago- we love to cruise!
I have used October Afternoon papers for this layout.

For this Maya Road chippie I coated with gesso and let dry, then coated 
with VersaMark and EP137 Shimmer and heat emboss. 

The Sandcastle is from #403 By The Seashore, and I used
 Mudd Puddles for the "water" underneath.

For the chipboard title, mask off the shells on the end using scrap paper, cover the word
with Peruvian LilyGL using Brushable Glue. Mask off the word; ink the shells white, then heat emboss using VersaMark and Princess Rose. 

To see detailed instructions and the full supply list for the project, see 

Service Project with ColourQ #205

Hello scrappy friends!
I hope you had a wonderful weekend.
I have been absent a bit lately as you may have noticed.
I have been having some issues with my tonsils, and 
I am so sad to say, they have to come out. Yes, at my age I
am having my tonsils taken out. Ouch. 
Still waiting on the DR to schedule, but we think this
will happen next week. :o(

Do you "like" my Facebook Page ?
I have some great candy up for grabs when I hit 300 likes
over on my page. I am only a few away from that, so please stop
by, like my page and share with your friends!

Anyhoo- today we have a new palette up over at ColourQ

These colors were a bit of a challenge for me,
blue and gray are not high on my color list!
Eventually it all came together. Here is a look at my project,,,
My background paper is Kaisercraft, all my other papers and 
die-cuts/stickers are from Authentique. 
These chippies are from Dusty Attic; I heat embossed them with a couple of 
different powders for an aged look. Flowers are from I Am Roses.
I also took the wire stems I cut from the flowers, coiled them into little vines
and added them to the flower clusters.
The alphas are from Authentique, the chippie is from Want2Scrap 
and it has been heat embossed as well. 
I really wanted to use this die-cut arrow, but the letters were more of a 
rust color- I took a journal pen and went over them to make it match. 

I am linking up at the following challenges:
Southern Girls - Warn Fuzzies - whats more warm and fuzzy than
cute Girl Scouts handing out Valentine cards? Seriously!
The Paper Girls - use wire


Be sure to link up your project over on the blog 
before noon next Monday!

Thanks for stopping by today!
Anita