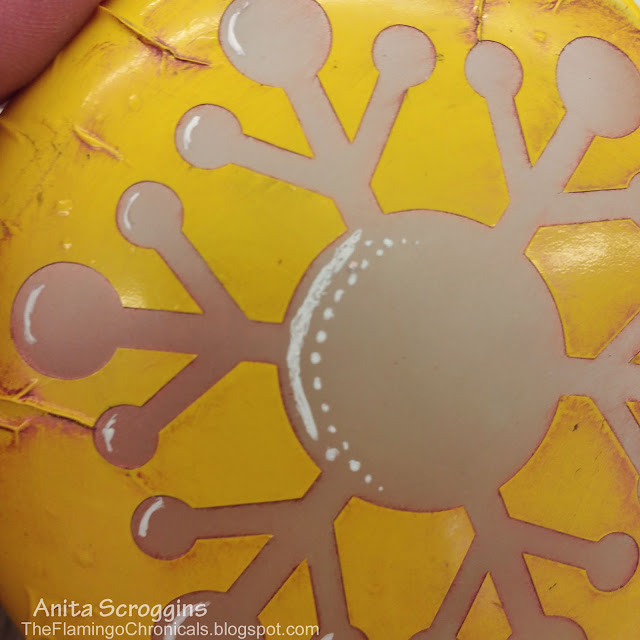
I used etchmask® stencil material to cut my stencil. I used my Cameo machine for this. Have you seen the new Cameo 4 machines? OMGoodness y'all they are amazing!! You can check them out here. If you are in the market for a new cutting machine I can't recommend the Cameo 4 enough.
Etchmask cuts beautifully in my Cameo! Once it is cut I like to trace around the cut design with a marker so I can see where I am placing it. Then I apply my etchmask Transfer Sheet to the top, remove the paper backing and apply to my surface.
After removing (weeding) the etchmask where I want to actually etch, I applied my etchall® etching creme and waited 15 minutes. (When I am working with small ornaments I like to keep a paper towel under them to keep them from getting scratched as I work.)
After 15 minutes remove the etching creme back into the jar to use again (you did know that etchall® etching creme is reusable, didn't you) and rinse the ornament. Since I was going to color my etched design I was very careful to not lift the edges of the etchmask as I was rinsing.
Since the surface has been etched, it now has some "grab" to it and will take color! I used Brilliance Cosmic Copper which has a little mica powder in it for some shimmer.
NOTE: This does take a fair amount of time to dry! I waited a bit and then used my heat gun on it to finish it off.
I used my white Signo pen to add some accents to the colored design, then set the whole thing aside for a couple of hours to let it dry before removing the etchmask.
Of course, it wouldn't be Christmas without some ribbon so I added a nice big bow to the top, some Maya Road snowflakes, some rhinestones to the design, and of course some glitter. Gotta have glitter!
By leaving the etchmask® on while I inked the design, I got a nice dark border around the etched space- this would not happen had I removed the etchmask and then inked.
Be sure to check out all the amazing products that etchall® offers.


