Showing posts with label Christmas. Show all posts

Crafting with Artesprix Sublimation Markers


Sublimation Tag

This month at Designer Crafts Connection we are creating with Artesprix Sublimation Markers. I have seen the products demonstrated at shows but I have never worked with them before. I have to say they were fun and easy to use. 

Designer Crafts

Artesprix Blog Hop

I received a great selection of products to work with. I got to work with a variety of classic colors, pastels, and a woodsy set.  I also got two sets of tags and a set of small, zipper top bags to work with. 

Artesprix has lots of products to work with and a ton of tips on how to  use them on their website

Sublimation markers

I stamped my images using the Sublimation Ink Pad and colored in with markers from different sets. I wanted to see if I could "blend" colors with the markers, so I layered colors on the flower petals and the leaves. 

Before and After Sublimation

Here is the tag after sublimation and the design sheet I used. I was pretty surprised the original design didn't change that much during sublimation. I guess I assumed it would disappear since it was moving to the tag! Nope- it stayed put right where it was.

Sublimation Flower

 Here's a close up of the flower. As you can see I was able to blend colors in the design- but I think I need a bit more practice to make it smoother. I was pretty happy with how this turned out though. 

DIY Craft Bag

My second project was a small take along craft bag for the princess. The transfer was not as crisp on this one- but that was probably my fault. I am pretty sure I shifted the bag during pressing. 

Sublimation Ink

To create this design I used small stamps and colored the ink directly to the stamp itself. This was quite the time gobbler! 

Stamping sublimation Ink

My workspace during this process was a mess! 

Stamped background

Here is a look at my design before I pressed it. It is very random and eclectic and I think my princess with love it. She always brings art supplies when we head out somewhere- so this should be a handy place to store them for her. 

Be sure to check out the Designer Crafts Blog to see all the projects made. There are some great ones! 


DIY Christmas with Kunin Felt


Christmas Garland
It's Christmas time so that means new decorations to mix with the old. My sweet princess has a Candy Land themed tree here at our house. I used Kunin Felt to make a super cute Christmas garland for her tree. She loves the color combo of pink and aqua so those are the colors I concentrate on. For this project I added in some white as well. 


Kunin Felt

Kunin felts and fabrics are made in the U.S.A. of Eco-fi® 100% polyester fiber, made from recycled post-consumer plastic bottles.

Felt Crafts
 
I started with 3 colors of felt and an older Sizzix die. Like really older. As in for the old red Sizzix machine from the stone age! I love those dies and use them all the time.  Anyway,, Aqua, Pink, and White felt and lots and lots of circles!

Cutting Circles

I cut 20 circles of each size from each color of felt. Which got me 240 circles- so more than enough. I love that I can cut multiple layers at a time with these steel rule dies. It really makes projects like this go quicker. 


Felt Circles

I mixed all the pieces up pretty well. I wanted a truly organic look and did not plan any pattern for the garland. I just grabbed from a pile as I sewed. There were 4 sizes of each color so it ended pretty easy to sew them randomly and still look great. 


Sewing it all together was pretty easy too. This is a great project for a beginner sewer. The machine does most of the work and all you have to do is feed the circles in. I had the speed set to pretty slow. I am really trying to spend more time enjoying the process instead of just rushing through. I used my Brother Sewing Machine - I love this thing. It is a workhorse!!


Felt Garland

Ta-da! I used a medium stitch length for this garland and a cotton quilting thread on top and bottom. I cut the garland into manageable lengths and headed to the tree. 


Candy Land Decor
Modern Christmas

It looks great with and without lights! I love it. I think I may need a to do a few more feet to get the coverage I want on the tree though. 


Be sure to check out all the fun projects made by the Designer Crafts Connection Designers.  We have such a talented crew and I am always blown away by their creativity! 


Reindeer Snacks Table Sign

Reindeer Snacks
Who else is working on their last minute crafts? I know I have a few more things to get done! This year in addition to cookies for Santa we are leaving our Reindeer Snacks- so I made this super cute table sign for the princess to put out as well.

Stencil and paste
I started by covering a wood sign blank with patterned paper and sanding the edges to fit. I added some texture with a snowflake stencil and modeling paste, then set it aside to dry.

Iron on letters

 I pulled out some red Joy® Iron on Embroidered Letters - these are a 1" size. I love this size for smaller projects- they are so versatile!

Christmas snacks

The small Christmas tree is made using an older Sizzix die and matboard. I inked it with two colors and added a bit of texture paste for snow. Embellishments are from my Christmas box - lots of older buttons and tiny bits to finish the piece off.

I hope you have a Merry Christmas this year! Thanks so much for stopping by to see what I am up to.


Vintage Theme Christmas Cards

Foiled Christmas Cards

Are you frantically getting ready for Christmas? We decided to take a long vacation the weeks before Thanksgiving - so I am super behind this year! We will not be taking a vacation at that time again. It  wrecked my Christmas schedule!

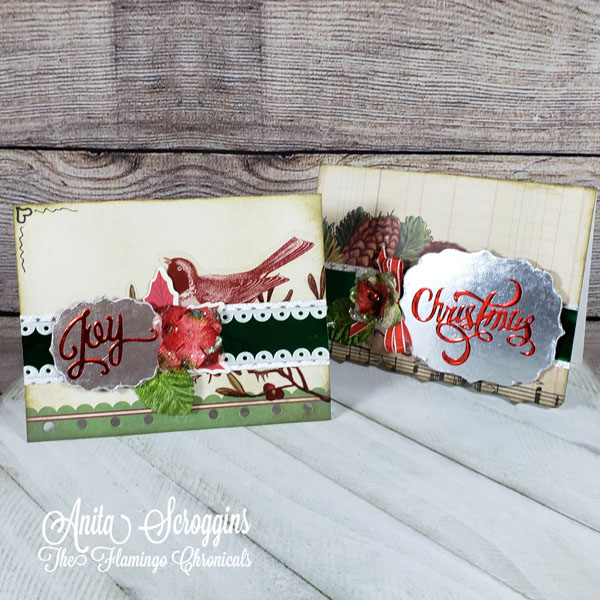
I don't send out many handmade cards- but there are a couple of people that I like to send something special too. For these cards I used Rinea® Foiled Papers to add some lovely accents. And I got to repurpose some supplies I have had lying around for years!

Craft Supplies

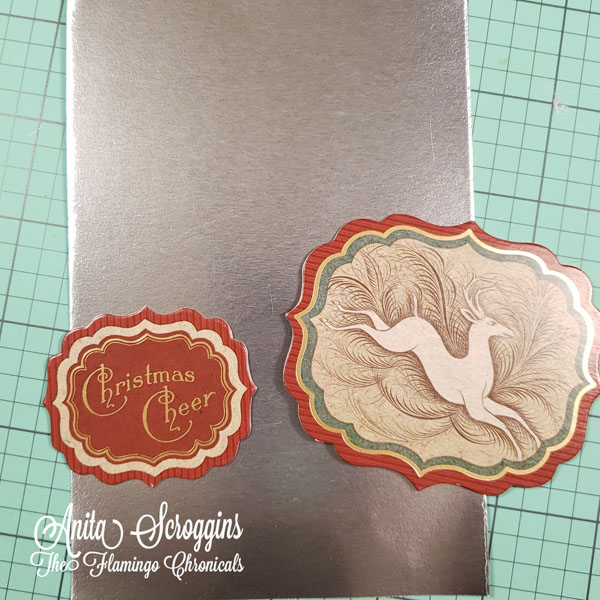
I have totally had these chipboard pieces from K & Co for years. Literally years. It never seems like I have the right project to use them on. So this time I decided to cover the chipboard pieces to match my project. I used Silver/Silver Glossy Foiled Paper to cover one side of each chipboard piece.

Rinea Foiled Papers

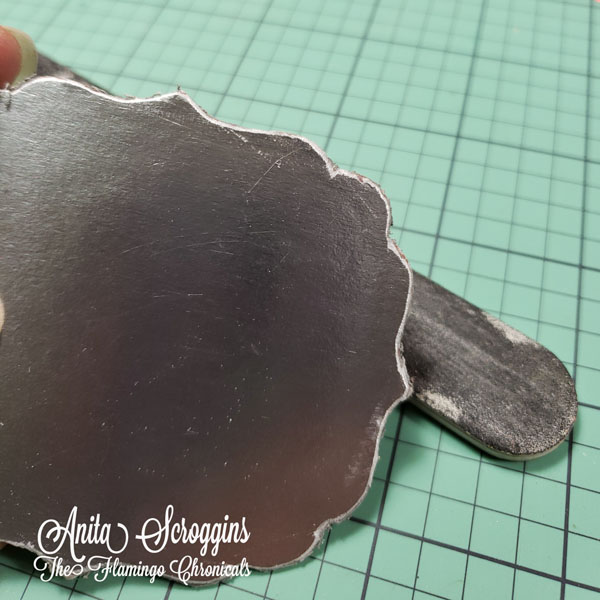
I started by applying double sided adhesive to one side. I love and use iCraft Easy Cut Adhesive Sheets from Therm-o-Web. They are so easy to use! After trimming the adhesive sheet close to the chipboard, I used a nail file to trim to fit. I love the this also gives the chipboard a vintage look too!

Die Cutting

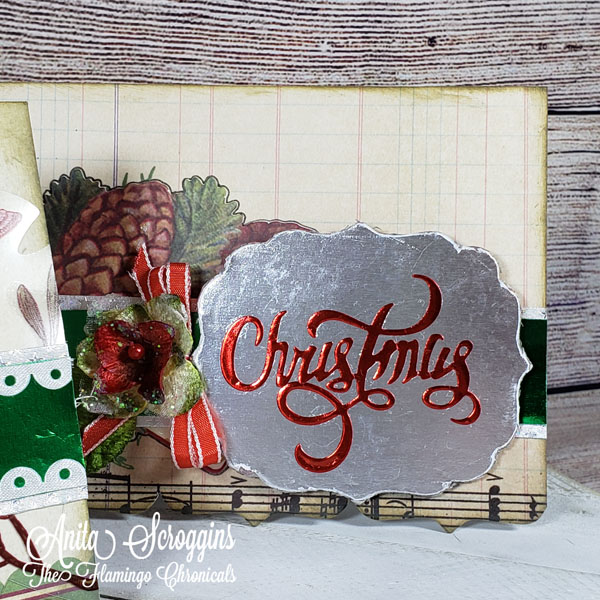
The card bases I used here are also from K & Co - seriously I have a bunch of this stuff I am trying to use up!  I cut the sentiments using Ruby/Gold Glossy Foiled Paper and a cute die set from PhotoPlay.

Christmas Cards


I grabbed a few more embellishments from my Christmas bucket to finish the cards off; ribbons, flowers, die cut embellishments, and some greenery. Done!

What are you working on for Christmas? I would love to see some photos - drop me a pic on my Facebook Page.


December Daily Organization using Deflecto® Crafts

December Daily Storage

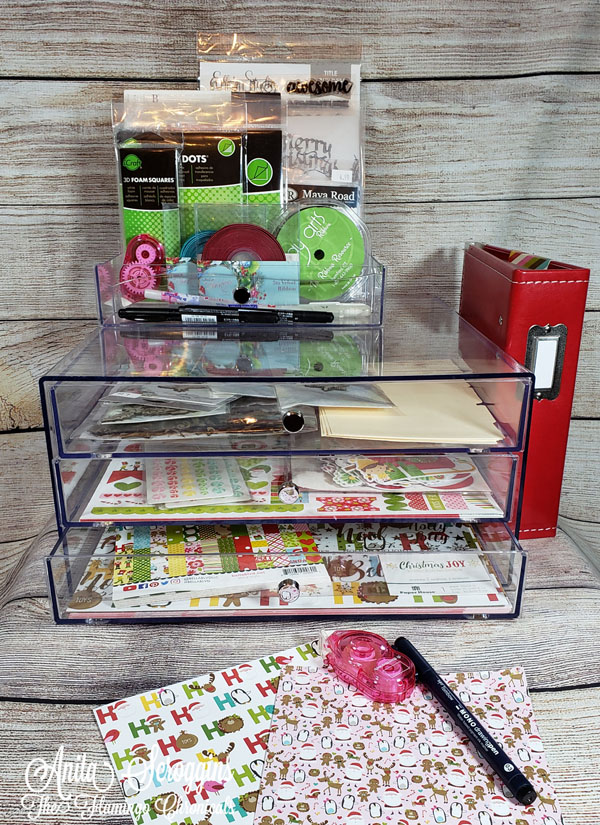
Are you a fan of the December Daily Albums? I love making them every year. Although these days I only do the last 12 days before Christmas. Since it is just us and the hounds here there days, it is pretty boring!  I normally keep everything in a little basket in my studio, but this year I wanted to have my supplies in the living area so I would work on it in the evening and still visit with the hubs.

This post may contain affiliate links. Please see my Disclosure*


Paper Storage

I used the Deflecto® Large Three-Drawer Organizer for the larger supplies and a single drawer from the Small Three-Drawer Organizer to hold smaller supplies. I gathered up my papers, embellishments, adhesives, my album, and all the other things I decided to use this year.  I sorted everything by type and how I would be using it. I normally use a 6x8 album from Simple Stories - I like the size. The pages are big enough to hold two small photos, but not so large that it takes me forever to finish a page!


Craft Organization

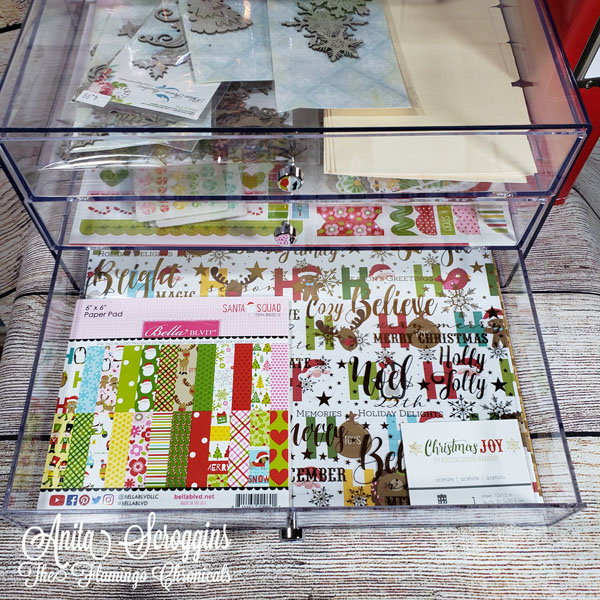
 I stored my 12 x 12 papers in the bottom drawer of the Large 3-Drawer Organizer. I normally try to keep my supplies to a minimum so I can create my pages quickly. Too many options slows me down! This year I selected some papers from Bella BLVD and Doodlebug Designs. They are both so cheerful and use non traditional colors. I can't wait to see how my album turns out. 

Deflecto Three Drawer Organizer

 Look how cute these papers are! I love those little reindeer. When I am ready to work on my album - which happens about every other day- I can just grab my supplies and start. No need to sort through a bunch of random supplies every time. Everything will be right where I need it. I am super excited about it.

Embellishment Storage
I have several 12x12 sticker sheets that I am using this year and I love how easy they will be to sort through and use. The Large Drawers are the perfect size for storing 12 x 12 papers and embellishment sheets. How cute are those little Shape Sprinkles from DoodleBug Design? I think they may be my favorite product this year!

Craft Room Storage

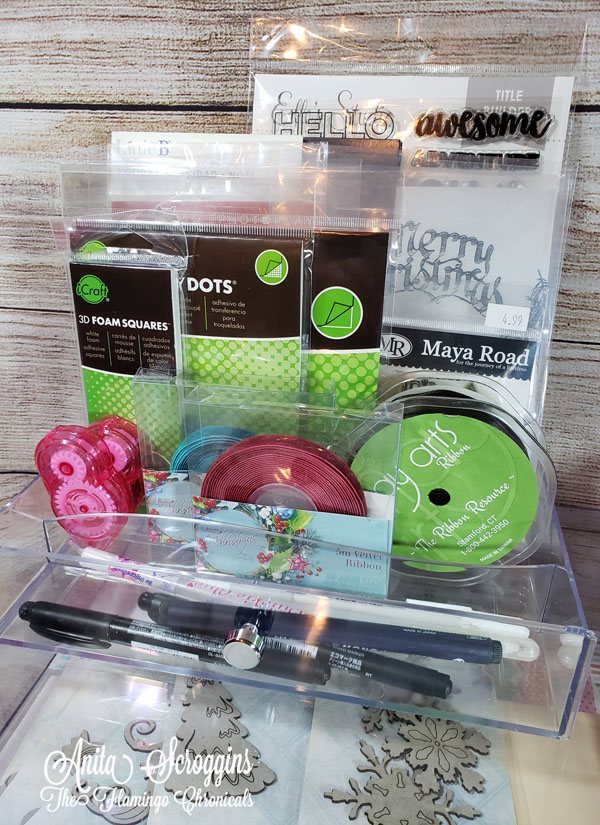
To store my smaller items I used one drawer from the Small Three-Drawer Organizer. It was perfect to hold my stamps, ribbons, adhesives, and journal pens. Since the drawers in the Small Organizer are divided they hold the larger items upright and keep everything in it's place. Everything is visible and easy to grab - I love it!

Be sure to check out my Pinterest for some great ideas for your December Daily Album


This is a sponsored post.  As a member of the Deflecto Design Team I have been provided product and 
compensation in exchange for my creative ideas, views and opinions.

Etched Rudolph Candy Dish

Are you looking for a fun gift this Christmas Season? Check out my cute etched Rudolph candy dish!  Everyone on your list will be happy to receive this- I plan on filling mine with some fun themed candy bars.

I started by cutting a stencil using etchmask® and my new Silhouette Cameo 4 machine. After transferring the stencil to the glass jar I weeded out the pieces of the design that were to be etched. I am a messy crafter- so I always mask off the parts of the project I don't want to etch.


Apply the etching creme to the stencil and allow to sit for 15 minutes. Be sure to return the creme to the jar after the time is up - it is reusable! Rinse the project in cold running water to remove any remaining creme.

To finish the project off I added Rudolph's red nose using StyleTechCraft™ Transparent Glitter adhesive vinyl. I love the way it turned out!


Etched Christmas Cookie Tray

etched cookie tray

I am full on in the Christmas prep mode. My favorite time of year! I needed a new cookie tray for the Princess to leave her Santa cookies out on. Of course I pulled out my etchall® and got to work.

This post may contain affiliate links. Please see my Disclosure* for more information. 


Etching supplies

 Gather up your supplies. I used:
I used my Silhouette Cameo 4 to make my stencil. Y'all - I love the new Cameo 4!! If you have been thinking about buying one - you should totally do it! Go grab yourself one NOW!

etching stencil

After cutting my stencil, I like to define the cut areas. I use some old chalks I have lying around and brush a little bit on the stencil. I make much fewer mistakes when weeding when using this technique!


Weeding vinyl

After I cut the stencil, I like to go ahead and apply the transfer sheet and apply it to the piece to be etched. I pull the transfer sheet off and then I weed it. It seems like now matter how careful I am, I will stretch the stencil if I weed first then transfer.  I also like to tape off the uncovered areas with masking tape. I am a messy crafter!

Apply a generous amount of etchall® etching creme and let it sit for at least 15 minutes. I'll be honest y'all,,, I normally just go do something else and come back to it after a while! Return as much of the creme as you can to the jar. Did you know that you can re use etchall®? You can!  After removing as much of the creme as you can, rinse the dish under running water. Be careful that you don't let any of the creme linger on exposed areas - it can start etching!

gold etched glass

Here lately I have been on a real kick about coloring my etched pieces. I love the way it looks! Gold Rub-n-buff is my favorite. I like to leave my stencil in place until after I have colored the etching. I use a cheap make-up sponge from the dollar store to apply the Rub N Buff, then just toss it in the trash.

Gold Glass
Look how sparkly the gold Rub N Buff is! It is perfect for coloring your etched pieces.

etched cookie tray

Thanks so much for stopping by! I hope you give glass etching a try!