Showing posts with label Etchall. Show all posts

Upcycle a Candle Container into a Succulent Planter


I have been buying these beautiful candles for years. They smell heavenly y'all! What's even better is they come in these amazing containers! I have been saving these pots all this time because I knew that sooner or later I would find a use for them- they are far too pretty for the recycle bin!  I have recently decided to try my hand at growing succulents and these make the perfect little pots! 
 
This post may contain affiliate links. Please see my Disclosure*

These are soy candles made by Swan Creek Candle Company. I buy mine at Bass Pro generally, although from time to time I find them at Tractor Supply or small gift shops. They are not the cheapest candles I have ever bought, but they do last a really long time. And they come in the most beautiful containers- so they are worth the extra money for me! There are so many scents too- but the Mulberry & Mandarin is my favorite. 

Etched Planter

I used etchall® etching creme to decorate my container. Did you know that etchall is the only glass etching creme that is kid safe? I have used it several times at the Girl Scout Camp I run each year- the campers LOVE it!  
 

etching stencil
I used etchmask® to cut my stencil for the project. I like to color my cut lines on my stencils so I can see exactly where they are when it comes time to place it on my project. I use my chalks from way back in the day. Do you still have these? I just can't seem to let them go- I have all the color palettes and I used them all the time back when I made those cute little tear bears. Do you remember those? Or am I just old?? Never mind!  Anyhoo - I use my tool of torture and a mini pom to rub some chalk over the cut stencil, then just wipe off the excess. This makes it so much easier to see where the cut lines are. 
 

Stencil Transfer
After applying transfer paper to the top of the stencil, remove the backing and apply to your project. See how easy it is to see the cut lines?  On this project it wasn't quite as important, but on any project where the surface is curved, or irregular it helps more than I can say! Remove the transfer paper and weed the portions that will be etched from the stencil. Be sure you don't distort the edges of the cut design.
 

Etched Candle
Use masking tape to cover any areas that you don't want to accidentally etch . I am notorious at doing that- so seriously get some masking tape and get to covering!  Apply a good coating of etching creme  and let sit for 15 minutes. Or do what I normally do and apply the creme, move on to something else, forget about the etching creme, then come back to it in a bit. Scrape the cream back into the jar- it is reusable! Rinse the container with cold running water- don't worry, water deactivates the creme so it won't hurt your pipes!
 

Coloring etched glass

 While just the etched glass looks great, I like to color it on a lot of my projects. For this one I used a Rose Gold Wax from Prima. I leave the stencil in place while I color the design, then remove. I think it is less messy that way.  I like using the cheap make-up sponges from the dollar store- that way I can use them once and toss them out. I put a good layer of the wax on the design, and buff with the sponge. Then flip the sponge over and buff the excess wax off.
 
Now,, this particular wax is NOT permanent. It will come off if washed. I am not really worried about washing a planter on my window sill, so I was OK with it.  
 
 
DIY Upcycle Planter


 There you have it! Be sure to check out etchall® on Pinterest to see more fun projects you can make.
 

Starry Night Etched Centerpiece Bottle

We are getting a little bit more camping down these days and I wanted some cool pieces that would give off some light, but not so much light that it would attract bugs. So,, one empty blue wine bottle became a starry night etched centerpiece. I love it and I need to make a few more! 

This post may contain affiliate links. Please see my Disclosure*

Y'all,, please tell me I am not the only one who has been drinking a little more wine during the lockdown? It's not just me, is it?  We decided to work our way through the range of Moscato sparkling wines and see what we really liked. I REALLY like the variety that comes in this blue bottle. A plus side is how beautiful the bottles are when they are empty!! I mean, that's important too, right? We gotta recycle those pretty bottles!!

I used etchall™ etching creme, etchmask, and transfer paper to complete my project. Be sure to check out all the amazing things you can do with etchall™ - there are so many ways to use it.


I started by making the mask to etch through. I was pretty lazy and just grabbed a punch to use! After cutting several squares of etchmask I punched them with a small star punch I have had for some time.  Then I placed them on randomly making sure that the mask didn't cover any open stars where I wanted to etch.

Once all the stars where applied I used masking tape to cover all the areas I didn't want to etch and to make a "wall" around the area since my project was ROUND. Why can't I ever want to etch anything that is flat??? Seriously - I will never learn!

Apply the etching creme and let it sit for 15 minutes. Or longer if you are like me and move on to something else and forget about it for half an hour or so.  Remove as much etching creme as you can and return it to the bottle, then rinse the bottle under cold water to remove any leftover.


Ta-da! Etched stars on a beautiful blue bottle.


Summertime Etched Glasses

etched glasses
Are you ready for summer? I sure am! I am planning on having party after party this year to celebrate being out of lockdown.  Summertime is my favorite to gather with friends and these cute etched glasses are sure to be a hit.

This post may contain affiliate links. Please see my disclosure*

Silhouette Cameo

I started with some cute glasses from the Dollar Tree. My other supplies are

etchall stencil

After cutting my design I like to go over it with some black chalk to better see the cut lines. This really helps when I am placing a design on a surface to be etched. After trimming the etchmask to size I applied transfer paper to each. Be sure to weed AFTER you have applied the mask to the surface.

stencil mask

Use masking tape to cove any areas you do not want to etch. I can't tell you how many times I have messed up a project because I failed to do this. Masking tape is cheap y'all - just put it on there!

Apply a thick coat of etchall® creme and let it sit for 15 minutes. Rinse in cool, running water making sure to get al the creme off. The water deactivates the etchcreme so it won't hurt your pipes!

Dollar Tree Crafts

There you have it! Super easy craft for those days when you are staying in. Did you know that etchall® is safe for kids to use too?  If you are looking for something to keep the kids busy give this a try- they will love it!

etchall supplies
Check out the etchall® website to see the full line of products and some great projects too.


Etched Wedding Champagne Glasses

etched champagne glasses
It is wedding season for the next couple of months so I have lots of gifts to make. First out of the gate is a set of etched champagne flutes. I love how these turned out! I took a pair of cheap Dollar Tree glasses and turned them into a lovely gift using etchall® etching creme and the new Petal Papers from DCWV.

etching stencil

I used my Silhouette Cameo 4 to cut etchmask® for the stencils I used. I always rub a little chalk over the cut stencil so I can see where the lines are. This makes it so much easier for me to see where to place the stencil on my project.

stencil vinyl
I applied the stencil to the glasses using etchmask Transfer Sheets. Once you have the stencil in place it is time to weed out the part of the design you want to etch.

etching creme

Apply etching creme and allow to sit for 15 minutes. For a project like this that isn't flat I use masking tape to create a "wall" around the stencil. This really helps keep the etching creme in place- and off the areas you don't want etched. After 15 minutes you can return the creme to the jar- it's reusable! Rinse well with running water and dry.

Crepe paper flowers
Have you tried the new Petal Papers from DCWV? They are available at JoAnn stores here in the states. I love to make flowers using crepe paper! I am excited that I can now get that crepe paper locally instead of mail order.

DIY paper flowers

Cut a 1 1/2" strip of the white Petal Paper. Make sure you pat attention to the grain of the paper- the "creases" should always be running top to bottom, not side to side.  Roll the strip up tightly and use a VersaMagic ink pad to color one edge.

Pearl trim
Use a 1" Glue Dot (or a 1" paper circle that you have run through a Xyron machine) to make the flower. Start on the outer edge of the Glue Dot and press the end of the Petal Paper into the dot. Gather the paper slightly as you continue to press it into the glue dot. I make two rows - just keep going from the outer layer to the center of the glue dot to make the inner layer. Use a small skewer to roll the edges of the Petal Paper randomly. You can also slightly stretch the edge to make it more ruffled.  I used some pearl trim from Expo International for the center of the flowers.

Crepe paper
Add the flowers to the base of the champagne glasses and they are ready to gift!

Thanks so much for stopping by today! Be sure to check out etchall® on Facebook to see some amazing projects to try. 


Etched Candy Jar

Love candy jar
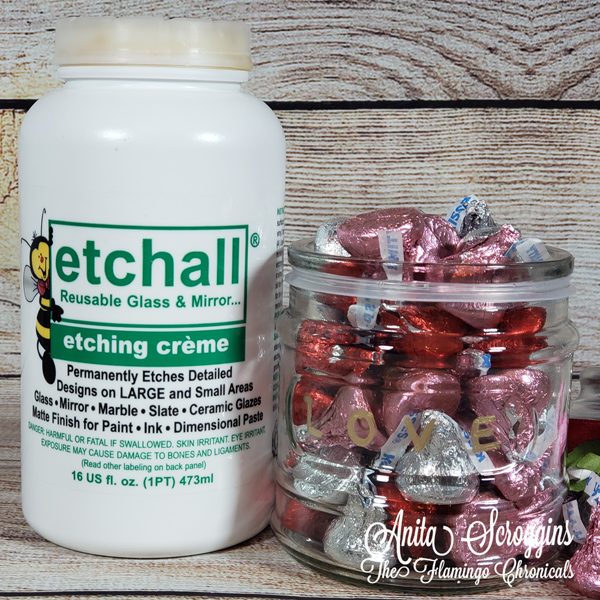
Y'all it's almost time for Valentine's Day and you know I need to give some candy and treats out to friends and family. I love to give out handmade treats and am always looking for a great container to put them in. This year I decided to make a few jars to put candy in. I picked up some small jars at the dollar store and grabbed my etchall® etching creme.

WRMK Alphabet punch

I started by using my WRMK Word Punch Board to create my stencil. I punched the etchmask® with the word LOVE for the front of my jar. There is a small recessed area on the front of the jar and I wanted something to just fit in there and this was perfect!

Etched jar

After I applied the stencil I used masking tape to cover the areas that I don't want to be etched. I am a messy crafter - so taping the area off is essential for me! Be sure the masking tape is pressed firmly onto the glass so no etching creme® seeps under it. Apply a nice layer of the etching creme® and allow it to sit for 15 minutes. Or if you are like me, leave it in your craft studio to go eat lunch, then get distracted and forget about it for two hours! Scrape the excess creme back into the jar and rinse the surface with cold running water. Be careful not to get the creme on any surface that you don't want to etch.

Valentine jar

After rinsing and drying I applied Gold Rub N Buff to the surface. I normally do this before I remove the stencil. I applied two layers of the rub n buff here. I love how this turned out. I am going to make a few more so that I am ready to hand out treats on Valentine's Day.

https://amzn.to/2F3TlzV
Be sure to check out the wide range of etching supplies available for all your craft projects.


Etched Rudolph Candy Dish

Are you looking for a fun gift this Christmas Season? Check out my cute etched Rudolph candy dish!  Everyone on your list will be happy to receive this- I plan on filling mine with some fun themed candy bars.

I started by cutting a stencil using etchmask® and my new Silhouette Cameo 4 machine. After transferring the stencil to the glass jar I weeded out the pieces of the design that were to be etched. I am a messy crafter- so I always mask off the parts of the project I don't want to etch.


Apply the etching creme to the stencil and allow to sit for 15 minutes. Be sure to return the creme to the jar after the time is up - it is reusable! Rinse the project in cold running water to remove any remaining creme.

To finish the project off I added Rudolph's red nose using StyleTechCraft™ Transparent Glitter adhesive vinyl. I love the way it turned out!


Etched Christmas Cookie Tray

etched cookie tray

I am full on in the Christmas prep mode. My favorite time of year! I needed a new cookie tray for the Princess to leave her Santa cookies out on. Of course I pulled out my etchall® and got to work.

This post may contain affiliate links. Please see my Disclosure* for more information. 


Etching supplies

 Gather up your supplies. I used:
I used my Silhouette Cameo 4 to make my stencil. Y'all - I love the new Cameo 4!! If you have been thinking about buying one - you should totally do it! Go grab yourself one NOW!

etching stencil

After cutting my stencil, I like to define the cut areas. I use some old chalks I have lying around and brush a little bit on the stencil. I make much fewer mistakes when weeding when using this technique!


Weeding vinyl

After I cut the stencil, I like to go ahead and apply the transfer sheet and apply it to the piece to be etched. I pull the transfer sheet off and then I weed it. It seems like now matter how careful I am, I will stretch the stencil if I weed first then transfer.  I also like to tape off the uncovered areas with masking tape. I am a messy crafter!

Apply a generous amount of etchall® etching creme and let it sit for at least 15 minutes. I'll be honest y'all,,, I normally just go do something else and come back to it after a while! Return as much of the creme as you can to the jar. Did you know that you can re use etchall®? You can!  After removing as much of the creme as you can, rinse the dish under running water. Be careful that you don't let any of the creme linger on exposed areas - it can start etching!

gold etched glass

Here lately I have been on a real kick about coloring my etched pieces. I love the way it looks! Gold Rub-n-buff is my favorite. I like to leave my stencil in place until after I have colored the etching. I use a cheap make-up sponge from the dollar store to apply the Rub N Buff, then just toss it in the trash.

Gold Glass
Look how sparkly the gold Rub N Buff is! It is perfect for coloring your etched pieces.

etched cookie tray

Thanks so much for stopping by! I hope you give glass etching a try!


Freestyle Etched Halloween Lantern

Halloween lantern
Y'all I love Halloween! It is my second favorite holiday. For this years addition I made a new Halloween Lantern using freestyle hand etching! Did you know I used to be a wedding cake baker?  Yep, for a little over 15 years I made custom wedding cakes. I have been wanting to use my baking skills on everyday crafts and this was the perfect combo. 


This post may contain affiliate links. Please see my Disclosure*


etchall® etching creme
I started by removing the glass panels from the lantern. They just slipped out from the inside after pushing the tabs aside.  I spooned the etchall® etching creme into an ordinary piping bag fitted with a small, round, piping tube.  This is WAY more than I needed for this project, but it makes the bag easier to hold and pipe with. 

freehand etching
I piped one of my favorite designs on all 4 panels of glass. This is by far my favorite piping pattern, and my most popular. This was my most requested cake design. Once the etching® creme is on the glass, just let it sit for 15 minutes to do it's work. Then scrape the creme from the glass back in the jar to reuse it. Rinse the glass under cold running water - don't worry, water deactivates the creme so it won't harm your pipes. 

hand piped wedding cake

 How lovely is this cake design?? I absolutely love it!! I made this pattern more times than I can count over the years!

Ann butler stamps and ink
While the creme is doing it's thing, let's make some fun ribbons to decorate the lantern with. Here I have used Ann Butler Crafter's Ink in Tangelo and a border stamp also from Ann Butler. I stamped the same design over and over on a piece of ivory grosgrain ribbon, then set it aside to dry.

hand stamped ribbon
How cute is that ribbon? So now you know it is super easy to make your own ribbon to match any project!  I tied a nice bow with the ribbon and attached it along with some Prima flowers to the lantern using my SureBonder Cordless Glue Gun. That thing is the bomb y'all - go get you one right now. 


Etched lantern
There you go! Easy peasy to make a fun holiday decoration that is uniquely yours. This project took less than an hour all together, including taking the panels out and reassembling the lantern. 

Hop over to the etchall® site to see more amazing things you can do with etchall® etching creme