Showing posts with label Smoothfoam. Show all posts

Fun Summertime Wreath with Smoothfoam®

Hello everyone and welcome to another adventure of The Flamingo Chronicals. Today I am sharing a project made using the new Smoothfoam® Ruled Wreaths and lots and lots of summery crocheted flowers.
 
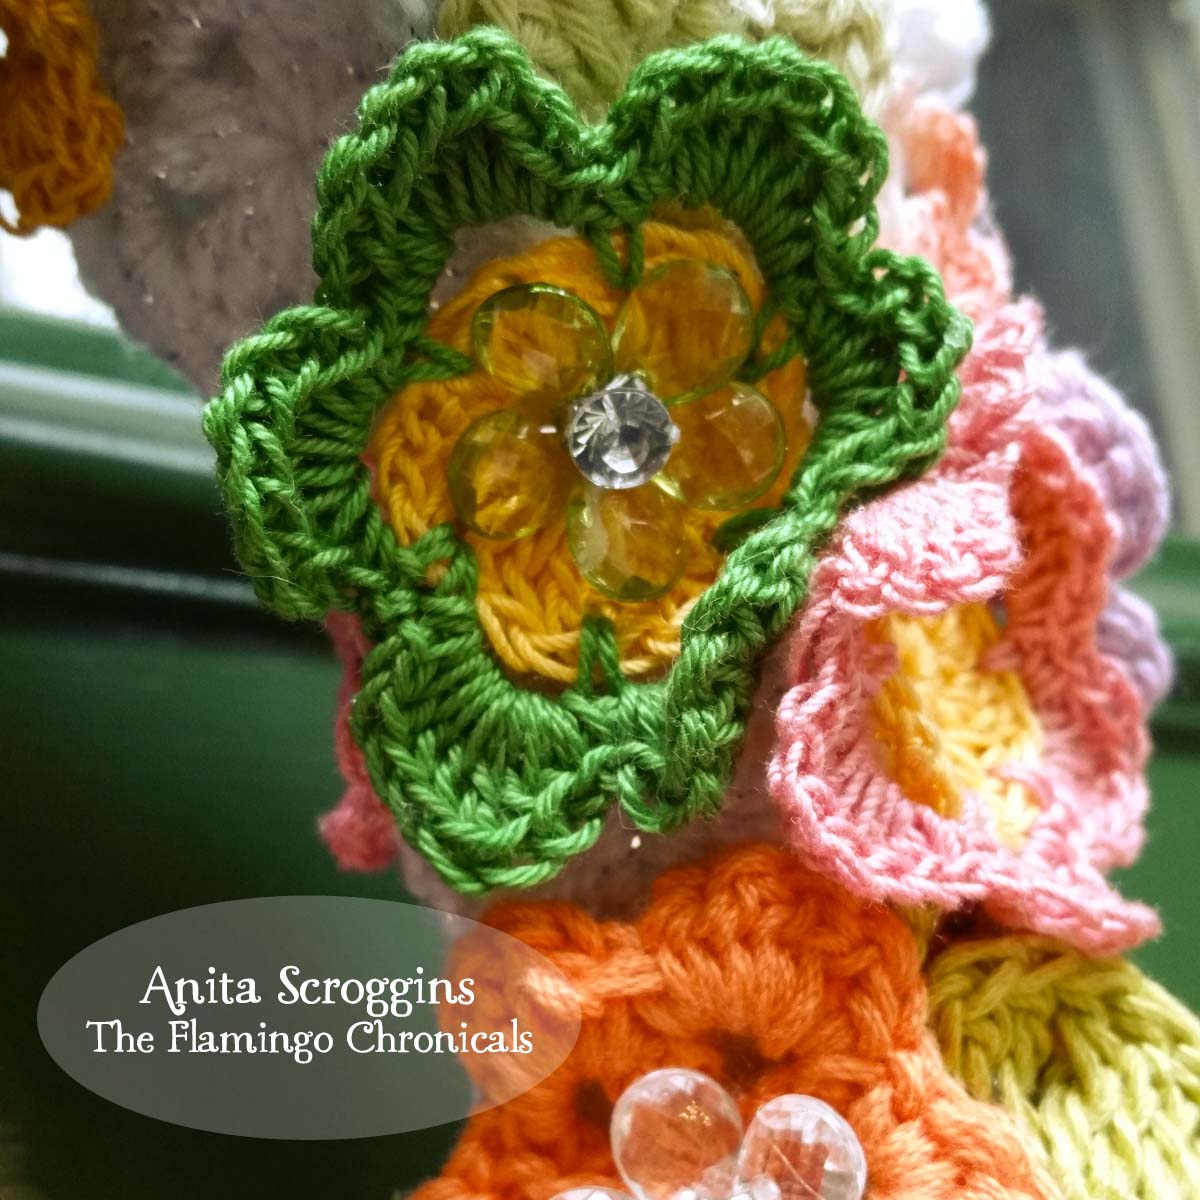
So, I have this amazing friend who crochets these beautiful flowers for me -  she is a so talented. Not very long ago she had a bad fall down the stairs in her house and suffered a broken neck - so please say a prayer for her as she recovers. I have been using these flowers on projects for years and I had a whole bin of odds and ends left over, so I piled them all on my table for this project. I mean who doesn't love a wreath full of flowers????

The wreath's are marked in equal measurements to make it easy for you to place the items on your wreath so your project has that professional look. These things are pretty awesome so you are going to want to check them out for sure.


I used my Surebonder Low Temp Glue Gun and a sheer sparkle ribbon to cover the wreath and then started attaching flowers. I used the divided sections to make sure I had an even coverage of flowers and colors overall on the wreath.


 I used my glue gun again to attach some plain grosgrain ribbon to the back for a hanger. When working with Smoothfoam® a low temp glue gun is the perfect adhesive - plus you won't burn your fingers :)

Here are some closeups of the flowers.


Be sure to check out all the other projects from the talented designers participating in the blog hop - see them all over on the Designer Crafts Connections blog. 
There is a prize up for grabs too and all the details are on the blog - click the link
above to join in the fun.


Memories Mixed Media Wall Display with Smoothfoam®


SF Memories MM board 4

I have been on a mixed media spree of late and Smoothfoam® is an amazing surface to create on. Today I am using the 1x6x12" Smoothfoam Sheet as my base.


SF Memories MM board 1


I started by gluing a layer of chipboard to the Smoothfoam® and then painting the entire surface with a coat of DecoArt Gesso from their Media Line.


I am so happy to be a member of the DecoArt Blogger program! I absolutely love their products - there are so many ways to use them and they never fail to give me the results I want!

SF Memories MM board 2


Add the second layer of chipboard and coat this with gesso as well. Let everything dry well.

SF Memories MM board 8


I began layering color on by using . After that I added fluid acrylics, then let those dry. My last layer of color was the Metallic Lustre - I added bits and pieces of color all over the piece randomly.

SF Memories MM board 5


I added Crackle Glaze to a few of the pieces for some visual interest.

SF Memories MM board 6


Last up I added accents on one piece of the chipboard using Liquid Glass. When dry I accented it with Metallic Lustre.

Supplies Used:
Smoothfoam® 1x6x12 Sheet
DecoArt Media Line:
   *Media: Gesso / Crackle Glaze / Liquid Glass
   * Fluid Acrylics: Titan Buff / Diarylide Yellow / Yellow Oxide / Metallic
   *Shimmer Mists: Turquoise / Yellow
   *Metallic Lustre: Silver Spark / Lavish Green / Orange Flicker / Brilliant Turquoise
Chipboard: Technique Tuesday / Want to Scrap / Blue Fern Studios
Low Temp glue gun


Signature1

No Calorie Cupcakes using Smoothfoam®

I sure do love a good cupcake, I mean, who doesn't??? Unfortunately my waistline does not like them as much as I do!  The solution is No Calorie cupcakes make using Smoothfoam®.

I started by painting 3" Smoothfoam Balls with acrylic craft paint. I used toothpicks to hold the balls up until they dried.

I used double sided tape to adhere the balls inside the liners, then decorated with paper flowers and ribbons.

For this one I added pearls for the flower centers. I secured the flowers using small head straight pins - this way I can change them out later if I want to!


Big Time Party Decorations - Flowers!

The Princess is almost a year old and we are getting ready for the party. We have TONS of flowers to make and here is a look at how some of them will look.


This flower is 18" in diameter and very sparkly!

Supplies:
  • Smoothfoam 3" Ball
  • Italian Crepe Paper
  • chipboard
  • double sided tape
  • coffee filters
  • hot knife
  • gold paint, gold spray ink, gold microfine glitter
  • Beacon 3-N-1
  • Ribbon for hanging
  • paint brush, chop stick, stapler


To start off I cut a chipboard in a 8" circle and covered it with strong double sided tape. For the outer layer of petals, I cut ten 6"x10" pieces of crepe paper, then shaped them as shown above. Gather then across the bottom, staple together to maintain the shape and stick down to the adhesive.
TIP: - I cut a "ring" around the outside of the circle and just removed that portion of the release paper, instead of pulling it all off.

Add 5 petals, evenly spaced around the circle, then add 5 more. For the second layer of petals, I cut strips 5" wide and ruffled them as I stuck them down to the adhesive.

For the center, I cut the outer ring from 3 coffee filters, fringed them, layered them together and added them to the center of the flower.

For my center, I cut the 3" Smoothfoam ball in half with my hot knife, painted it with gold metallic paint, and sprinkled it with glitter while wet. When it was dry, I adhered it using Beacon 3-N-1.

To finish it off , I rolled the edges of the petals using a chop stick, shaping as I went. Then gave the whole thing a good spray with gold ink.  Add a ribbon to the back to hang. Done!

Thanks for stopping by today!


Christmas in July with Smoothfoam and Robin's Nest

I have been uber busy working on some Christmas projects these last two weeks - in July no less- and here is the first one that I get to share with you!


Over at Designer Crafts Connection we have a challenge sponsored by Smoothfoam and The Robin's Nest this month.


DCC and Robin's Nest design team members received product from the Robin's Nest and Smoothfoam with the challenge to create some fun holiday projects to share with their readers.  You can check out these designer projects by hopping thru the DCC webring and visiting the Robin's Nest blog, or select from the projects featured below.  Don't forget to enter to win a stash of holiday goodies from Robin's Nest and Smoothfoam by commenting here, or on any of the participating blogs. The more often you comment, the more chances you have to win!  The winner will be selected by midnight, July 28th....  Good luck!  

Here is what I came up with.

I wanted to make something small that I could display Christmas goodies on come holiday time. I bake constantly during the holidays and I am always in search of some little something to put a few tid bits out on. For this I used:
Smoothfoam 8" Disc
Smoothfoam 3" Cube
Smoothfoam Ornament 
All the papers, pearls, die cut snowflakes, and ribbon are from Robins Nest.
The base is from IKEA- it is a candle holder. I used a gold paint pen to add some color to it. To attach it to the Smoothfoam Disc I used Aleene's Liquid Fusion.
To color the ornament shape on top I used DecoArt Metallic Luster Paint- this stuff is the BOMB folks- you should run right out to the store and pick some up. Seriously.

I can't wait for Christmas to roll around so I can throw down some cookies on this cute little thing.  The perfect size for 6 cupcakes. No one will ever know what happens to the other 6.

Thanks for stopping by and have a wonderful week!


Summertime Yard Games

Our family loves to get together in the summertime and we love to play games. One of the first games that the little kids learn to play involves dice, and I thought it would be awesome fun this year to play the game in the yard with super sized dice.

I used Smoothfoam 5x5x5" Cubes, painted them with two coats of white acrylic paint and let them dry. For the "spots" I punched black cardstock into 1" circles and adhered. To finish off, I added a coat of Matt Mod Podge to seal them- who knows what they might be thrown in.

Be sure to check out the Smoothfoam Blog for lots of amazing ideas. Thanks so much for stopping by today and have an amazing weekend!


Steampunk Wall Decor with Smoothfoam

Howdy to everyone in blogland! Today I have some fun wall decor to share with you.

I saw something link this at a local retail store, but it was priced at more money than I am willing to spend for something I can make myself!  So I pulled out some Smoothfoam and went to work.

I wanted something small, so I started with a 12x12 SCrapbook page Mount and cut it down to three 5.5" squares using a craft knife. To see a tutorial on this by Julie McGuffee check it out here.


I traced my cut shape onto the back of 6.5 x 6.5 cardstock, snipped the corners and adhered to each block. 

For this block I heat embossed Creative Embellishments chipboard pieces with Sparkle N Sprinkle EP. I adhered them over a small piece of MD Hobby gold metal.

For this block I used Whipped Spackle and a Tim Holtz stencil on the background, added another chipboard piece from Creative Embellishments, and some die cuts from the Kaisercraft paper pad I used to cover the blocks.

For the last block I ran a piece of MD Hobby & Craft Metal Sheet Roll (Gold) through my Cuttlebug with an embossing folder.  I inked the metal piece with StazOn and added another chipboard piece. 

Products used:
Kaisercraft papers; Be-YOU-tiful & Storyteller
Creative Embellishments chipboard pieces
Sparkle N Sprinkle Embossing Powders
Eileen Hull Embossing Folder
MD Hobby & Craft; Metal Sheet Roll & Hobby Shears
Tsukineko Inks: StazOn Black, VersaMagic Midnight Black, VersaMark
Adhesive 
heat gun 
craft knife


Thanks so much for stopping by today! I hope you are having a wonderful week so far :)


Easter Tea Table Decor with Smoothfoam

Hi everyone! Today I have a project to share for Smoothfoam. This weekend I am hosting an Easter Tea and I needed a cute accent for the table. Of course we needed to throw some Alice in Wonderland into the mix, so here is what I came up with.

Supplies:
Smoothfoam 2x4x8 Block
Paper Mod Podge, Paintbrush
Vintage sheet music
Assorted flowers, leaves, washi tape, chipboard letters
Ink, push pins, double sided tape, crepe paper


1. I started by tearing several sheets of music into large strips and adhering them to the block using Mod Podge.
2. To keep the wet paper from sticking to the table, push a few pins partway into one side so that the block will be elevated. Allow the Mod Podge to dry.

3. Apply washi tape around the corner. 
4. Ink chipboard letters and adhere.

5. Use double sided tape to adhere crepe paper around sides of block.

Add flowers as desired.


There you have it! I am so happy with how this turned out- I love it! I will have more on this tea later in the month. Thanks so much for stopping by!