Showing posts with label DoodleBug. Show all posts

Fun and Cute Christmas Gift Card Holder

This post may contain affiliate links.


Christmas Gift Card Holder


I am so in love with this paper from Doodlebug Designs! It is the new Milk and Cookies line and I picked it up at the Craft Warehouse when I was in Idaho a couple of weeks ago. I always give lots of gift cards at Christmas time so this paper was perfect to make a fun and cute holder for one.


Defelcto flexible pouches
Deflecto Flexible Pouches come in two sizes and they are great for all kinds of projects! I used the smaller size for this gift card holder. These pouches are also great for storing paint samples and color combos; they are super handy to carry in your purse when you are shopping.   You can also use the large size pouches to create a mini album - check it out here.

Creating a custom gift card holder
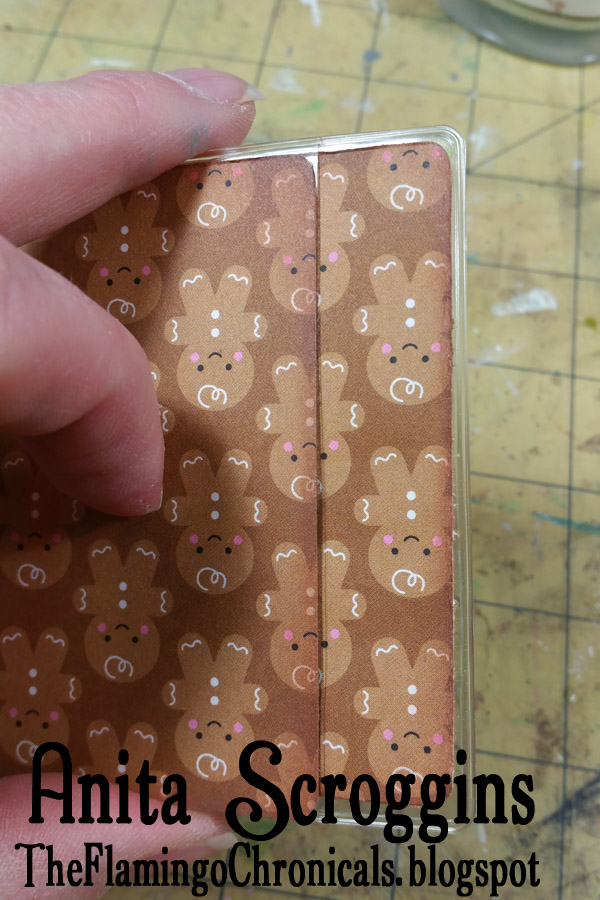
I started by covering both sides of the pouch with patterned paper. I used the new Milk and Cookies line from Doodlebug Designs - it is so cute! On the back side of the pouch where the plastic overlaps, I adhered a smaller piece of paper to slip inside.

Here comes Santa Claus
I adorned the front of the pouch with more paper from the Milk and Cookies line. I love to add faux stitching to my projects - it just adds so much visual depth to a piece! I layered die cut stickers, paper accents, and some amazingly cute Shape Sprinkles to embellish this side.  My last step was to outline the sticker shape with a thin black pen - it just makes the shape pop off the page. I am in LOVE with the Stabilo Point 88 Thin Line pens. Those things are amazing an give the best thin line!

Ho Ho Ho
On the reverse side I added more paper accents. The sentiment is created with Joy Embroidered Letters. These two colors were perfect for this paper line and this font is so fun and playful.  I cut a matching piece of card stock to fit inside the pouch and adhered the gift card using temporary tape. Punch a hole in the end of the card stock and tie on lots of ribbons to finish it off.

Milk and Cookies

Who wouldn't love to get this super cute Gift Card Holder? I am pretty sure there are going to be a few of them floating around the tree on Christmas morning here at our house.

To see more great ideas using Deflecto Products be sure to check out the blog.

Spooky Halloween Mini Album - Halloween Popcorn Box Party

Halloween Popcorn Box Party
It's Halloween so it's time for a few new tricks and treats and the Halloween Popcorn Box Party is serving up both! There are 75 wonderful designers who received product from the fabulous sponsors to play with and I came up with a fun Halloween Mini Album. 

The sponsors for this party are amazing - Adornit, World Market, Kunin Group, Udderly Smooth, Tombow USA, Expressionary, Ellison/Sizzix, Expo International, Oriental Trading. Be sure to check them all out!

This mini album will get a lot of handling by a toddler, so it needs to be durable and stand up to a lot of wear. The Deflecto Sign Tags are perfect for making pages in a mini album! They can be punched with all the binding machines on the market, decorated anyway you like, and they hold up to an amazing amount of wear. I made a template for my page size and cut the sign tags using a craft knife and a metal ruler.


The Sign Tags can also be cut with the large steel rule type dies. I wanted this amazing frame on the cover, but since it sticks out there is no way it would survive made from paper. The Sign Tags are not only durable, they are flexible as well. Pretty much toddler proof.

See that little spider on the front - Oriental Trading. Cuteness overload. The pumpkin is Kunin felt, the fence is matboard, both are die cut with vintage Sizzix dies.

 I love these little Trick and Treat trinkets. Guess where they came from?? Oriental Trading! Yep. They are a few years old, but I think we all know that I am a hoarder.

Who doesn't like pompom trim??? I think we should drape the whole world in pompom trim - it would make everything better! My papers are from Doodlebug Designs the are vintage designs.


The inner pages were decorated with patterned paper and a variety of embellishments.The pumpkin is a Laura Kelly die cut from Sizzix. The little black cat - did you know that you can cut Kunin Felt with thin dies?? Yep, you can. (die from LittleB).


Be sure to check out the post with all the projects shown. There are some fabulous things to check out.  You can find it here

Of course there is a prize up for grabs! Enter here for your chance to win.

a Rafflecopter giveaway


Easter Treat Boxes Tutorial

Hi everyone, I am Guest Blogging over at Craft Paper Scissors today and I have a fun and easy project to share with you. I love to feed people and host parties- and I am so happy those things go hand in hand! I was fortunate to help out a friend with a small Easter themed tea party. I wanted the guests to be able to take lots of goodies home with them after the party. Of course, I had to create some instead of buying some, and here is what I came up with.


I wanted to keep with the soft colors I was using for my table, pinks, yellows and pale greens. Since I was using vintage dishes and linens I wanted to keep the lines fairly clean as well, which is pretty hard for me! My PP are from ADORNit -  I am loving these papers, I have been using them on everything!


I used my Silhouette Cameo to cut out my boxes and layers, then inked all my edges. If you do not have an electronic die cut machine, they are lots of patterns online for creating your own.


I adhered all the layers before assembling the boxes. I used Eileen Hull dies (from my Prime VIB Blogger Event Box) and Maya Road stamps for the label on the from, using foam tape to give it some dimension. Each box is a little different; I simply added a few embellishments from my stash keeping with the color theme. I used a small piece of strong, double sided tape on each flap to assemble them.


For the handles, I simply cut 12" x 3/4" strips of cardstock, applied double sided tape to all but the last inch on each end, then applied coordinating ribbon to each strip. The ribbon gives the cardstock more shape and makes it more durable.


To add the handles I used more double sided tape at the very ends, and added the handles to the inside of the boxes.

I finished each one off with a sparkly bow made from Offray Metallic ribbon. 

Thanks so much for stopping by today! Be sure to hop over to Craft Paper Scissors and check out what's going on over there.

Have a fabulous Holiday this weekend!