Showing posts with label Silhouette. Show all posts

Vinyl Halloween Sign using StyleTech Craft

Halloween Sign with vinyl

Hi everyone, today I am hopping with Designer Craft Connections and StyleTechCraft™ Vinyl. I **LOVE** StyleTechCraft™ Vinyl. Really. I have used every brand on the market and NOTHING weeds like StyleTechCraft™. I don't even put weeding lines in my designs anymore!

https://designercraftsconnection.blogspot.com/2019/09/styletech-crafts-designer-blog-hop.html
Affiliate links are used in this post. Please see my disclosure policy here.

Vinyl halloween sign
I used my Silhouette Cameo to cut the vinyl.Have you tried the new Silhouette Cameo 4 yet? I really love mine!


Paint Prep

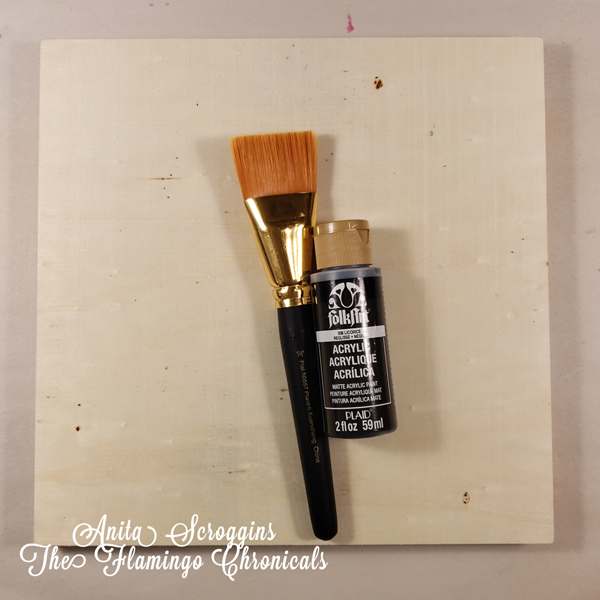
I started by prepping my surface with Folk Art Licorice Acrylic paint and a large flat brush, also from Plaid. The sign base is a 10 x 10 Wood Canvas from Plaid. It will cover with one coat of paint- but it is unfinished wood and will soak up a fair amount of paint.

Adding Sparkle

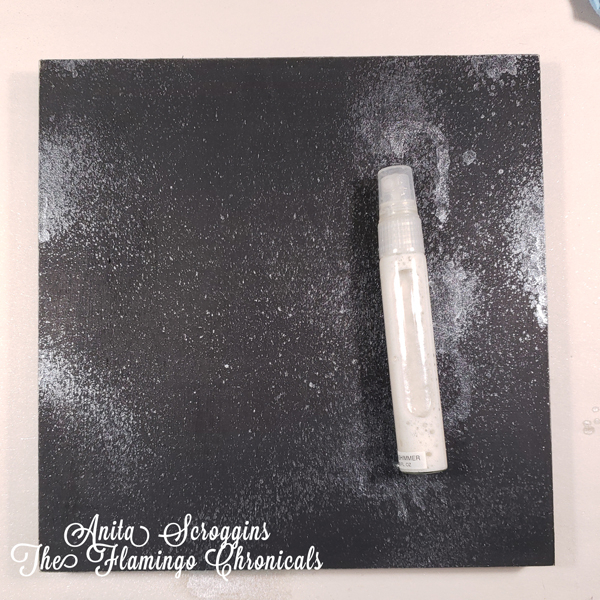
Once the paint was dry I added some sparkle using Shear Shimmer Spritz Spray from Imagine Crafts. This stuff is one of my go to products. I love adding a little bit of sparkle to my projects and this is quick, dries quick, and is beautiful!

Weeding vinyl
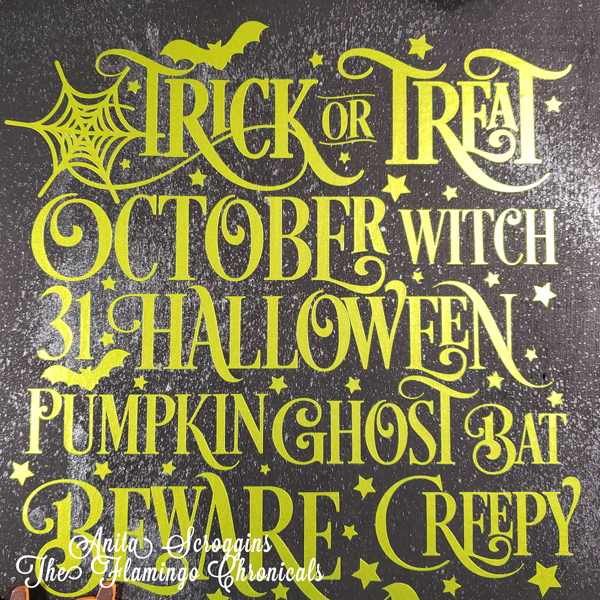
I used StyleTechCraft™ Luster vinyl Lemon-Lime #900 for my design and cut it using my Silhouette Cameo. This design is from the Silhouette Store and I used it as -is. I resized it for my project but that was it.

Hinge Method

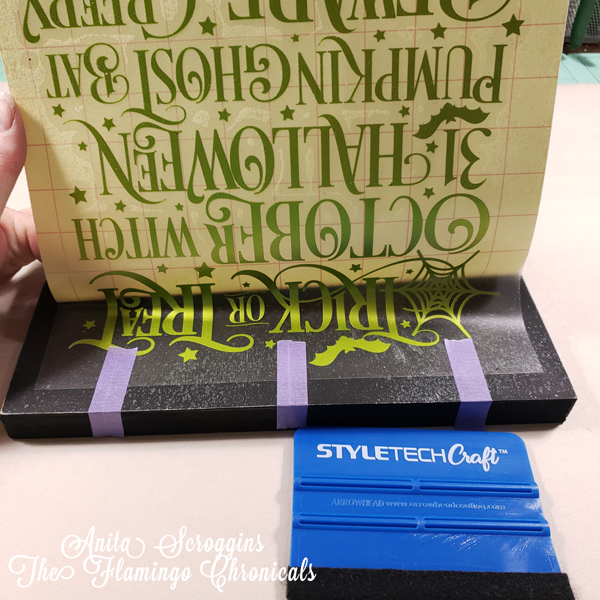
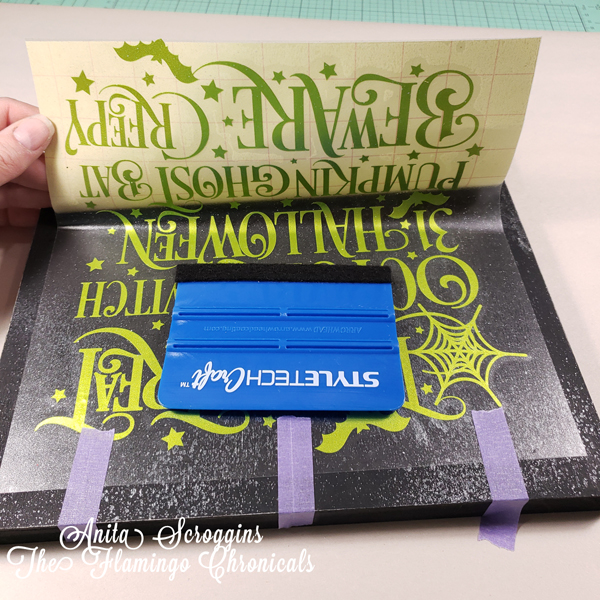
For a large design like this I like to use the Hinge Method to apply my vinyl. After weeding and applying transfer tape I cut a small strip from the top of the backing (be sure to allow for this when you cut the transfer tape). Then position the design in the base, using a few pieces of low tack tape. I used the Purple Tape from Therm-o-web. It is great!

Transferring vinyl

Here you can see the small strip of transfer tape that extends beyond the backing.

Applying vinyl

Next up I lift the design up and begin pulling the tape backing away from the design, while smoothing the design down using a scraper.  Go slowly and make sure each piece is secure on the backing before you pull more of the tape backing away.

applying vinyl
Keep going slowly until you have the entire design down. Then use the scraper to go over the entire design to make sure that everything is pressed firmly to the base.


Here are a few close up shots.

Creepy Halloween


Shimmer Sign


Halloween decorations


Luster vinyl
See how shiny the Luster vinyl is? Love it!

Be sure to hop over to the Designer Crafts Connection blog to see all the 
amazing projects made with StyleTechCraft™ Vinyl. 


Silhouette CAMEO® 4 - Everything You Need to Know


Silhouette CAMEO® 4

Y'all. I am so excited. I just can't even tell you how excited I am about this new machine. I was fortunate to go to the Silhouette CAMEO® 4 Launch Party and I am in love with this machine. You need one. Really you do. You are going to be mad if you don't pre-order yours and then all your friends are having more fun than you! Trust me on this.


Pre order CAMEO® 4

I pre-ordered mine and you can too.  Hop over to the Silhouette America website and add one to your cart. Use my exclusive code FLAMINGO to get free shipping when checking out. Seriously. Go now. I'll wait.


Did you get one? You are going to love it! They are shipping late September/early November.

So let's talk about some of the new features that come with the new machine.

More downward force

Silhouette is advertising a whopping 5kg of downward force. The CAMEO® 3 had 230g of force. WOW - what an upgrade!
At the launch party I was able to see the CAMEO® 4 cut felt and I was AMAZED. The machine zipped right through the felt and cut cleanly. I do a lot of quilt applique and I am super excited about this new feature. Especially combined with the new roller blade (more on that below).

Cameo 4 felt
Look at those cure little things!

Speed - super fast!

The CAMEO® 4 cuts at approximately three times the speed of the CAMEO® 3. It. Is. Fast. Y'all. Really fast. I was able to see it in action at the Launch Party and I was amazed at how quickly it moved.  The CAMEO® 4 has a dual tool carriage . Carriage 1 is for high speed and Carriage 2 is for force. They are driven by separate motors specific to their task.

Built in Roll Feeder

Yep. For those of you who cut tons of vinyl, the roll feeder is now built in. Previously you had to buy an additional piece to do this.

Cool New Tools

The CAMEO® 4 will have a suite of new tools.
The new tools and housing are designed for the huge increase in power of the Cameo 4 and will not fit into any previous Silhouette models.
  • Rotary blade- this is what I am dying to get my hands on! They are scheduled for release in November. This is what you want for cutting any kind of fabric. 
  • Kraft knife blade- this is the tool for cutting thicker materials. Think fun foam, mat board, heavy chipboard, etc.

The machine will also have automatic tool detection to allow it to automatically adjust to whatever tool you happen to load in the carriage — blade, pen, whatever — without you needing to fiddle around with settings in Silhouette Studio.

Single Tap Auto Blade

So, you know how we all loved the auto blade detection on the CAMEO® 3? But we hated that repeated clicking before each cut?  They heard us. The CAMEO® 4 has "single click" technology. It only clicks ONCE before each cut.

Other New Features

  • Built-in roll feeder allows you to easily load and cut rolled materials like vinyl and heat transfer.
  • Built-in crosscutter lets you trim vinyl or heat transfer right from the roll.
  • matless roller
  • Increased cutting length - up to 16ft now!
  • LED backlit touch panel
  • Improved roller adjustment
  • 3 mm clearance for thicker materials.
  • Sliding lid and backlit touch panel give your machine a sleek, compact aesthetic.
  • Bluetooth® connectivity allows wireless cutting.
  • Print & Cut registration capability
  • PixScan™ compatible
  • Driven by free Silhouette Studio® software to give you limitless design options to customize your project.
  • Mac/Windows compatible


The CAMEO® 4 is will be available in
  • White 
  • Pink
  • Black
The white version is available for pre order right now. The pink and black will come later this year.

Bigger is better

Are you dying to get your hands on a wider cutting machine? The Cameo Plus (15-inch cutting width) is expected to release in January 2020, selling at $399.99 and the Cameo Pro (20-inch cutting width) will release in March 2020, selling at $499.99.

Look how cute these cookies are y'all??? The stencils were cut using the new CAMEO® 4. They were so cute. And yummy.


Be sure to follow me on Facebook to see more information on the new CAMEO® 4 - I should have mine in the next couple of weeks. I will be over sharing for sure. 


Thin Blue Line Decor


 Although my hubs would like to keep it a secret, I am very proud of the fact that he is a police officer. He has 23 years on the job, and this is after he spent 20+ years in the Marine Corps. He has 43+ years of public service under his belt - and I could not be more proud of him.  We have almost nothing in our home that reflects his job. As he gets closer to retirement I am starting to add some decor. This DIY Thin Blue Line wall hanging is the perfect start. It was easy to make with my Cameo Silhouette and a few supplies I already had on hand.

This post may contain affiliate links - please see my disclosure*.


I started with a wood panel from Plaid® Crafts and applied two coats of Wicker White Acrylic Paint. I received these new Base Coating brushes from Plaid to try out and they are really wonderful. I have some larger brushes to base coat with, but these are wide AND thicker than normal. They lay down a nice coat of paint without leaving brush strokes. Allow the first to dry completely before adding the second coat and make sure the paint is completely dry before attempting to apply the cut vinyl!


I created a simple file using my Silhouette Cameo 4. The hardest part was getting a good trace of the hubs badge. I finally gave up and pulled a shape from the internet that was really close, and traced that shape.  I used StyletechCraft™ for this project: Glossy Black and Ultra Metallic Blue. Transfer the larger design onto the base using your favorite transfer tape/paper. I like both and use them for different things. For this project I used both - transfer paper to apply the large design and transfer tape to add the small detail stripe.


There you have it! I can't wait to add this to my gallery wall.


Black Friday Silhouette Deals

Let's start the shopping early! Are you wanting a new Cameo Silhouette? The time is NOW! I have access to the Black Friday Bundles and deals at Cameo America and I am sharing them with you.  Save up to 50% and be ready to start your holiday crafting.


Have you been wanting to try the new ALTA 3-D printer.  This bundle includes:
SILHOUETTE ALTA
WHITE FILAMENT
BLACK FILAMENT
$25 DOWNLOAD (CODE)
Free Shipping

Regular price $354.97 - SALE Price: $249.99

 Bundles are available with multiple color machines: Mint, Slate, Aqua, and White!
 The bundles include:
SILHOUETTE CAMEO 3
$25 DOWNLOAD (CODE)
WINTER SPECIAL CONTENTS (DIGITAL)
BUSINESS EDITION (CODE)
HANDBOOK (CODE)
VINYL STARTER KIT
HEAT TRANSFER STARTER KIT
SILKSCREEN STARTER KIT
SKETCH PENS BASICS (8 PENS)
TOOL KIT
FREE SHIPPING

All Cameo 3 Starter Bundles are sale priced at $249.99


The Curio starter bundle is the perfect price so you can finally get one of your own!

The bundle includes:
SILHOUETTE CURIO
BUSINESS EDITION
$25 DOWNLOAD (CODE)
WINTER SPECIAL CONTENTS (DIGITAL)
NATURAL CURIO DUST COVER
GOLD FOIL TRANSFER SHEETS
METAL STIPPLING SHEETS
EMBOSSABLE FOIL
LTR SIZE EMBOSS PAPER
LARGE CURIO BASE
4 GLITTER SKETCH PENS
4 METALLIC SKETCH PENS
FREE SHIPPING

Regular price $575.92  SALE PRICE $199.99


There will be doorbuster sales Thursday and Friday on a variety of vinyl and HTV bundles. They are going to be HALF OFF - so be sure you grab yours.

To grab your new gear hop over to the Silhouette America site and be sure to use my code for early access. These deals are available starting 8:00am MST on WEDNESDAY November 21st. 

There are so many deals I couldn't list them all here so be sure to check the website for the full list. Pretty much if you want it, it is going to be on sale this weekend!

Remember - these deals don't officially start until 6:00pm on Thanksgiving day - but using my code FLAMINGO will grant you early access!

Now go forth and shop!


Back to School Fun with Deflecto

Hi everyone - who is ready for back to school? It seems like it is so early these days!! This months theme for the  Deflecto Craft DT is Back To School so here is a look at the projects I came up with.

I am all about using vinyl to decorate EVERYTHING these days so that was my go to for this project. To really make the designs stand out, I outlined and filled in the designs with a white paint pen.

For my Reading Bank I started with a Wet Erase Sign and removed the insert.
I took a 5x7 Beveled Edge Frame apart and used just the two clear panels for this project.


I cut the vinyl with my Cameo Silhouette and applied it the front panel.

I used very thin double sided tape to adhere the panels to the Wet Erase base, then finished off with some ribbons, and die cut stickers.

Be sure to check out the new Deflecto Blog for more great ideas and thanks for stopping by today!


Easter Treat Boxes Tutorial

Hi everyone, I am Guest Blogging over at Craft Paper Scissors today and I have a fun and easy project to share with you. I love to feed people and host parties- and I am so happy those things go hand in hand! I was fortunate to help out a friend with a small Easter themed tea party. I wanted the guests to be able to take lots of goodies home with them after the party. Of course, I had to create some instead of buying some, and here is what I came up with.


I wanted to keep with the soft colors I was using for my table, pinks, yellows and pale greens. Since I was using vintage dishes and linens I wanted to keep the lines fairly clean as well, which is pretty hard for me! My PP are from ADORNit -  I am loving these papers, I have been using them on everything!


I used my Silhouette Cameo to cut out my boxes and layers, then inked all my edges. If you do not have an electronic die cut machine, they are lots of patterns online for creating your own.


I adhered all the layers before assembling the boxes. I used Eileen Hull dies (from my Prime VIB Blogger Event Box) and Maya Road stamps for the label on the from, using foam tape to give it some dimension. Each box is a little different; I simply added a few embellishments from my stash keeping with the color theme. I used a small piece of strong, double sided tape on each flap to assemble them.


For the handles, I simply cut 12" x 3/4" strips of cardstock, applied double sided tape to all but the last inch on each end, then applied coordinating ribbon to each strip. The ribbon gives the cardstock more shape and makes it more durable.


To add the handles I used more double sided tape at the very ends, and added the handles to the inside of the boxes.

I finished each one off with a sparkly bow made from Offray Metallic ribbon. 

Thanks so much for stopping by today! Be sure to hop over to Craft Paper Scissors and check out what's going on over there.

Have a fabulous Holiday this weekend!


Halloween Decor with Smoothfoam

Good morning everyone! Today I want to share to fun Halloween project with you using a Scrapbook Mount Page from Smoothfoam.


I painted the surface black and then inked the edges to make them darker.

I used my Cameo to cut the phrase and  added detailing with markers.

The bat's faces are done with paint pens so they have a little extra dimension. I folded the wings before I adhered them to the project.

Thanks so much for stopping by today!
Anita


Sparkle N Sprinkle September Reveal


Welcome to Sparkle N Sprinkle's September 1 Reveal.


This month SIX new stamp sets are being introduced.   These sets are 20% off their regular price, until September 3rd.  All the new reveal sets are available on Cling Mounted Rubber and as a digital image. The Magic of the Season, set #653 is the stamp set featured in  This Month's Technique Video.


The sets are:


Autumn Splendor #651   (Digi version - DIGI651)

Farm Sweet Farm #652  (Digi version - DIGI652)

Magic of the Season #653  (Digi version - DIGI653)

Thanksgiving Friends #656  (Digi version - DIGI656)

Bountiful Blessings #658  (Digi version - DIGI658)

Sweet Holiday #655  (Digi version - DIGI659)


I have use the Magic of the Season stamp set for my layout this month

I used the swirly portion of the hat stamp to stamp all around the edge of my page, then I heat embossed with Silver Detail EP.

I also used the new Wonky Plaid Background to stamp a boarder across the center of my page. I applied
 Tear-ific Tape to cardstock and cut the title using my Cameo machine; I burnished it with Gypsy Red GL.

I heat embossed the Want2Scrap Chippies with Cappuccino EP.

I added a bit more sparkle using Tear-ific Tape and Silver Dreams GL.

To see all the details including a full supply list, please check out
my gallery at Sparkle N Sprinkle.


On Sept 3rd,  one Grand Prize Winner will be selected from the comments left on the designers' blogs listed below.  The Grand Prize Winner will receive their choice of:


1) all SIX of the new rubber stamp sets

or 

2) all the new digital stamps and digital stamp sets. 


The new SNS Creative Challenges also begins today, with lots of prizes and recognition badges. 


The winner of the blog hop will be announced on Sept 3 on Facebook, the SNS blog, and on our blogs:


(Tip: if you have a problem with a particular link, try clicking on the person's blog title to send you to their Home page.)


Don't forget to leave a comment with each Designer to be eligible for the Grand Prize.  We love reading your comments and hope we have inspired you as well.  If you absolutely can not leave a comment for some reason, please email icinganne@yahoo.com with your comment and the name of the blog or Designer you are commenting about.

We hope you enjoy the New Reveals as much as we do!
Wonder which Designer contains the Grand Prize this month?


Thank you so much for stopping by today!
I hope you have had an amazing holiday weekend with family and friends. 

Anita