Howdy everyone in blog land. Spring has sprung and I am super happy about that! Of course, in Texas that means bluebonnet photos and here is my Princess in her first set of photos
Seriously - how cute is that face! "Mimi- what do you mean I can't eat it?"
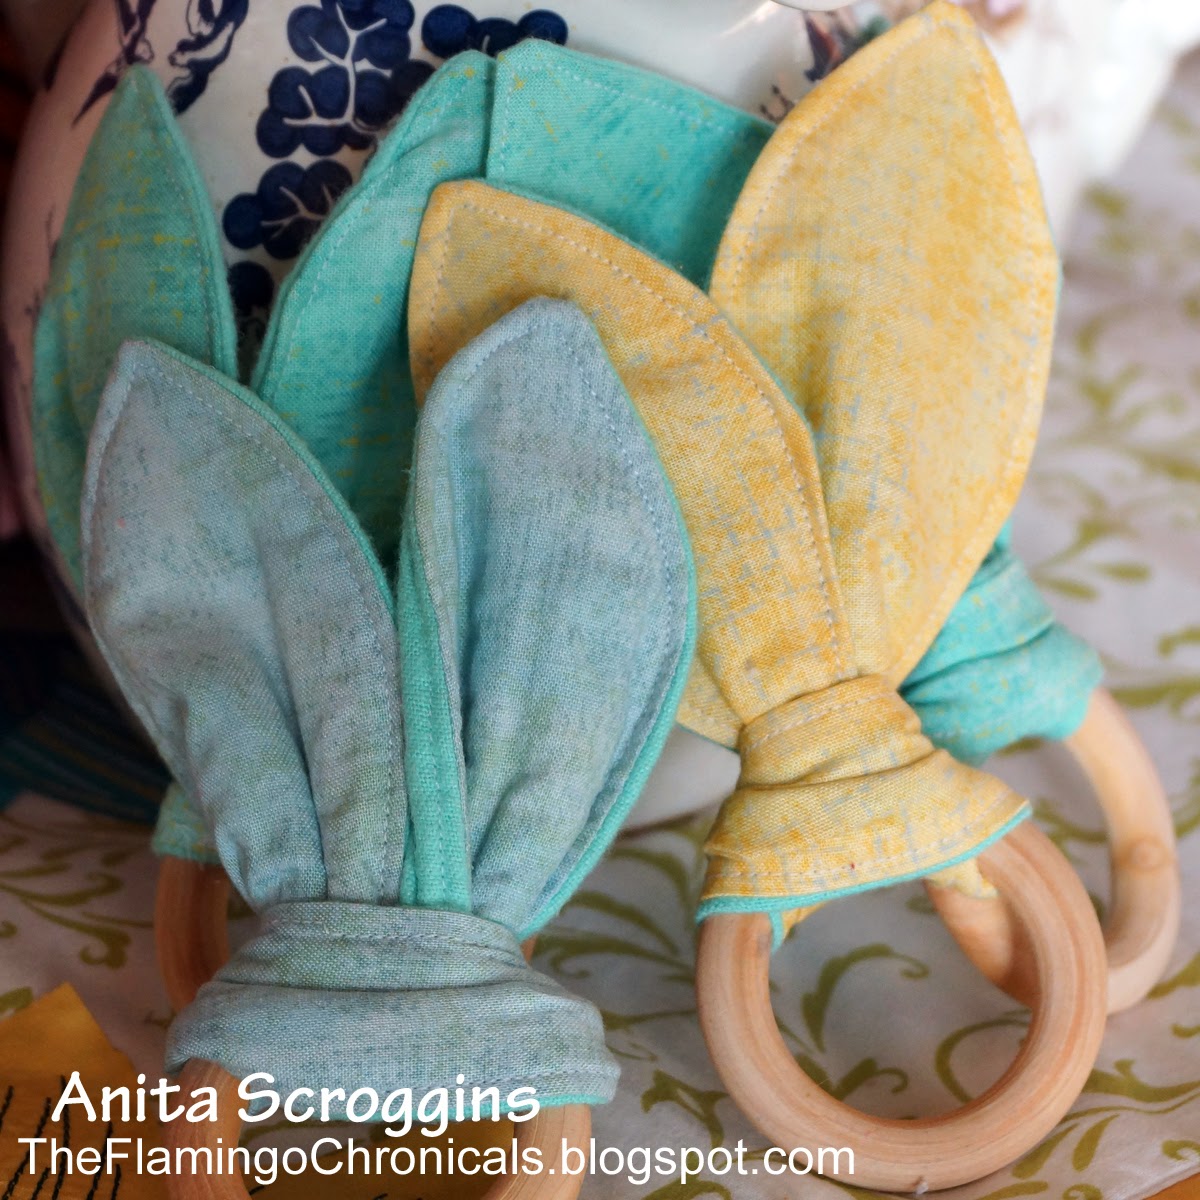
Of course, the Princess is putting everything in her mouth these days since she is teething, so I needed something for her to chew on. I got out some beautiful fabric from
ADORNit and my
Fusi-Boo from Fairfield World and went to work. Here is what I came up with (thank you Pinterest!)
These were so easy and quick- if you can sew a straight stitch you can make these.
I love these fabrics! I have used Burnish Mustard, Burnish Aqua, Burnish Grey, Burnish Green, Burnish Pink, and Red Burnish. You can find them all
here.
First thing is to cut your fabric and Fusi-Boo into strips about 4" wide X 14" long. You will need:
- cotton print fabric for the front
- a flannel or minky fabric for the back
- Fusi-Boo for the middle
I made 10 of these in just over an hour. By working on each step 10 times, before going on to the next step, it really speeds up the process!
I drew a pattern on 8 1/2 X 14 paper and cut it out. Be sure to add your 1/4" seam allowance to the pattern. Place your fabrics right sides together, and add a layer of Fusi-Boo, then pin the pattern on and cut out.
Stitch around the fabric, leaving one side of the middle portion open. Snip the ends to cut down on bulk and turn inside out. Press the seams flat, making sure to turn the open section under 1/4".
Top stitch all the way around the fabric very close to the edge and press again. I used a Lark's Head Knot to tie them on my wooden rings (ordered from Amazon). She loves these things! The best part is, when they are soaked in drool you can take the fabric off, throw it in the washer, and put it back on the ring. Super handy.
Be sure to check out
ADORNit for beautiful fabrics and
Fairfield World for Fusi-Boo.
What have you been working on lately, please share a link with me in the comments! I would love to see.
Thanks so much for stopping by today! Have an amazing weekend!


a.jpg)