Showing posts with label Prima. Show all posts

Spring Banner- Home Decor

Hi everyone, I am guest blogging over on Craft Paper Scissors, be sure to stop by and check out all the amazing projects!  I love Spring! It is my favorite time of year. Everything is coming alive in the yard, the birds are singing, the flowers are blooming and the world is happy. I like for my decor in the house to reflect those same feelings so cheery and full of color is the name of the game.

This year a created a new banner using laser cut wood pieces, cardstock, colorful flowers, and lots and lots of fun ribbon!


I found these wood cutouts at a popular chain craft store last month and I knew that I had to make a banner with them- they just yelled SPRING at me from the shelf. I started by covering the wood with two layers of VersaMagic ink in Pink Petunia, glueing them to cardstock when dry.


I pulled out my trusty decorative edge scissors and trimmed around the edges of the shapes- no measuring, I just eyeballed it. Then the real fun began! I pulled lots of spring colored flowers from my stash (have you seen my Prima Breeding Program?) and started layering them together. For the section on the right above, I punched three pieces of patterned cardstock in staggered sizes, shaped them, layered them together using foam tape, then added that onto a larger daisy. Easy peasy- super fun flower!


For the flower on the left I used vintage crepe paper and an XXL Glue Dot to create the back section, then adhered a ruffled flower in the center to complete the look. I have several tutorials on making your own flowers here.

For the section on the left I made a ruffled flower using Italian Crepe Paper, using a Maya Road trinket as the center, then adhered it into a hoarded vintage Martha Stewart paper flower (shown in the previous photo on the right). For the right section, I layered 7-8 hoarded vintage Prima flowers, using my Tiny Attacher to secure them in the center. These are the nice, big ones they used to make that came in the cans that are about 4" across. I really miss those!

 Something I do every time I make a banner is group lots of ribbons between each section. I just love the way this looks. I picked up this technique years and years ago in a class, so long ago I don't even remember what the class was about or for! The process is simple- grab a bunch of different ribbons, clip them to about 4" and lay them on your work surface. Take one ribbon and clip it a little longer- about 6" and use this one to tie all the others into a bunch, using a sturdy knot. Then tie that onto whatever string you have going from section to section. Easy peasy.

Thanks so much for stopping by today!

Birthday Album for a Princess

Howdy everyone! Today I have a pretty little mini album to share. I made this last month for a sweet little girl turning 5 years old.

Warning: Lots of photos! :) 

I used some vintage textured K&Co floral paper that I hoarded for years. I made the title piece for the front using my Silhouette Cameo and the Cut and Print feature. I used my Cinch to bind the album.


The mom wanted lots of pockets and tags so that people at the birthday party could leave messages.


The birthday girl's name is Princess- so we needed lots of bling, lots of flowers, and lots of pink!


On the inside of the album I used quite a bit of My Mind's Eye patterned papers, punches, ribbons, and Prima Flowers.


I think I used 10 yds of ribbon in this book!


I loved making this little book, and I was so happy with how it turned out!  I hope you enjoyed my book.  I would love it if you left me a comment to tell me what you think!
Have a wonderful week!

Hummingbird Vase with Connie Crystal and Etchall®

Good morning (or evening) and welcome to the Connie Crystal challenge at Designer Crafts Connection. I was so happy to receive the beautiful supplies from Connie Crystal to use for my project. I love bling and shiny things!


I decided to make a vase that I can use for all occasions so I pulled out a rectangle glass vase, my Connie Crystals, and my Etchall®.

 First step is to apply my mask and tape off the area I don't want etched. I applied my Etchall® Creme and left for 20 minutes. This stuff is reusable Y'all, so it lasts a long time!

While that was going on, I got my crystal sheets ready to add to the vase. I applied my pieces to double sided tape, then trimmed the tape down with an craft knife.

I used a piece of washi tape around the bottom of my vase to line up my crystals, peeled the backing off the tape and wrapped them around my vase.

Next up were the flowers, I layered some fabulous flowers from my stash and added some metal accents, pearls, and beads from Connie Crystal.

I used Glue Dots® to adhere the flowers to my vase, adding a few stamens to round out the bunch.


Christmas Kissing Ball with Smoothfoam

Good morning everyone, I hope you had a Merry Christmas!  It's Anita here today to share a fun Christmas project with you. We always have a kissing ball here at our house, and this year I decided to make one I could use year after year. So I pulled out a Smoothfoam ball and went to work.

Supplies:
3 3/8" Smoothfoam Ball
Paper flowers of varying sizes
Wired Leaves and decorative berries
1" Gold floral pins
Velvet Ribbon
Small stapler
paper piercer or small awl
Wire cutters
Beacon 3-In-1 Adhesive

1. Cut a  length of ribbon and fold in half; staple the open ends together about 1/2" from the ends. Spread the two small end pieces apart and pin to the ball using floral pins.
2. Start by stacking two flowers together. Push a floral pin through the center of the flowers then insert the pin into the ball. Continue adding flowers until the ball is covered.
TIP: Start with larger flowers to fill in the background, then add smaller flowers to cover the gaps.

 3. Make sprays of leaves and decorative berries. To secure, twist the wires together and wrap one of the wires around the others several times, very close together (this should be very close to the last leaf). Use wire cutters to clip the excess wire.
4. Use a paper piercer to poke a hole in the ball near the ribbon (move any flower petals out of the way). Apply glue in the hole and insert the end of the wires. Repeat for a total of 3 sprays, spacing them evenly around the top of the ball.
5. Shape the leaves in a downward direction.


Halloween Fun with Sparkle N Sprinkle

Hello everyone! I hope you are enjoying your long weekend.

Today I have another layout to share with you for Sparkle N Sprinkle
using some fun new Halloween Stamps.
I have very few Halloween photos of my little ones, so the ones I do have are so precious to me! They were 3 and 5 here. I have used the new Authentique papers for this layout and I love that little border of witches that I used right behind my photo!

For my title I have used Camera Life and heat embossed it with Concord Star.

I used the Witches Brew stamp set and the same EP for my sentiment. I used Clementine EP on the middle layer of my die cuts. To add a little sparkle to my border I used Purple Rain GL and 1/8" Tear-ific Tape. For the double layered hexagons, I applied 2 1/2" Tear-ific Tape to my paper, punched it out, burnished with Cloud Nine GL, and adhered with foam tape.

For my border I did some punching, layering and sewing with my machine.

I used Flourishes 2 in the corner and heat embossed with Detail Black EP.  I added a spritz of silver spray ink.


To see all the details and products used, hop over to

Thanks so much for stopping by today!

Anita


Deconstructed Layout #15 Timeless Memories


Timeless memories

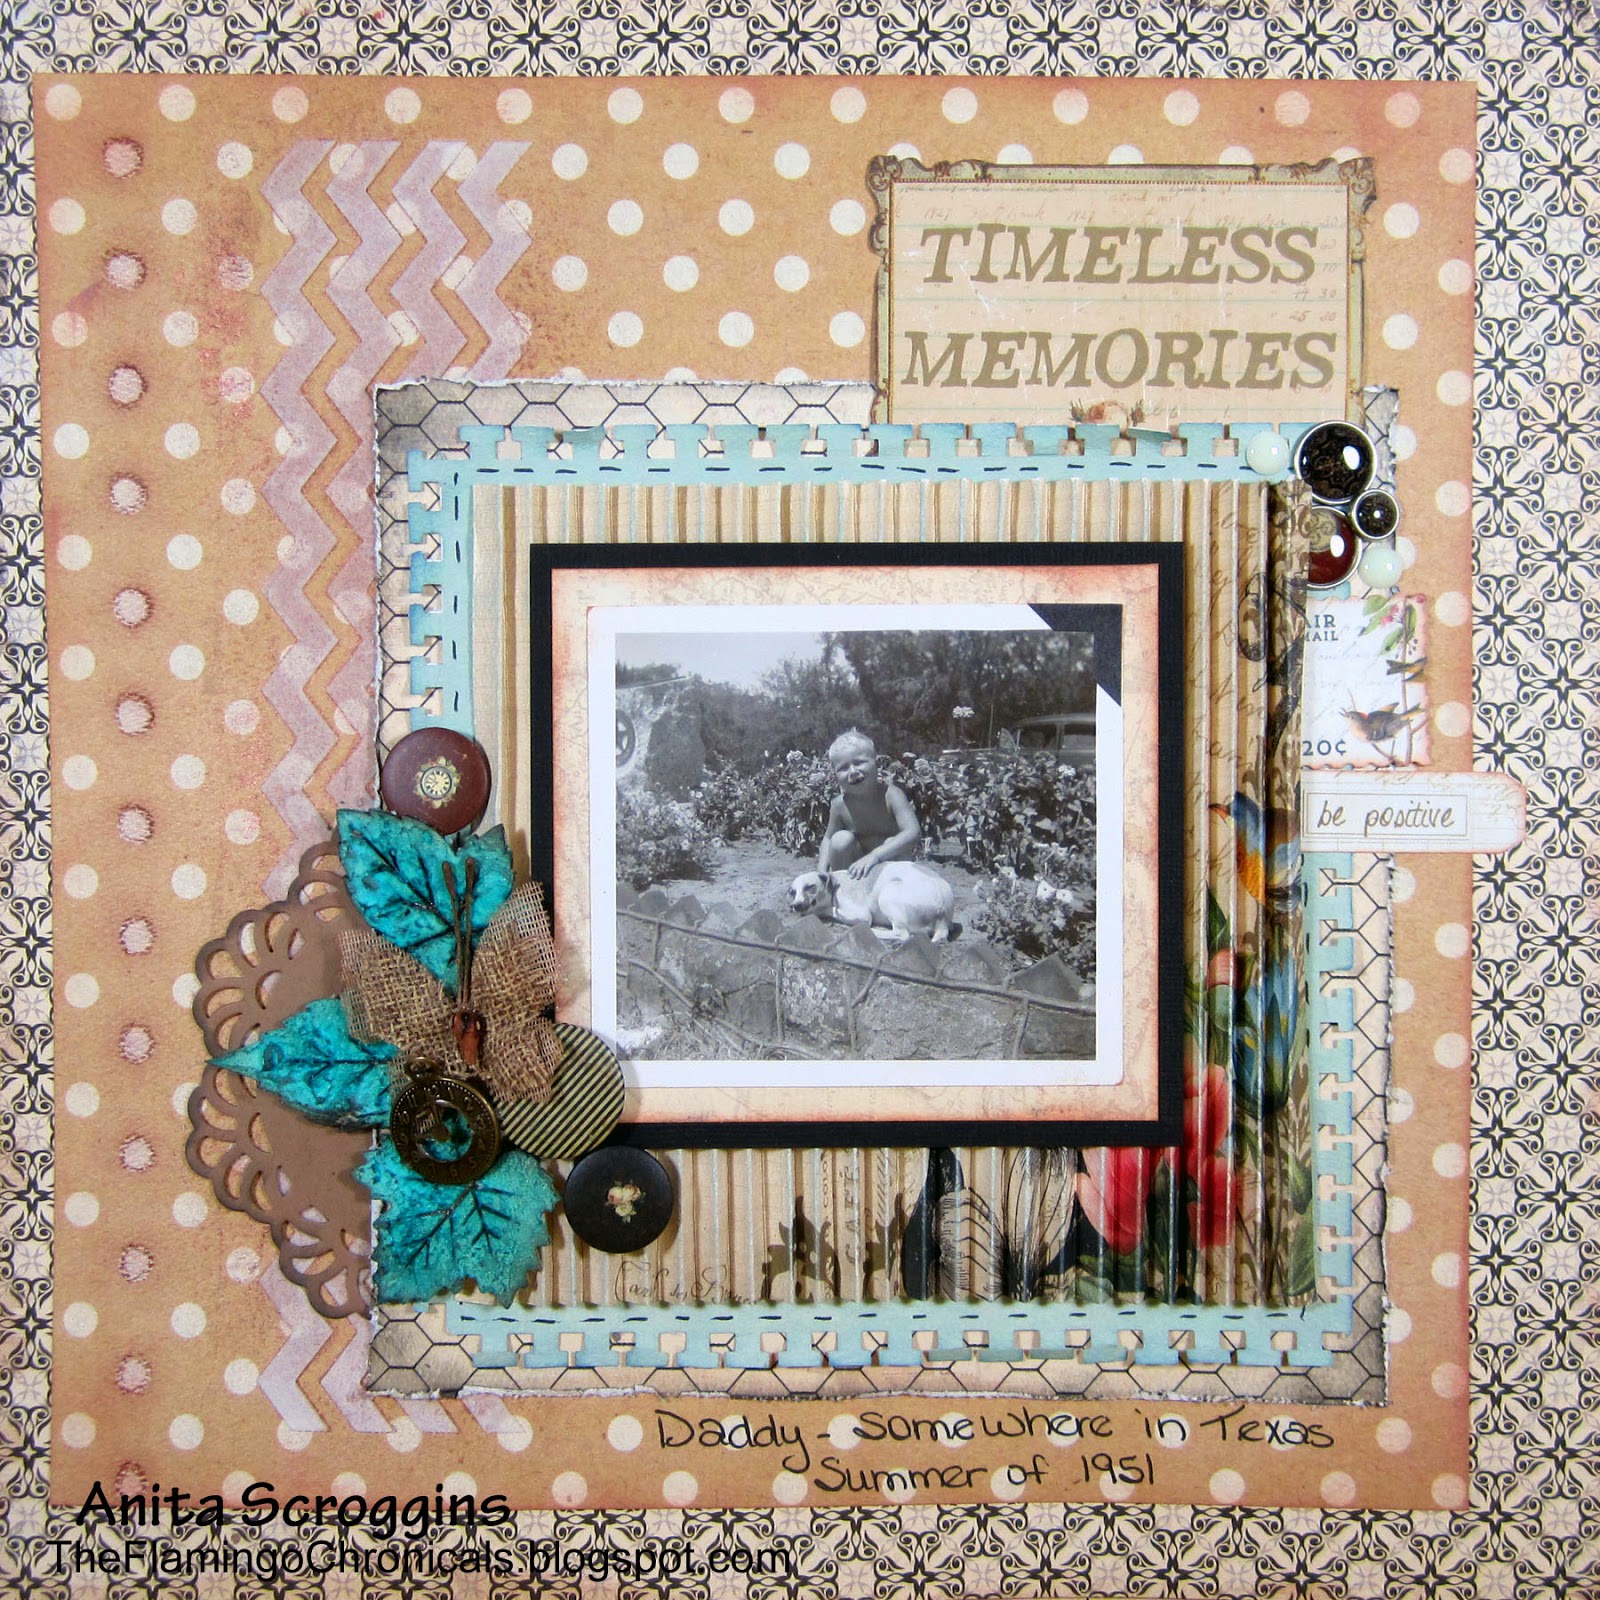
Hi everyone, I'm here today to share a new Deconstructed Layout with you. Today's tutorial is on paper pleating, which is a great way to add some dimension and texture to your layout using just a plain piece of paper! I have had this photo of my dad for some time, but wasn't sure how I wanted to scrap it.Since it is a black and white photo, I didn't want to overwhelm the photo so the colors of these Authentique papers were great.


To see all the tutorials in the Deconstructed Layout serious check them out here.

paper scoring
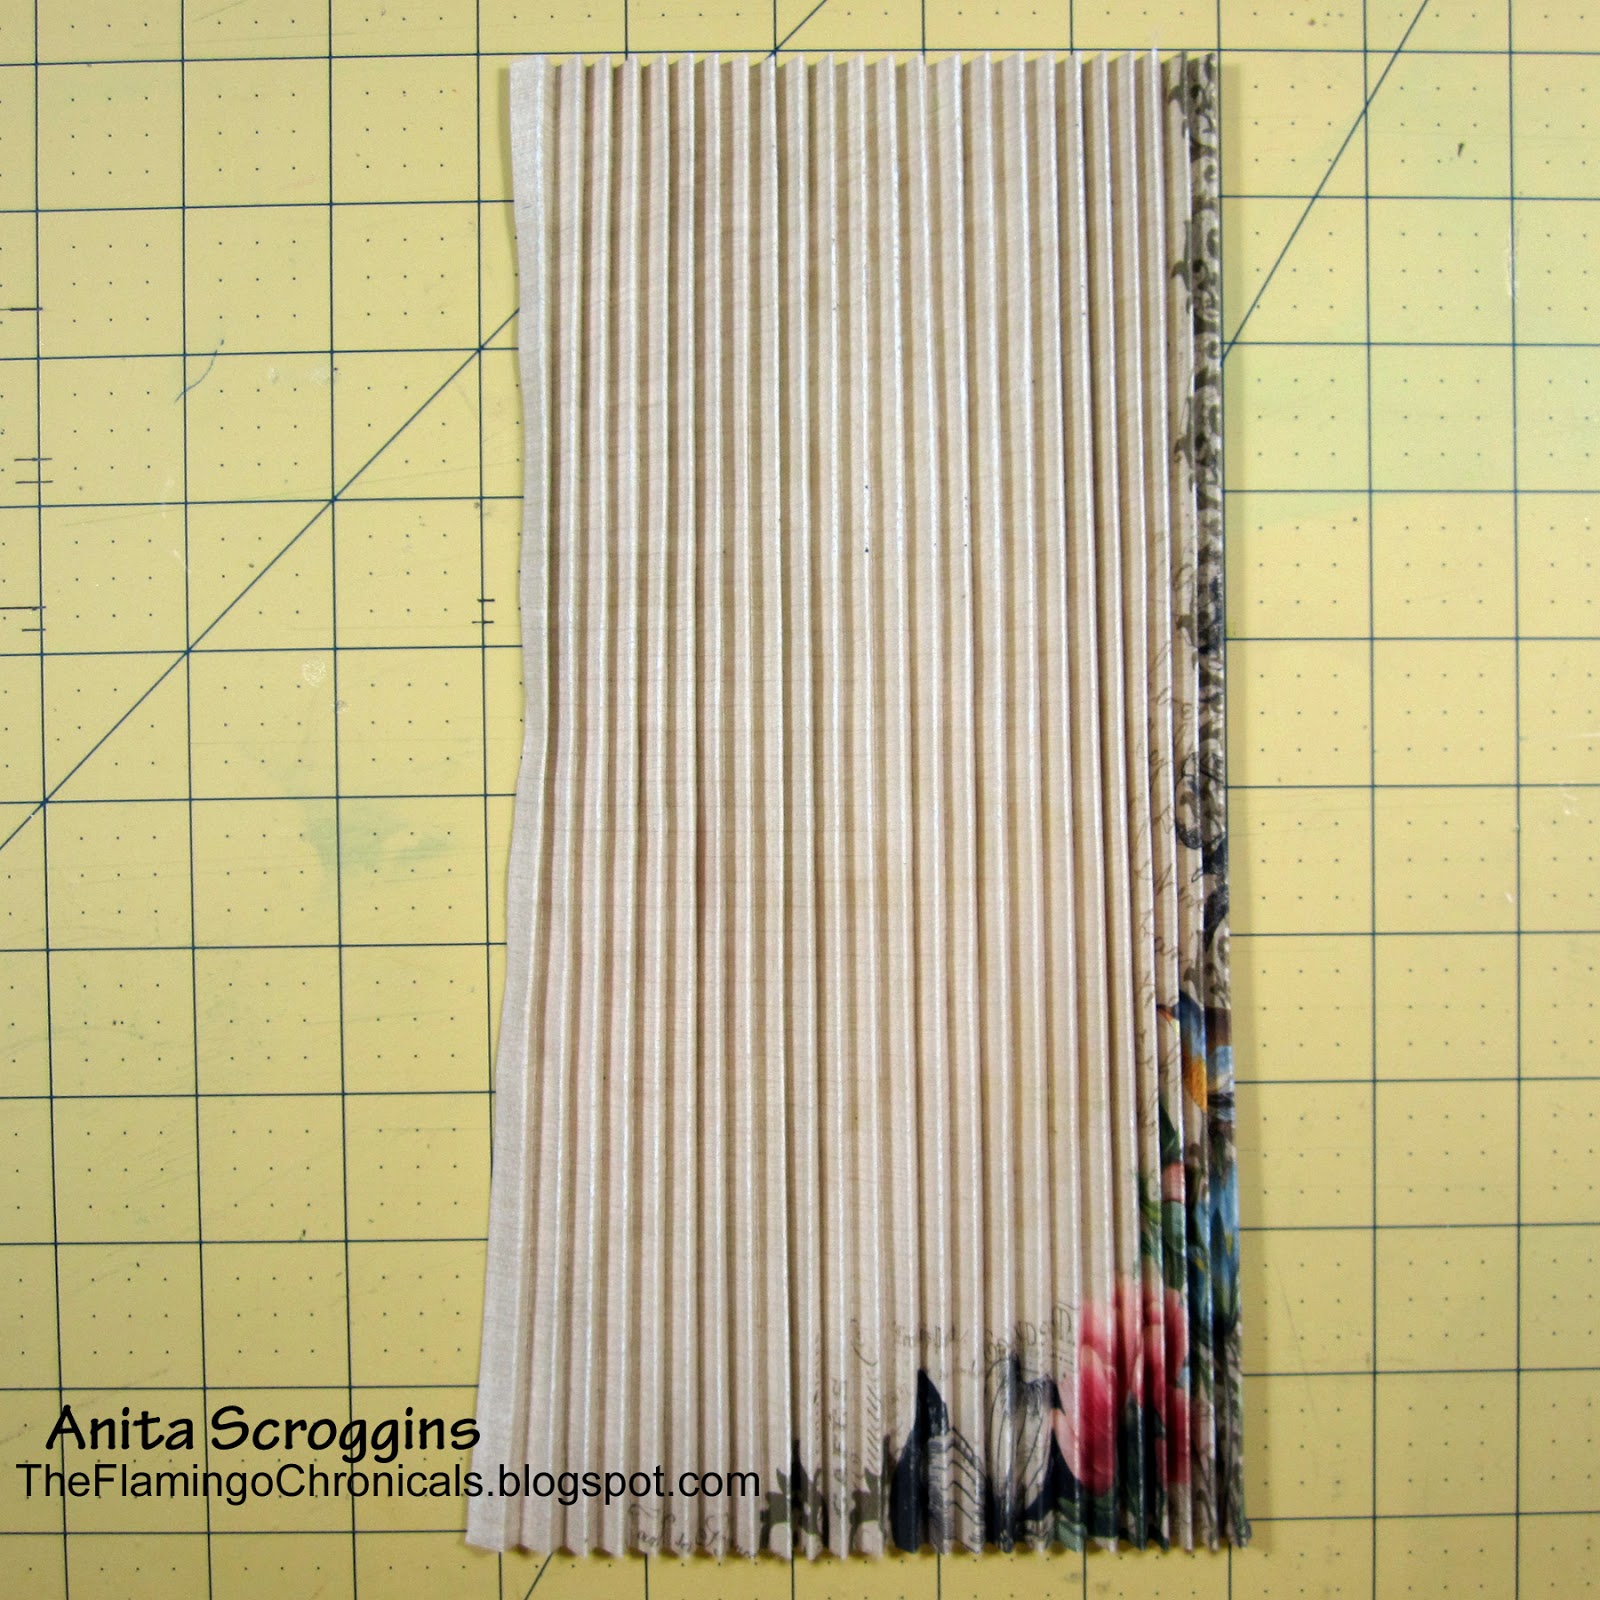
I wanted to use this paper, with these accent colors, but I didn't want the pattern on the paper to show. I decided to pleat the paper to distort the pattern.

paper pleating
I scored the paper every 1/2", then flipped it over and scored on the 1/4" intervals between the first score marks. So the paper ended up being scored every 1/4", with every other score mark alternating front and back.  Now the fun really begins!

pleated paper
Accordion fold the paper until it is pleated all the way across.
(This is time consuming and takes some practice, I admit. I recommend that you start with some fairly thin paper and make the score marks further apart, maybe every 1/2" instead of every 1/4" to practice. Once you get a feel for it, then work on the paper you want to use on your layout.)

making a photo mat
You will need something extra strong to hold the pleated paper down, so I used Tear-ific Tape from Sparkle N Sprinkle. Any very strong double sided tape will work. 

vintage photo
I adhered the pleated paper onto several other layers of paper, then matted my photo and adhere it on top using more double sided tape. 

chipboard cluster
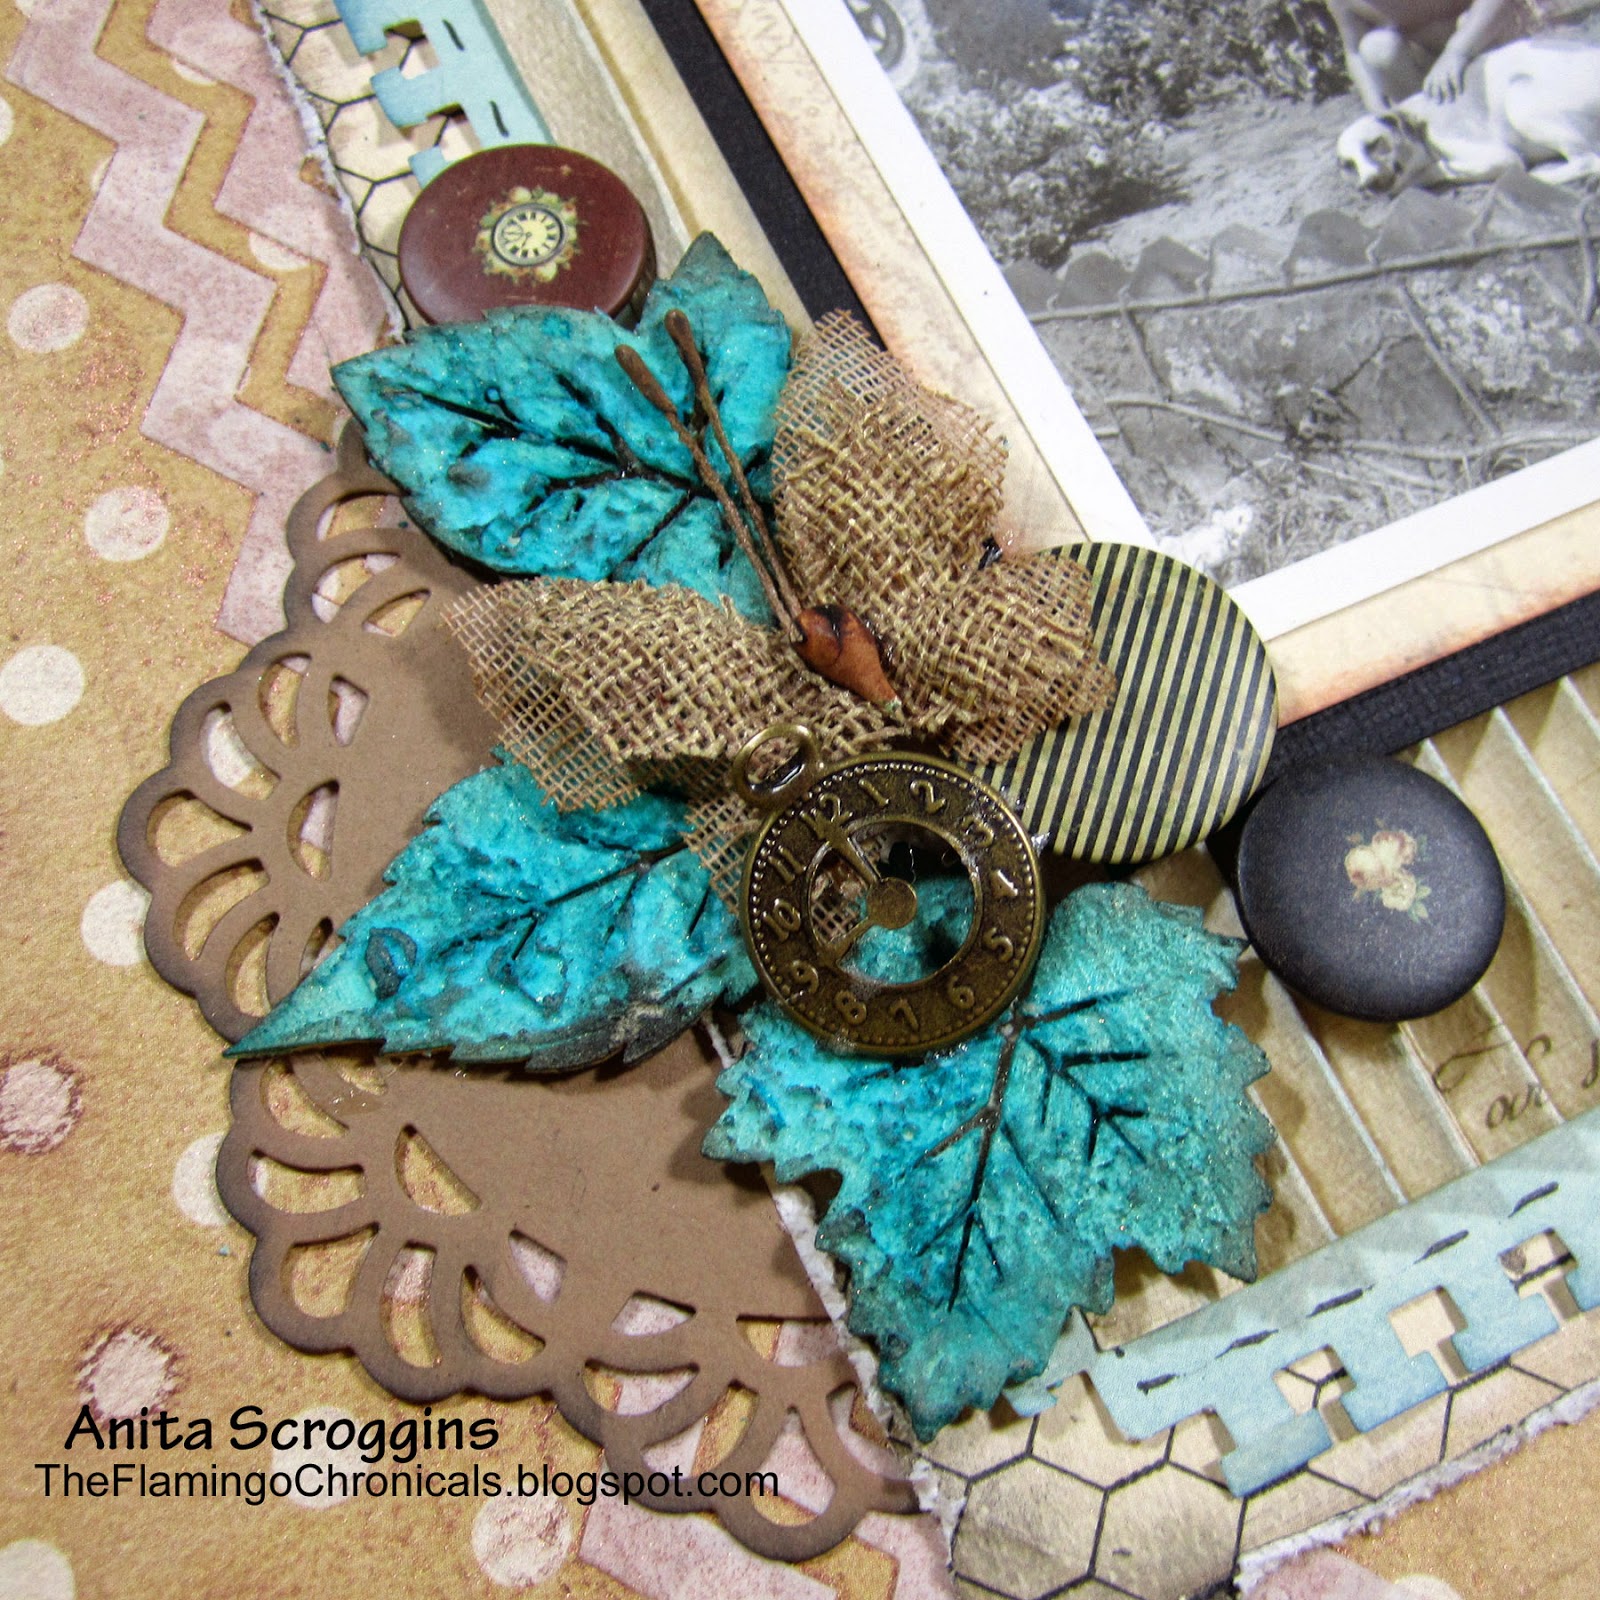
I used a variety of embellishments for my cluster. To color the wood leaves from Prima, I first covered with a layer of Molding Paste, using my paint brush to give it some texture. Once it was dry I used Time Travel Teal from Lindy's Stamp Gang Industrial Chic Magicals Set to color them. 

I hope you give this technique a try! It takes a little practice, but it is a great tool to have in your bag once you get the hang of it.


Preserving Memories- Dcc Blog Ring

Happy Labor Day everyone!!!

I hope you have had a fabulous weekend with family and friends so far. 

It is the first Monday of the month so it is time for the 
Designer Crafts Connection 

To jump through the web ring, find the image in my sidebar  like the one pictured here and use the arrows to move through the ring.

Blog Ring and this month's theme is "How I preserve my memories".

Of course you know I scrapbook, but I also have a variety of other items around the house that are wrapped up in memory keeping; shadow boxes, canvases, photos, and one very awesome flamingo mosaic made out of pink glass. One of my very favorite is this frame from my daughters Debutante Year
 This was DD2s formal portrait for her Debutante Ball and it was on display during the ball Of course, I had to do something special to show off my baby! This frame is 40 x 30 and the very definition of Southern Gold Gilt!
The theme that year was 
"Diamonds, Pearls, and My Little Girl"
so I pulled lots of her "little girl" photos and used those to cover the mat space in the frame.

I added lots of flowers, ribbons, pearls, bling, and sewing to the photos and mat to add to the frame. 

Sorry about the glare- after a couple of years, I realized I would have to put all this behind glass. It is almost impossible to photograph- even though I used Museum Glass.  And yes, sadly those  are scratches on the photo in the corner, the frame shop dropped the entire piece and broke the glass after installing the first time. Luckily, it only dented the surface of the photo, and didn't take scratch the color off.

Thanks so much for stopping by today! 
Be sure to check out the rest of the web ring- there are so many talented artists in the group!
Anita

Deconstructed Layout #12 Newborn Photo


Newborn Photo
For the Deconstructed Layout #12 - Newborn Photo - I want to talk about using a LOT of the same color, without overwhelming your layout with it. You CAN do it! The secret is to layer the color same color with a neutral to help break it up.

To see the entire Deconstructed Layout series be sure to check this page.


Punched paper
This is my second layer from the bottom, and I love the pattern, but wanted more color. So after I punched the edges, I inked it- and I mean I really inked it! The ink extends about 2- 2.5" in from the edge.I started with the lightest color of ink I wanted to use, then added a darker color of ink just along the edge of the paper. 

Heat embossing
Next up, I used my VersaMark  around one side at a time, and added a bit of texture with Lindy's Stamp Gang Hibiscus Rose Orange Embossing Powder. 

embossed chipboard
I also used Lindy's on my Blue Fern Studio's Chippie- this time Golden Angel Wings. You can see on the upper layer of paper, just under the chipboard, I stamped using the Heart Flourish Splash stamp and an ink one shade darker.  I added the small burlap flowers to the centers of a couple of larger flowers for the corners.

Burlap flowers
 I added more flowers, butterfly, and a brad to the lower corner. I also added some faux stitching with my Signo White pen. 

layers of color
This photo illustrates how I wanted to use my color how it all came together. For the most part my layout is a monotone, mainly PINK. However, I separated each layer of pink with a NEUTRAL.

Starting from the corner there is;
1. The background page
2. the PINK punched page
3. the neutral flower die-cut and chipboard
4. the PINK edge of the punched paper
5. the white portion of the punched paper
6. the PINK cardstock
7. the photo
So, the moral of our story is this:
if you want to use one color in abundance, be sure to place it between layers of neutral colors
and it will be fabulous!


I hope you give this a try, and I would love to see how it turns out!