Showing posts with label Home Decor. Show all posts

4th of July Wall Decor

Create a fun piece of wall decor to celebrate the 4th of July!

This post may contain affiliate links. 
USA Decor
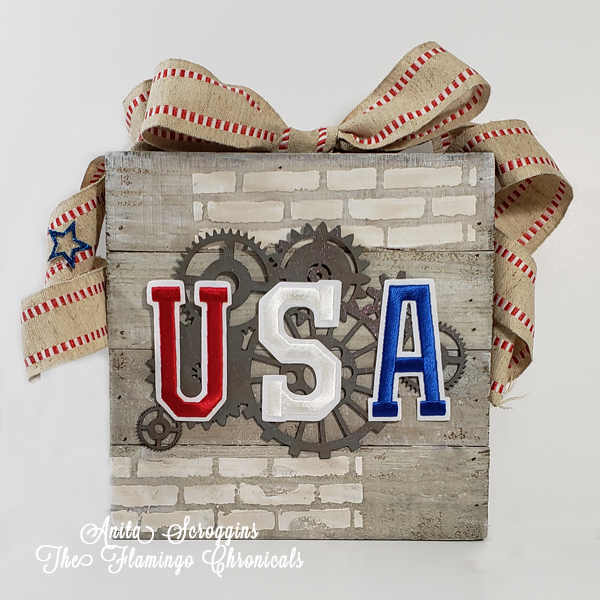
How fun is this? Do you love to change out your home decor pieces with every holiday like I do? I am always looking for fun new pieces to put out each month. Creating this one was fun and fairly quick. Please see the bottom of the post for the supplies I used.

Base Coating wood
I started with a premade wood base from the local big box craft store. I used a base coat of Cottage White Pickling Wash by FolkArt. I was not concerned with getting a smooth coat of paint and really just brushed it on at will.
Modeling paste
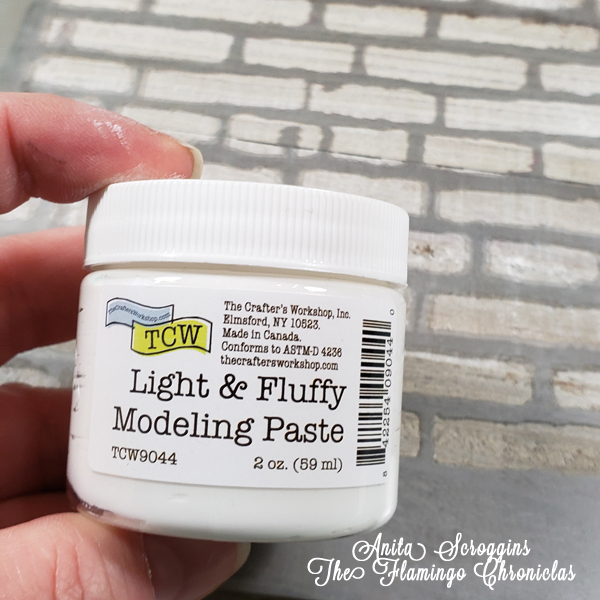
Have you tried this stencil paste yet? I was able to try it back at Creativation in January and I LOVE it! It is so smooth and lightweight and drys super quick. It is really easy to spread over the stencil and I have not had it leak under the stencil at all. Give it a try, you will love it!
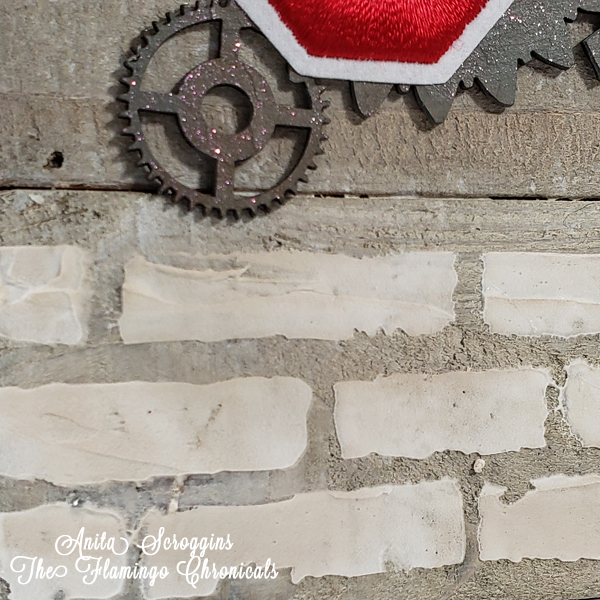
Using a stencil
After the paste was dry I used a dollar store make up sponge to very lightly brush paint across it. I love how much texture this gives a project!

Dragonfly Glaze
I used a piece of chipboard from the {a vintage girl} line and base coated it with light gray paint. I lightly sponged on a brown paint randomly and then added a splotches of the new Dragonfly Glaze from Plaid. This stuff is awesome y'all. It is a color shifting glitter that you can add on top of other paints. 
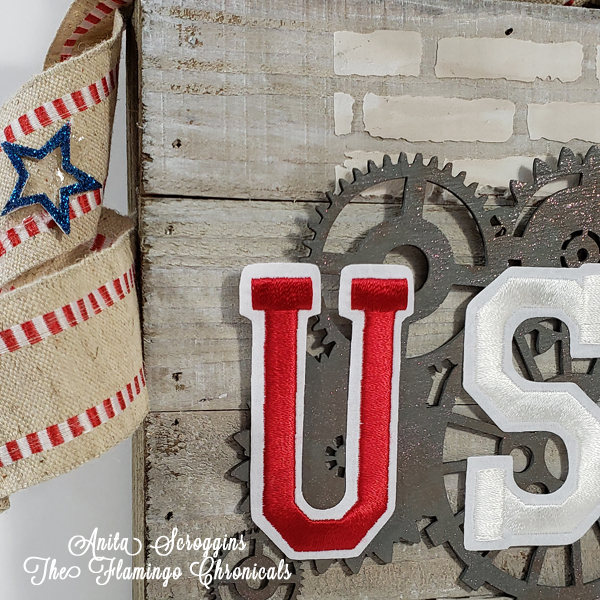
Embroidered letters
See that sparkle at the top of the chipboard piece? That's the Dragonfly Glaze!  I added the chipboard to the base using a low temp glue gun, then added my Joy® Iron on Embroidered Letters. The letters are SELF STICK y'all so they are easy to use in craft projects like this one. 

I used a 3D Foam Star from Scrapbook Adhesives by 3L and coated one side with a bright blue glitter. I removed the backing from the other side and added it to my ribbon. 

Plaid Craft Paints

I used the following supplies on this project:


How to Decorate with Embroidery Hoops

Hey y'all! I hope you are working on your Valentine decorating.  I have been all about the embroidery hoops lately- I have several projects in the works so be on the look out for those on the blog soon.  For this project I used an 8: hoop and supplies I had on hand.

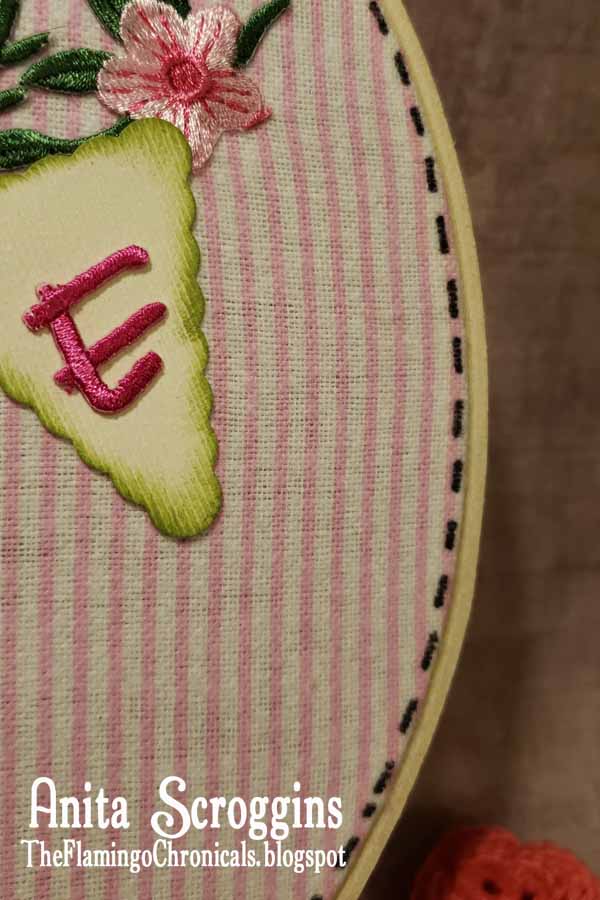
I began by pressing my fabric, ironing the floral embroidery piece in place, and positioning the hoop on it.  Pay attention to the pattern on your fabric!!  Move the bottom of the hoop (shown here) under the fabric and secure the top of the hoop in place. If it matters to you, be sure you get the hardware on the hoop at the very top. Tighten the hoop down and pull the fabric tight.


Trim the fabric around the hoops leaving  a little over a half inch margin. Fold the fabric under and secure in place using Beacon 3-in-1 glue. This glue grabs the fabric and sets quickly.

I used my Monotwin from Tombow in black to add faux stitching all around the edge. I really have a thing for faux stitching - I add it to pretty much everything!

I used an older CTMH punch for the pennants, inking the edge of the cardstock with Tea Leaves Dew Drop from Tsukineko. I use my 1 1/2" Xyron Sticker maker to adhere the letters to the pennant pieces. The heart shaped piece is SELF STICK y'all! Add some flowers, leaves and ribbons to accent the bottom of the hoop.


How cute is that?? Love that faux stitching by the way 😁

To finish the project off I added more twine for a bow to cover the hardware.


 Supplies:
Thanks so much for stopping by today. I hope you give this fun craft a try.


How to use Adhesive Vinyl to Create Beautiful Framed Quotes

Framed quote
Do you love making new things for your home but you also like to replace them every few months to keep things looking fresh? I sure do and I don't want to spend a fortune to do it either! One of my favorites is to pick up a frame in a thrift store or dollar store and transform it with a quote cut from adhesive vinyl. Framed quotes are perfect room accents and you can switch them up depending on your mood! Cheap, easy, fun, and beautiful! What more can you ask for?

This post may contain affiliate links - please see my disclosure*

For this project I used the Transparent Vinyl from StyleTechCraft™. Y'all. This vinyl is SEE THROUGH. It has the most amazing look in person - although it was a tad difficult to photograph. This product would be perfect for creating a stained glass effect on a window in your home!

Adhesive vinyl

I used a quote I purchased from Silhouette Store - quick and easy remember?  I cut it out using my Silhouette Cameo and mat, then weeded the excess vinyl away. I simply sized it to my frame opening and cut it out. Five minutes!  Because I am all about the pink (my poor hubs!) that was my go to for this project as well. I think this will look perfect in the princess's new room.

paper flowers

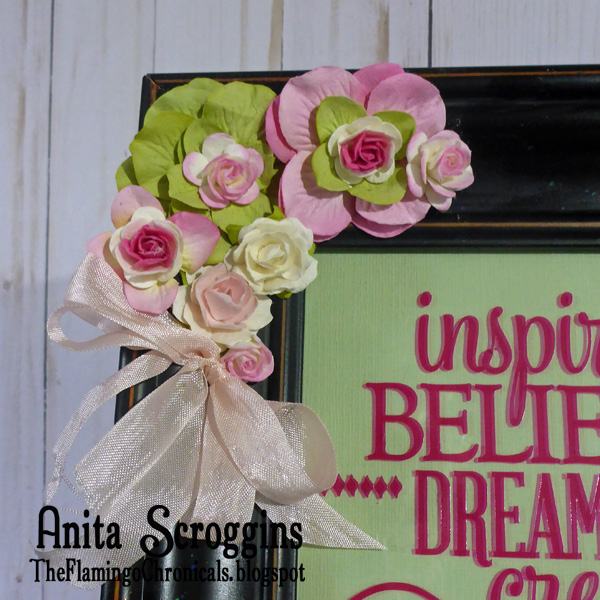
No project would be complete without flowers and ribbons. I grabbed a handful from I Am Roses and created a spray on the corner of the frame. I used my Ryobi rechargeable hot glue gun to attach the flowers then finished them off with a bow made from seam binding.   I used a piece of contrasting cardstock behind the glass to make the vinyl stand out. Pink and green is such a classic combo!

Mega Glitter Mod Podge
Have y'all tried this new formula of Mod Podge? This Mega Glitter is amazing!! Glitter all the things!! It has big chunky specks of holographic glitter in it. Go get you some today and pick up some of the Mod Podge brushes while you are there. Those little brushes make apply Mod Podge a breeze and they clean up so easy. No more hard, sticky brushes!

Holographic glitter Mod Podge
Do you see those huge flecks of glitter?? I brushed the lightest coat imaginable on here and this is how it turned out. Seriously, go get you some today.

Hop over to the StyleTechCraft™ Facebook page to see new products and project ideas. 


Spring Butterfly Craft Frame

Spring Butterfy Acryllic Craft Frame
It's spring time here in Texas and my thoughts have turned to flowers and butterflies. I created this fun frame to go with my spring decor and I have to say it is pretty versatile!  I used the 4X6 Green Craft Frame from Deflecto for this project.  My butterfly in the center is a chipboard piece from Blue Fern Studios that has been heat embossed.

This post contains affiliate links. When you click on the link and purchase something I receive a small commission, but the price you pay is not affected.

I added some fun dots around the outside edge using a Testors Acrylic Paint Marker - the let the frame sit overnight to dry. I found out the hard way that it takes the paint a while to dry on this surface :)

For my center section I wanted to use a Sign Tag but it wasn't quite large enough to cover the opening in the center of the frame. I made a double mat using cardstock, stamping the smaller layer using StazOn ink and a smaller Dyan Reaveley stamp.

The Sign Tags are a beautiful mat surface which makes them perfect for using rub ons. This is one from an older set and I don't even remember what brand it is. Yes, I am a hoarder. For the leaves I used a McGill punch I have had literally for years. It was one of the very first punches I bought back when I started scrapbooking!

I used lots of Prima Flowers, some buttons and embellishments, and pearls in the corners to dress the frame up. I have found that a hot glue gun works very well to adhere these on to the front of the frames.

Yes, these flowers from Prima are forever old too. Did I mention that I am a hoarder? I love these huge blooms and I am sad that I have very few left.


Be sure to stop by the Deflecto Blog and see all the wonderful projects over there.


Quilted Wall Art using Fabric Elements

Fabric Elements Quilted Wall Art


Hi everyone, I am super happy to be participating in this months challenge at Designer Crafts Connection - we are working with kits provided by Fabric Elements.

These darling kits are the creation of Rebekah Meier and here is what she has to say about them:
For those not familiar with Fabric Elements, here is a little background.  Award winning Fabric Elements™ is a culmination of my experiments, favorite materials, and techniques.  It is a collection of my stencils, tissue paper, and fabric designs with pre-packaged fiber goods – such as batting, felt, gauze, Lutradur, and many others.  The collection is designed to work together with my techniques and instructions to create endless mixed media and fiber art projects.  I love to take the ordinary – like quilt batting and interfacing – and combine them with paint, inks, and other embellishments to elevate them into something extraordinary!

I created something a little different with mine kit, here's a look.

Mixed Media Fabric Art
Instead of making one large quilted project I chose to make 4 smaller ones for a collection of wall hangings. I will have a full tutorial on this coming up later in the week with step out photos, so be sure to check back.

Quilted Mixed Media Hot Air Balloons
Each one of these little quilted pieces is 4 x 5.5 and I used random stitching on them. I also used double the amount of batting that the kit called for to give them extra dimension.

DecoArt Metallic Lustre Paints
I used a huge variety of Blue Fern Studios chipboard on this project and each piece was painted with DecoArt Metallic Lustre Cream Paints. Those things are the bomb if you have never tried them!

Blue Fern Studios Chipboard
It is super easy to blend the Metallic Lustre paints because they are so creamy.

Random sewing patterns
I used several colors of paint paint from the DecoArt Media line for the background, then stenciled on some texture using the Crackle Paste.

Chipboard with Metallic Lustre Paint
A white paint pen rounded out the project, adding accents here and there.

Of course we have a great prize up for grabs, so don't forget to head over to the Designer Crafts Connection blog and check out all the details.


Thanks so much for stopping by today and have a fabulous week!

Table Top Easel Photo Display

Table Top Easel

Today I have a fun project to share using Deflecto Wet-Erase Sign Easel.  These handy little things come in a three pack and you can use the chalk markers shown here to make quick changes for everyday use.

http://deflectotocraftwith.blogspot.com/


Decorated table top easel

For today's project however, I wanted something a little more permanent so I started by using a paint pen to draw the uber cute border you see here all the way around the chalkboard. I matted a photo of The Princess and added that using foam tape for some added dimension.

Flowers made with Eileen Hull dies and Vintage Sewing Patterns
To make the flowers I used some of the new dies I FINALLY tracked down from Eileen Hull for Sizzix. I used vintage sewing patterns and added a resin center to the smaller one.

Folded Paper Banner

 The title for this piece was probably the easiest thing I have ever come up with! This child has the bluest eyes - they are amazing. To make the banner I cut and folded a piece of patterned paper and adhered to the bottom of the easel. Some alpha stickers and a Maya Road wood embellishment finish it off.

Be sure to check out all the fun stuff Deflecto has to offer, you can find us all over the web!


This is a sponsored post. Deflecto has provided product in exchange for my creative ideas, views, and opinions.


Etched Monogramed Hurricane Centerpiece


We have a wedding coming up this spring in our family and what is more perfect for a table centerpiece than an Etched Monogrammed Hurricane? This is the south after all, we do love our monograms!
I picked up a set of these Hurricane Globes at an estate sale last fall and I have been looking for the perfect project to use them for. Wedding? Perfect! I used Etching Creme, etchmask®, and tools from etchall®, along with masking tape and a sharpie.


I used my Silhouette Cameo to cut the etchmask®. In order to apply it to this extremely crazy curved surface I removed the backing from the center of the mask first and centered it on the hurricane.

OK. This project almost ended up smashed on the floor. Seriously. It was crazy difficult to apply the mask to this thing! I don't mind curved surfaces, but this thing curved out, then back in again. Notice there are a couple of bubbles in the mask - since they were in the part I was going to remove, I wasn't too concerned about it. I just make sure that there are no bubbles on the cut lines.
NOTE: - I use a sharpie to trace over some of the cut lines before I apply the transfer paper to the front. This lets me see where my design is so I can apply it where I want it

Finally I am able to take the transfer paper away and then I use the Squeegee tool to smooth down all my edges, just in case. At this point I am ready to apply my Etching Creme - let it sit for 15 minutes, then return the excess to the jar. (You do know that etchall® is reusable, right??) Rinse away the remaining creme and remove the mask.

Please forgive the outside in the yard photo. There were so many curves on this thing it was impossible to get a shot with no glare/reflections on it inside the house!

I welded several designs together to get this monogram that goes almost all the way around the hurricane.  I am pretty happy with how it turned out- now I just have to do it again so I have a matching pair. Sigh.

Hop on over to the etchall® blog to see all the great products, tools, tutorials, and projects available.