I have had so much fun with the Art Play Paintables paper from ADORNit! I am loving them so much!!! Really, I really love to color anyway, so these are right up my alley.
Here is another project I made this week using one of the larger images from the set.
I used the 8 1/2 x 11Cubicle Sign Holder from Deflecto Crafts for my frame. I used a combination of Tombow markers and PITT® Pastel Pencils from Faber-Castell to color it in.
When I went to mount my finished project onto paper and insert it into the frame, I noticed something pretty cool,,,
The paper that came in the frame made a pretty good background for my project- it was so pretty! So I mounted my project right on the included paper and put it right back in the frame :o) - upcycling at it's best, right?
Thanks so much for stopping by today! Have a fabulous week!!
Showing posts with label PITT® Pastel Pencil. Show all posts
Winter? Bring it on! Sparkle N Sprinkle Layout
Hi everyone, today I want to share a layout I made using the new stamp set Finn's Scarf DIGI#672 for Sparkle N Sprinkle.
I used my Silhouette Cameo's Print and Cut feature first, then used my PITT® Pastel Pencils from Faber-Castell to color the image. My papers are the new Lawn Fawn Snow Day.
I heat embossed my chipboard snowflakes with Mediterranean Star EP, then again with Opaline EP on top. I added stripes of sparkle on my border paper by applying 1/4" Tear-ific Tape, then burnishing with Seaspray GL.
I used a stencil and molding past on the background, then sprinkled parts of it with Arctic EP. I also stamped on the background with Flourishes 1 #516, and heat embossed with Arctic EP.
After coloring with m pastel pencils, I added a few highlights with a white pen.
Here are a few of the products I used on my layout:
The Deconstructed Layout #16- Tower of Terror
In today's Deconstructed Layout we are all about the background!Today my project is about making your own background. I have
used a plain piece of solid cardstock and altered it using stencils,
Gelatos®, PITT® Pastel Pencils, ArtGRIP® Aquarelle Watercolor Pencils,
stamps, spray inks, and molding paste.
To see the whole series of Deconstructed Layouts click on the logo.
For the base layer I used a 12x12 stencil and filled in the circles using watercolor pencils, Gelatos, and pastel pencils. I then outlined all the circles with a fine tip black pen - one that won't run when sprayed with water! I moved the stencil and sprayed lightly with water so make the watercolors run in a few places. I also added a few sprays of ink here and there.
The next layer is some simple stamping. I used an old background stamp that I bought years go - it's a basic shape that works well on pretty much everything. Next up is a layer with stencils and modeling paste. When the paste was dry I used a damp sponge and Gelatos to color it. This method also deposits a bit of color in other random places so beware.
Here's a close up of the colored paste. You can see how the color is uneven and leaves some areas of the paste white. The very last layer on the background was to add some shimmer spray. It's hard to see in the photo but it's just visible at the top of the beige circle.
Here are a few close ups of the layout.
I used lots of layers under my photo for added visual texture.
Lots of layers here too - eight layers total at the corner of the photo. Because they are all flat layers it doesn't add any really bulk to the layout so it will still slip easily into my albums.
Yeah,,, that's Steven Tyler in the back row.
I always add journaling to my layouts in my own hand writing. I started scrapbooking to tell stories and I just can't do a layout with out telling the story! If you want to know why you should use your own hand writing, rather than a printout, on your layouts, see my post here on why it is so important.
Way back in the day, when I was a Band Mom, we went to Walt Disney World one year for competition. As a group of us were standing right at the front of the line to get on the Tower of Terror, who should walk right up to the front of the line but Steven Tyler of Aerosmith!
If you would like to see more of The Deconstructed Layouts
the entire series is shown HERE.
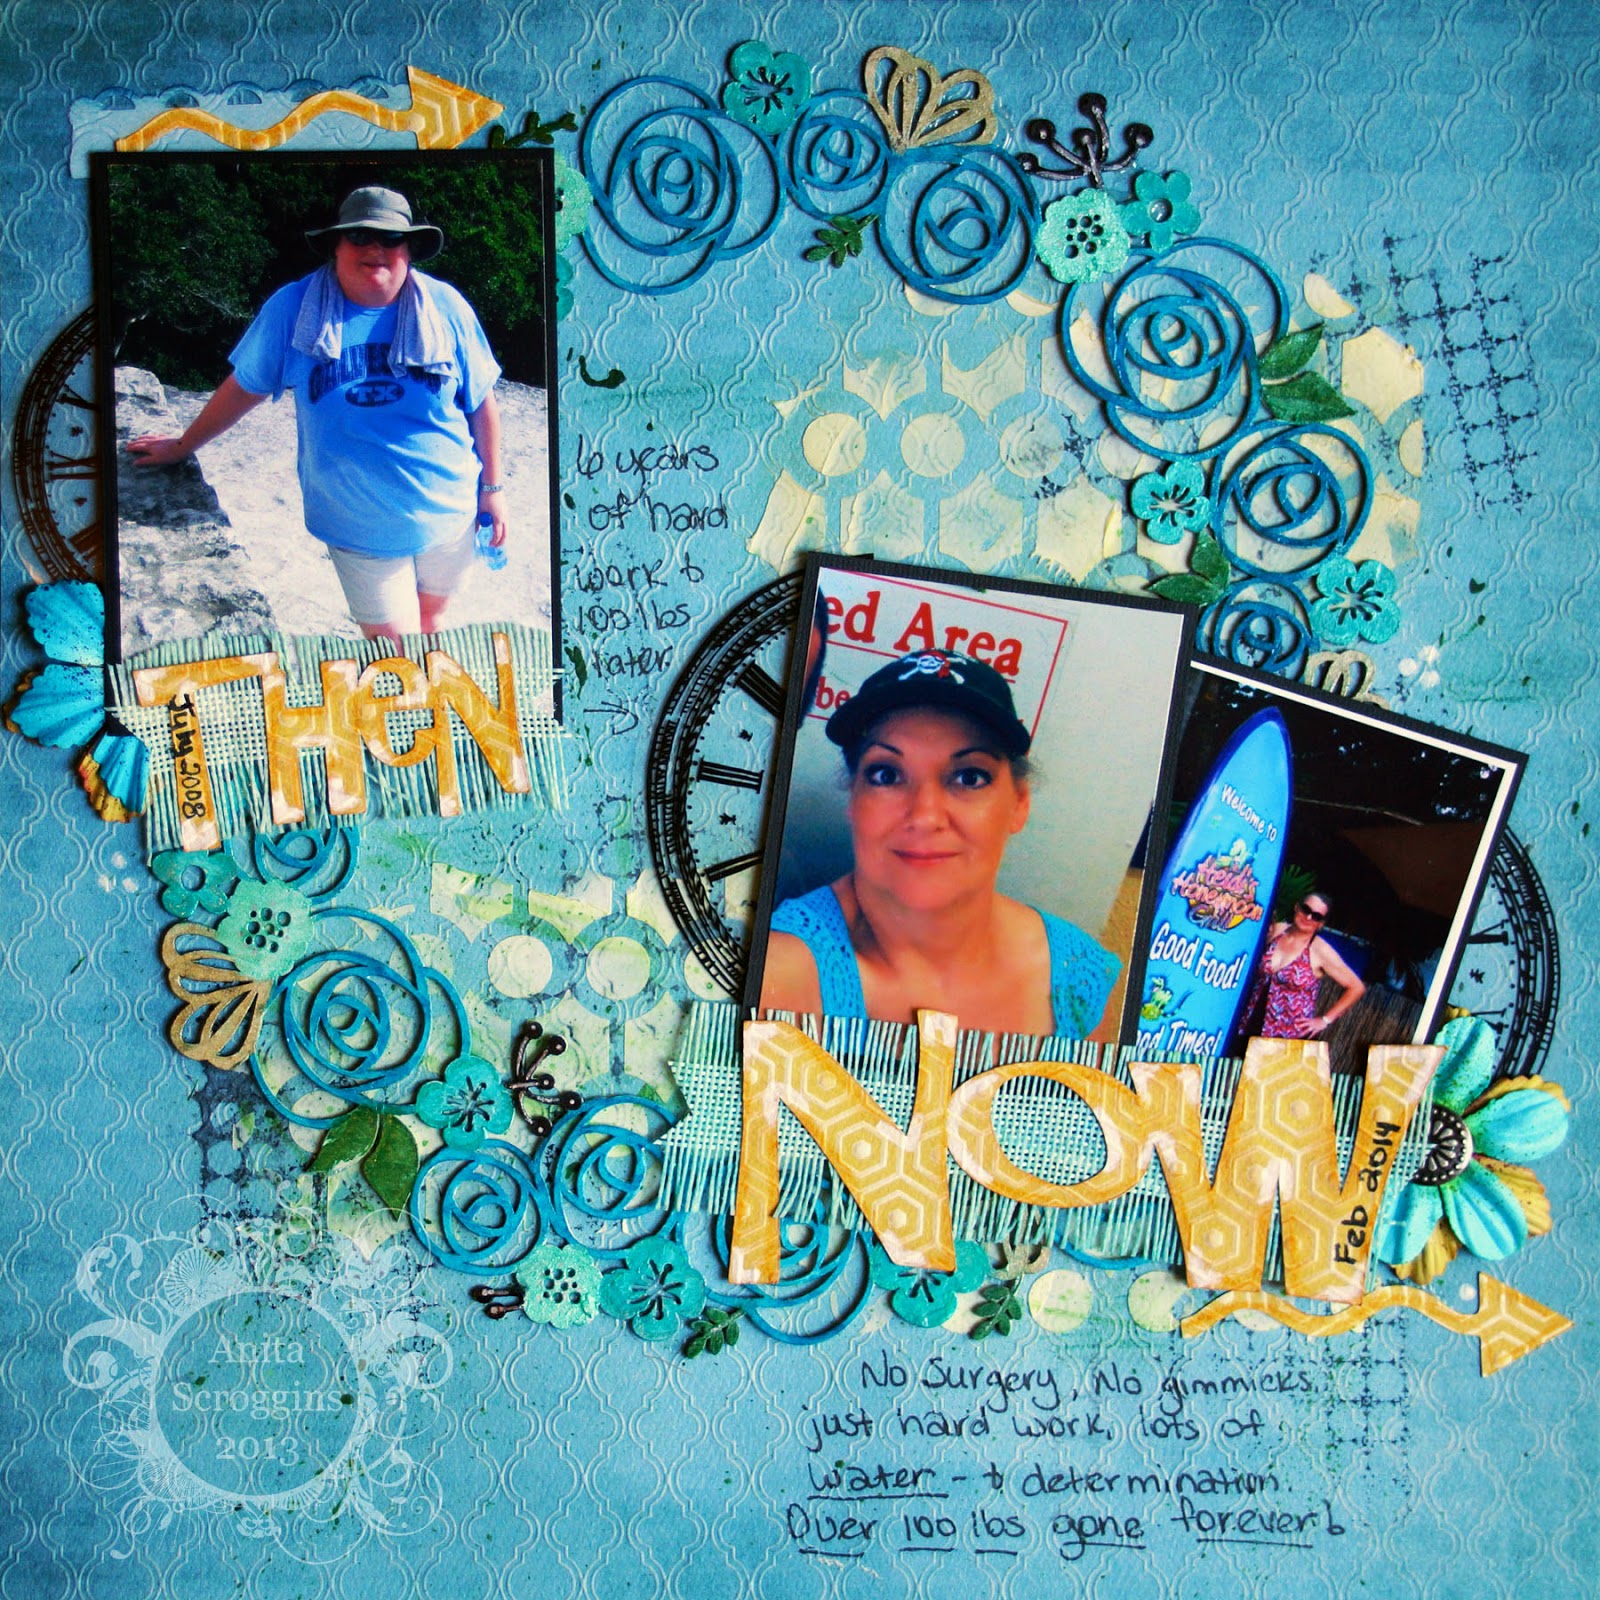
Deconstructed Layout #5 - Then and Now
Hi blogging buddies! Today
and I have another Deconstructed Layout to share with you!
Today we are going to talk about adding background texture to your layouts
using stencils, stamps, paste and colors.
Here is a look at my layout
and, yes, that is me in the layout- both before and after. Quite a change, isn't it!
Now, you know I like to have a lot of "stuff" on my layouts, but I
am really trying to make them more flat so I can get more than 10 in an album!
So I added a lot of texture to this layout without adding a lot of bulk.
I have used My Mind's Eye papers, lots of Faber-Castell® products,
my Cameo, Wendy Vecchi Stamp, Maya Road Ribbon.
Start out by stamping randomly on the page, I inked my stamp
with a Stampers Big Brush Pen in black, then misted it with water before stamping.
I only inked a small part of the stamp each time. You can see that the image is dependent on
how much water you mist onto the stamp, less water equals a cleaner impression, more
water equals a messier impression- totally up to you.
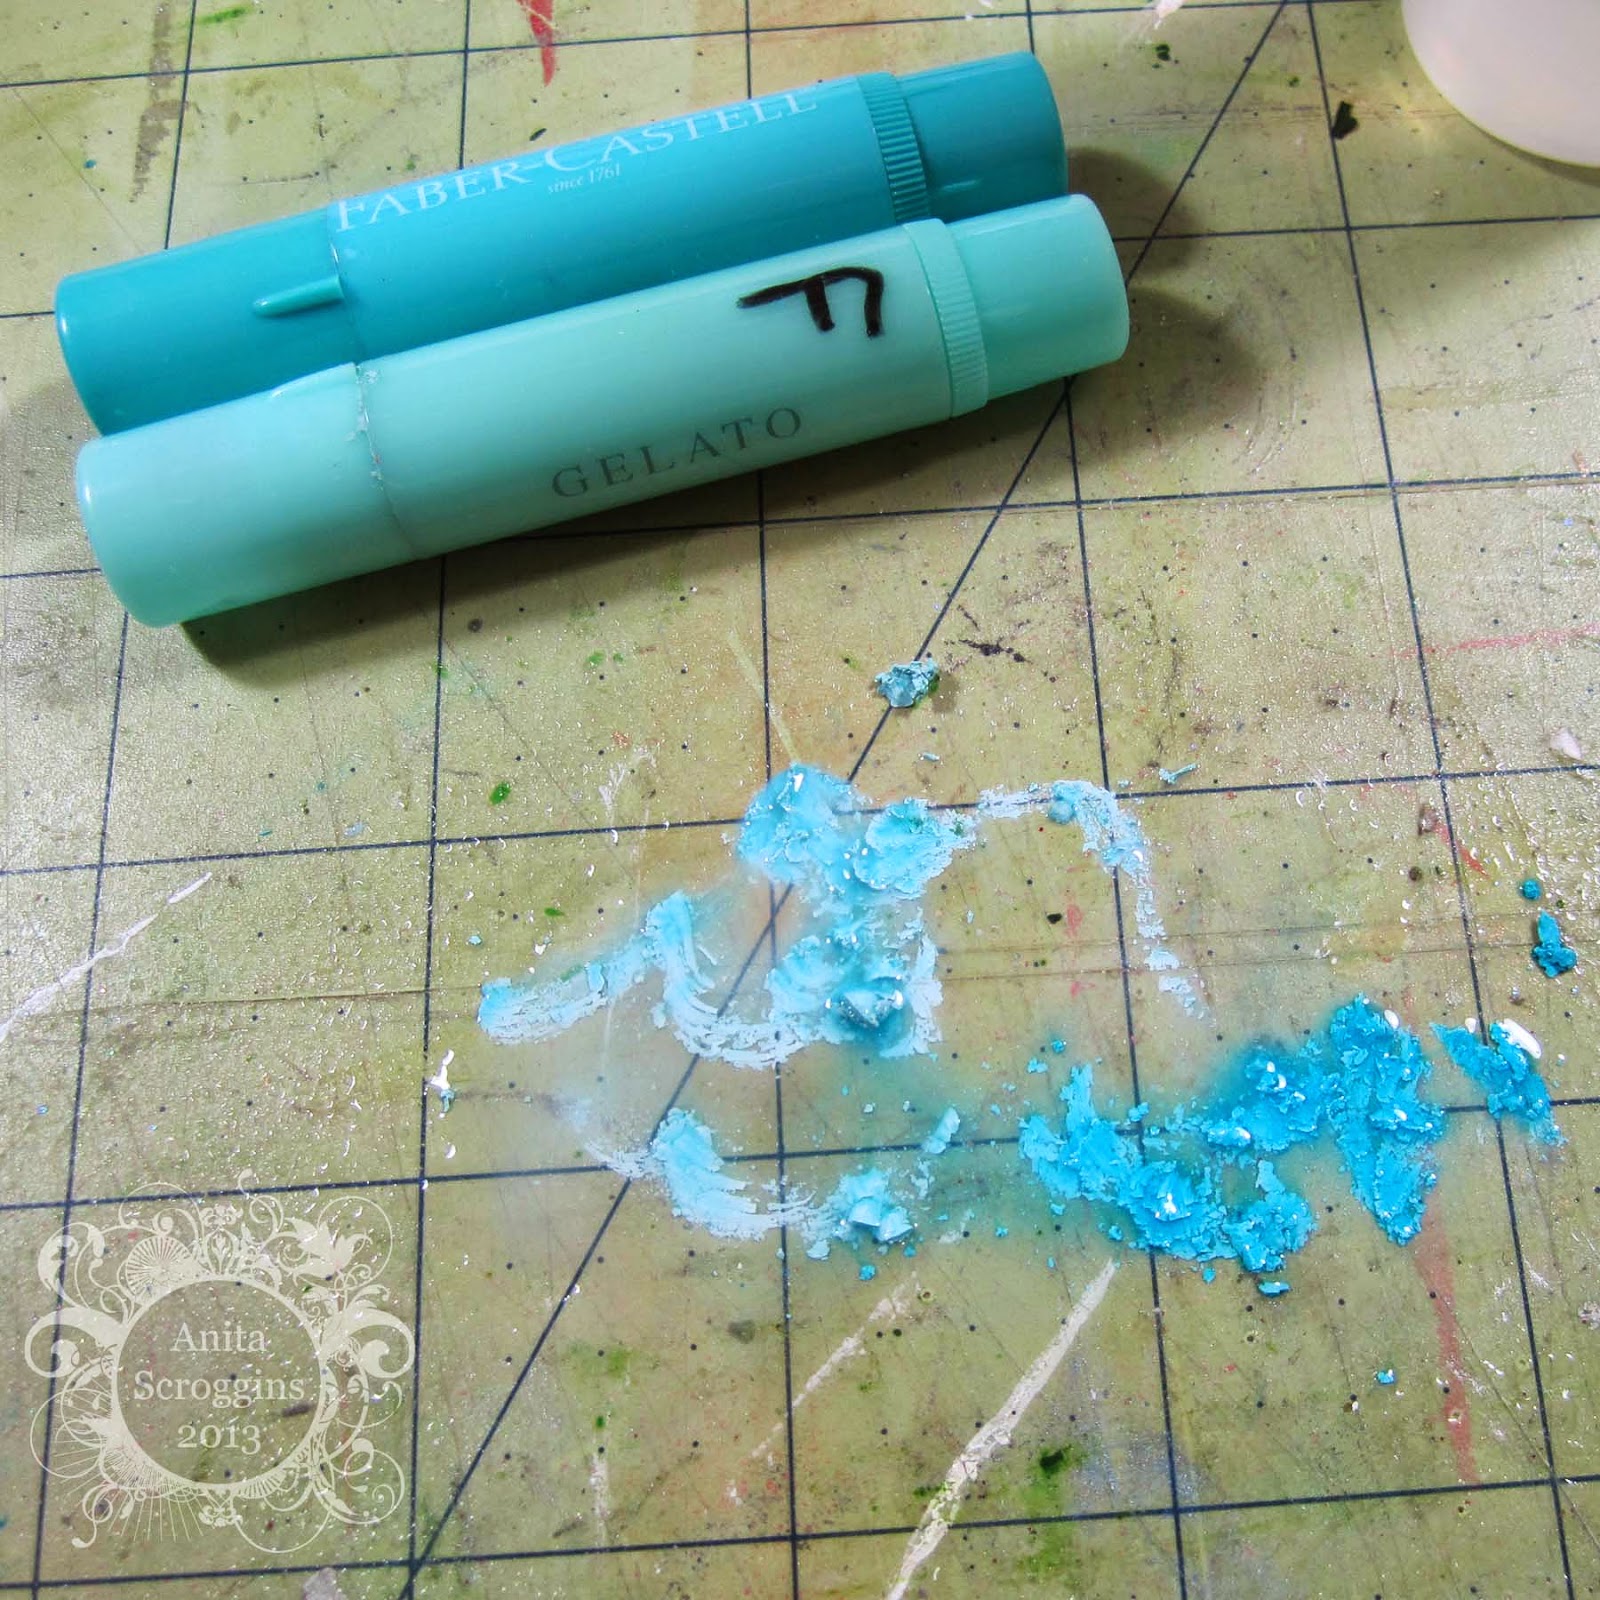
Next up, I cut a small slice off the end of my Gelato® stick and added water
(I normally use a craft mat, but here I was working on a large piece of clear plastic that my
die cut chipboard came in, you just can't see it in the photo)
Mix the Gelato and water into a thin, runny paste, and flick it onto the layout using
a stiff paint brush.
Next use a stencil and Modeling paste to add another layer.
I have no idea why I have no photo of this!
While your paper is drying, grab a large Die Cut Chipboard piece and apply a coat
of gesso. (I didn't apply the gesso on this cardstock, I just used the cardstock to get a better photo)
This chipboard is Blue Fern Studios.
When I apply paint, gesso or whatever to a large piece, I always get a bunch on the bottom
of the piece, so I take the chipboard and put it onto a plain piece of cardstock- this will take
the excess gesso/paint off the bottom of the chipboard AND start another background page
I can use later.
I colored some of the flowers with my PITT® Pastel Pencil, I put down a HEAVY coat
without smoothing it out in any way. Notice how grainy the texture is here.
I then used a small paint brush and baby oil to smooth the color out.
It seriously looks about 100 times better in person- I could not get my camera to
take a good photo of this. It has a sheen to it, and it is a little darker once you add the oil.
I colored some of the flowers with my PITT® Pastel Pencil, I put down a HEAVY coat
without smoothing it out in any way. Notice how grainy the texture is here.
I then used a small paint brush and baby oil to smooth the color out.
It seriously looks about 100 times better in person- I could not get my camera to
take a good photo of this. It has a sheen to it, and it is a little darker once you add the oil.
I used a variety of mediums to color my chipboard when it was dry; Stampers Big Brush Pens,
PITT® Pastel pencils, Metallic PITT® Artist Pens, and Gelatos®.
Rub a little bit of your Gelatos directly onto you work surface, mist it with water and combine to
form a workable paint. Using a paintbrush you can paint the smaller pieces. I used Gold Gelatos to paint the bows on the chipboard in this same manner.
Once I had everything colored the way I wanted it, I added a coat of Faber-Castell® Glaze to
the entire piece.
Once I had everything colored the way I wanted it, I added a coat of Faber-Castell® Glaze to
the entire piece.
Mix more Gelatos® with water- you want this one pretty runny
Use your ribbon to soak up the color- using this technique you can color your
ribbon any color you need to match your layout.
I used my Cameo to cut my title, then I added white accents. I also
used a Pastel Pencil to add more depth to the edges- a Watercolor Pencil will
work in the same manner for this technique.
Here are a couple of close ups of my layout
Here you can see the modeling paste I applied- when it was dry I used a sponge to apply
Gelatos® directly to the paste to give it a light color.
I thought it would be cute to add my dates to the titles of each photo-
just another way to show the passing of time.
I am linking up at the following challenges:
Lasting Memories- Make your own background
Scrap Our Stash- Something old,, something new (paper is older than 6 months, chippie is new,
title is fussy cut and I used the color blue!)
Stuck! Sketches- sketch challenge
(I rotated the sketch and added another photo instead of journaling)
Thanks so much for making it to the end of the post today!
To see more details on this layout, check out my blog.
Mixed Media Layout using Faber-Castell® and Glue Dots®
Happy Monday morning blogging buddies.
Yeehaaww! It is the beginning of the week and
I am ready to go! There is lots of crafting on my schedule
this week and I am starting off with this great layout
made with some of my favorite products :)
Today I want to share a DT project for Faber-Castell
I wanted to add lots of texture and interest to my layout
without adding a lot of bulk, so color is the way to go.
All my papers are from Prima - I am loving their new lines! I also used cardstock from Bazzill, Prima flowers, Fancy Pants buttons, bling from Prima and Want2Scrap, stamps from Technique Tuesday and others, Tsukineko inks, and my sewing machine. All my adhesives are from Glue Dots® - Pop-Up Glue Dots®, Ultra Thin Glue Dots®, and Mini Glue Dots®.
Whew!
I brushed Faber-Castell® Gesso onto my large background stamp and used this to create the texture you see here. When it was dry I rubbed Rose Metal Gelatos® over it to give it color. To see the foll technique be sure to hop over to the Design Memory Craft Blog.
I used Mini Glue Dots® to layer all my photo mats before sewing them together.
I used just a few in the center of each mat just to hold them together.
Because this piece was layered on top of the photo mat (which was 4 layers of cardstock and photo) I needed more height on the top side to make it even. I used two layers of Pop-Up Glue Dots® for this. For the lacy cut out at the top of the photo, I used Art GRIP® Aquarelle Watercolor Pencil #124 on the roses, and PITT® Pastel Pencils #170 and #199 on the leaves.
I just stacked two together to get the height that I wanted.
The paper I used for the mat at the upper left here is fussy cut from one of the Prima
papers - I am telling you I love this paper!
Of course I had to add some flowers! I used my Ultra Thin Glue Dots® to add my buttons and flowers above my pennants and 1" Glue Lines® to add the ruffled doily that is right under the flowers.
Easy peasy to stick your buttons down with these Ultra Thin Glue Dots®!
Be sure to check out the Glue Dots® blog where there is
always lots of inspiration to be found!
Thanks so much for stopping by today.
I will have some yummy goodies from Faber-Castell® and Glue Dots®
to give away so check back soon! I am waiting on photos of the prizes :)
May the Flamingos be with you!
Anita
I wrote this blog
post while participating on the Glue Dots design team.
Just Because I Love You Card
Good afternoon blogging friends!
Are you ready for the weekend? I am,, I have
so much to get done. I am ready to take advantage of
the beautiful spring weather and get some plants in the ground.
Today I have my DT Project for Just For Fun Stamps and I have made a card with the
fabulous sketch created by Linda
I made my card into a square, because I am really not that great at making rectangle cards!
I have used Traditional Easter Basket for my main image, along with Caterpillar Silhoutte
to accent. I also used my Nesties, Tim Holtz die, seam binding, McGill and CTMH punches, bling
from Want 2 Scrap, and my sewing machine. I used Sketchy Grid on one of the layers in the middle.
All of my papers are Graphic 45, but they are from different lines.
I used my Art GRIP® Aquarelle Watercolor Pencils, PITT® Pastel Pencils,
and Metallic PITT® Artists Pens to color my images.
My sentiment is from Sentiments 3
Thanks for stopping by today!
Anita
Subscribe to:
Posts (Atom)
.jpg)