Showing posts with label Plaid Crafts. Show all posts

Mod Podge Easter Tray


Mod Podge Easter Tray

This year I am determined to get more Easter decor up around the house. Last year I created my Easter Tree (check it out here) and this year I want to add a few smaller pieces around the house. My sweet princess loves to find new things when she comes over. I think she is going to love this Easter Tray that I created using Paper Mod Podge.


PAper Mod Podge

I picked up this tray at HL a while back and have been wanting to use napkins and Mod Podge to create something fun with it. I found some super cute bunny napkins and couldn't wait to get started!  Did you know that Mod Podge has brushes designed to use with their products? I love using these because I don't have to fight with brush marks!

Fussy Cut Napkins

Start by fussy cutting the napkins. These napkins were pretty thick so I used my favorite paper scissors. Be sure to cut enough to finish your project and a couple of extra. Once the layers are separated they are thin! Pull the layers apart so that you are left with the top layer only.


Mod Podge Napkins

I like to start in the middle of the piece and apply one piece at a time. I did find that it was easier to apply a thin layer of the Mod Podge, then press the napkin into it, and let that dry. Then I went back and applied a layer on top of the napkins. When I tried to apply the top layer while the bottom layer was still wet, I tore the napkin! 


Easter Egg Dish

I added a sentiment in the middle of the tray using StyleTechCraft™ Ultra Metallic vinyl in Melon #133 and my Silhouette Cameo 4. This cute bunny tray I picked up at Home Goods- man I love that store!


Easter Decore

I decorated a small bottle I had on hand with Easter paper, cardstock, and some twine. I didn't want to worry about keeping water in the bottle so I used some pretty paper flowers instead. I hope my princess loves these! 


Flamingo Mandala using StyleTech Craft Opal Vinyl

Flamingo Island

Who else is ready for summer? I know I am. Summer means vacation for us and my favorite vacation spot is Flamingo Island in Aruba. We have been a couple of times now and I can't wait to go back! I made this Flamingo Mandala to remind me of how much I love it there. I used Opal Vinyl from StyleTechCraft™ for this project. It is so amazing. 

This post may contain affiliate links. Please see my Disclosure*


Styletechcraft Vinyl
The Opal vinyl is like a color shifting ninja y'all. It is pretty easy to loose track of time just tilting your project back and forth in the light to see it change colors. Not that I would know that from first hand experience or anything,,,,,, just saying. 

Opal Vinyl
For this project I used Opal Blue #108 and Glossy Bubble Gum #469 from StyleTech Crafts®. 

Wood canvas
I used a Wood Panel from Plaid® for my base. These are 10x10 and they are so handy for all kinds of projects. I started by painting my base with Pink Dogwood Milk Paint. I only used one coat since I was happy with the color. 


Flamingo Crafts

After layering on my vinyl pieces I finished with some coordinating ink and a small heart stamp that I had on hand.  A black paint pen to add some details and I am done! 

Be sure to check out the StyleTechCraft™ Facebook page for product updates and great project ideas. 


Dot Painted Easter T-shirt - The Perfect Kid's Craft

Painted shirt
Are you sheltering at home and looking for new things to keep kids occupied? This is the perfect craft for you! You probably have everything you need on hand for this project. My princess loved doing these. It was a great way to spend an afternoon.


Kids crafts
I cut the bunny shape from freezer paper using my Cameo 4; the glossy vinyl setting works perfectly. Iron the pattern down on the shirt - shiny side down. Don't worry- it will not leave a residue when you pick it up. Freezer paper is a GREAT temporary stencil on fabric. I use it for all kinds of things.

Craft paint
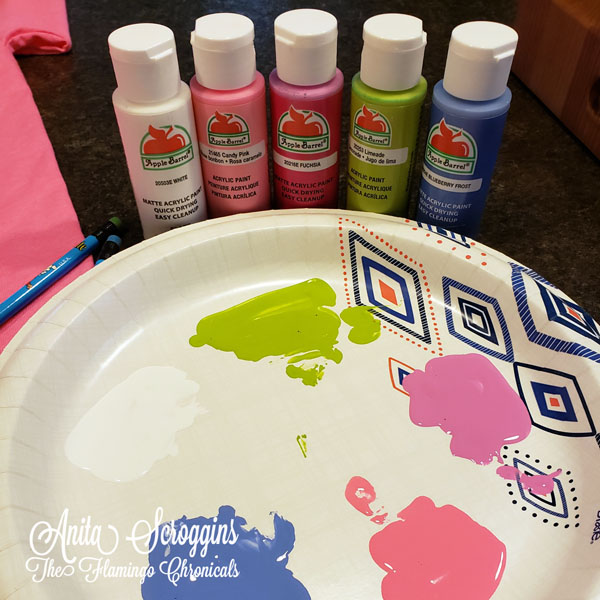
Next up is paint. Although I love the Plaid Fabric Paints, I didn't have the right colors on hand for this project. Craft paint works  great too. This will not last forever- but it will last well beyond the point where she outgrows the shirt. Now- this is important - put a layer of waxed paper, or freezer paper, or a piece of cardboard inside the shirt! I TOTALLY forgot to do this with the first shirt we did- and the paint bled through to the back. So it's now a night shirt 😀😀  Learn from my mistakes!! 

Monogrammed shirt
Grab some pencils and start dotting - kids love this! The only real rule is you want to make sure that there is a solid line around the stencil so when you pick the stencil up the outline is clear. Other than that- let them go at it! We worked with one color at a time, all the way around the stencil, then moved on to a new color. At the end (when she had lost interest!) I filled in a few bare spaces. Let it dry overnight.

Iron on letters


I used Joy® Iron-on Letters to add the words "hop hop" to the shirt, just inside the outline. Have you ever tried heat resistant tape when working with vinyl or other items that need to be ironed on? It is a life saver at times. When I am working with iron on letters I can put them where I want, then tape them down. This way I don't have to worry about them shifting when I am putting a pressing cloth on top. The tape leaves no residue and is really cheap. You can pick some up here.

That's it! Cute shirt for a super cute princess and one afternoon of shelter in place taken care of :)

http://creatingwithjoy.blogspot.com/

You can find a wide selection of Joy® embroidered iron-on letters and alphabet sheets in different sizes and colors at your local crafts store.


DIY Upcycled Candlesticks using Chalk Paint


Do you have a set of those cherry finished candlesticks hidden in the back of the garage? So did I until I saw a fabulous set of white candlesticks in a catalogue that were outrageously priced. CLICK! My brain immediately went to the set I had in the donation box. I knew with a little TLC my old candlesticks would look fabulous. I upcycled them using Folk Art Chalk Paint and this project was a breeze!


Here's what I started with. I bought these years ago and they served faithfully on my mantel until a few months ago when they were relegated to the garage and the donation box. Using Folk Art Chalk requires no prep work! Which is my favorite. I started by putting a thin coat on each candlestick- I had SIX of these things. I used a turntable from my former cake decorating days to make this process easier. It came in pretty handy!


Here I am half way through the process. I applied two coats of the base paint, letting them dry between coats. All in all it was pretty quick for each step, but the dry time was a little tedious. Waiting on paint to dry - the crafting life!

 I had the hubs cut squares from pine in three sizes; 6", 7", and 8". I positioned each candlestick upside down on the squares and traced a circle for reference.  Adhere using hot glue and then add two coats of paint to the squares to make the platforms,

Because I didn't want a stark all white candlestick I applied a light coat of glaze to them. I mixed two colors of chalk paint together and thinned it with a little bit of water. Using a wet rag I applied it in small sections.


After applying a bit of the glaze I used the wet rag to spread it out. If there was a stubborn spot I used a wet wipe to take off the excess.

Here is the final look of the glaze. This process did take a bit as I only wanted to work in small sections. This allowed me to work each section while it was still wet.


Here are the two paints that make up the glaze. I mixed them 50/50 and then thinned with a bit of water to make it more workable.

I love how they turned out! They are perfect for my Easter Tree. I can't wait to use them with my tree for the rest of the year- we decorate it for every holiday!

Be sure to check out my other posts for this project.
The - Easter Tree itself.
The - Giant paper flowers using DCWV Petal Papers.
The - Easter Egg Garland
The - DIY Easter Decorations
The - Upcycled Candlesticks


Decorating an Easter Tree

Easter Tree
Last year I decided to keep my Christmas Tree up all year and decorate it for the different holidays. The princess loves the tree and it's the first thing she runs to when she comes over. She loves to click the lights on and off. She's so cute. We skipped Valentine Day and went straight to decorating an Easter Tree. I had so much fun doing this tree y'all.

I have a few coordinating blog posts coming up on how I made the decorations for the Easter tree.
Easter Egg Garland
Paper Peony using DCWV Petal Papers
DIY Dollar Store Easter Decorations
Upcycled Candlesticks using Chalk Paint

DIY Candlesticks
How cute are these candlesticks? I had a set of them sitting in the garage waiting to be donated. When I saw a lovely set in a catalog for WAY TOO MUCH money I knew I could re cycle mine! I love how they turned out and I can remove the bows to replace with new ones for each season.

Easter Decor
I don't remember where I picked up these super cute carrots but I have had them a few years. I love how they look with super cute bows behind them. They were perfect to use on my Easter Tree.

Easter centerpiece
I picked up these super cute bunnies at Dollar Tree. I used pipe cleaners to attach the bunnies to the bows and then attach to the tree limbs. How cute are these???

Dollar Tree Decorations
 For the topper on my Easter Tree I used a really big bow with lots of fun stuff stuffed in around it. The white filler berries I picked up at Dollar Tree. The top hats and Easter Egg Sprays are from Hobby Lobby.

Fancy bow
How amazingly cute are those little bunny ear top hats?!?!?! The pearl Easter eggs are from Dollar Tree. I amended them a bit to be able to stick them in the topper of the tree.

Upcycled candlesticks
I picked up these cute bunnies all over the place; Michael's, Home Goods, Hobby Lobby,, and the thrift store. I love Easter decorations and I have been collecting them for years.

I hope you have enjoyed my Easter Tree. I have so much fun putting this together. The princess loves it! I have several more posts coming this week on how I made all the decorations for the tree - so be sure to check back!

The - Giant Paper Peonies
The - Glittered Easter Egg Garland
The- DIY Easter Ornaments
The - Upcycled Candlesticks


Paint Storage Solutions with Deflecto®

Y'all it's National Craft Week - are you getting crafty? This past month I have been working really hard on getting my craft studio organized and cleaned out. I have TOO much stuff crammed in there and it is getting hard to work. I have a TON of paint. I needed to find a way to organize my paints, brushes, and supplies so that I could see everything and know what I had. I used a combo of Deflecto® Wall Mounting Bars, Stackable Caddy Containers, and IKEA Picture Ledges. So far I am loving this new system! 

So much paint
This is what I was working with y'all. Now I am a Plaid Ambassador (they are an awesome company to work with) but I have been collecting paint for far longer than I have worked with them. If you've ever looked at my studio tour you will see that way back in the day I painted murals in the house using Donna Dewberry's One Stroke method. So,, yeah,,, I have a lot of paint!!

before organization
About the only empty spot left in my studio was behind the door. I had to figure out a way to utilize that space to store all that paint! Enter the Deflecto Wall Mounting Bars and Caddy Containers. I have long wanted to use the wall system in my studio and this was the perfect opportunity. 

IKEA Picture Ledges
I started by installing IKEA Picture Ledges on the way using drywall anchors. Each one of the shelves holds 42 bottles of craft paint. SCORE! Of course, once I installed them I realized I wanted to have TWO rows of paint and I wanted to have the back row of paint raised up so I could see all the bottles. I had to take a couple of shelves down and re measure! Learn from my mistakes! 


Organization set up

Next up I installed four wall mounting bars - three to the side and one above. I really wanted to maximize my storage here. I measured my longest paint brush and spaced the bars far enough apart so that I would have space for those long brushes no matter where I put them. I used a combination of Small, Medium, and Large Containers, removing the lids of each one. They come on and off the wall mounting bar very easily. You can take them off the bar and straight to your work area. 


Wall Storage
Next up was sorting all those supplies! I grouped paint brushes by use and size in the Small Containers. I also threw in some other random supplies that fit perfectly in them. The Medium Container is even large enough to hold my paint pallets keeping them right where I can see and grab them when needed. 

Bin of Stencils
I needed a spot to store all my paint stencils and a Large Container was perfect. 

Plaid Stencils
ALL of these supplies fit easily into the one Large Container! Talk about using your space wisely!! It is so easy to pull the container off the bar, sit it on my desk, and pick the perfect one for my project. 

Organized paint brushes
Look how beautiful that is! All those brushes, sorted into bins so I can grab what I need without digging through a bucket. 

IKEA shelves
Here is a look at the final project - all my supplies stored neatly and in minimal space. With room left over for my rolly cart too! 


Defecto Stackable Caddy

The containers are part of the Stackable Caddy System. This is such a great way to carry your supplies with you when you travel to crops or other events. They can be used for so much more than craft supplies too; baking, kids toys, in the bathroom, in the dorm room, etc. They are one of my favorite pieces of storage!


http://www.deflecto.com/craft/ 
This is a sponsored post.  As a member of the Deflecto Design Team I have been provided product and compensation in exchange for my creative ideas, views and opinions.


Be sure to take a look at the Deflecto Pinterest page for more great storage solutions. 

Anita Scroggins