Showing posts with label Tear-ific-Tape. Show all posts

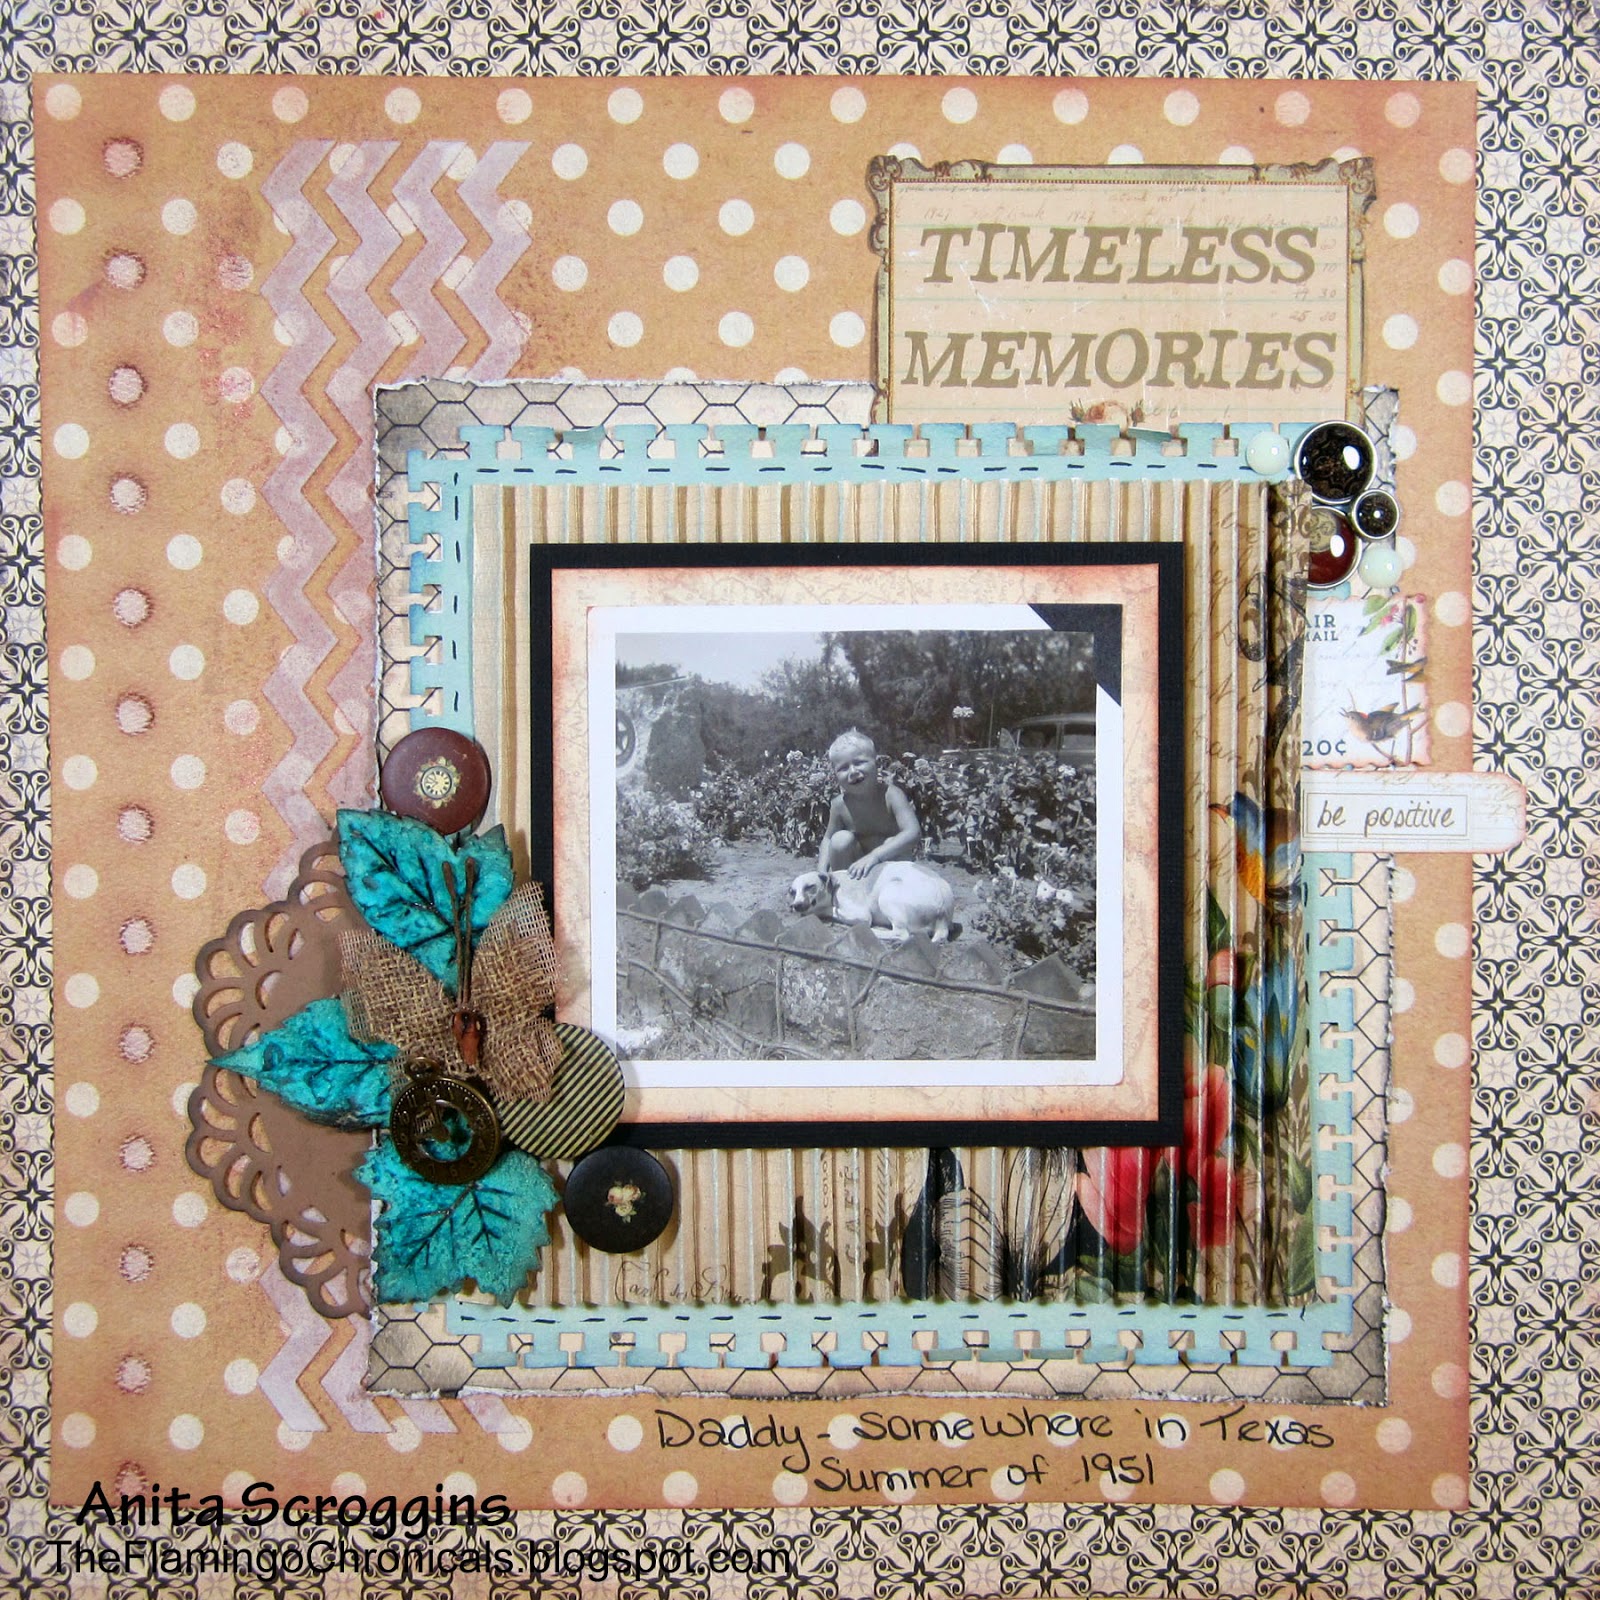
Deconstructed Layout #15 Timeless Memories


Timeless memories

Hi everyone, I'm here today to share a new Deconstructed Layout with you. Today's tutorial is on paper pleating, which is a great way to add some dimension and texture to your layout using just a plain piece of paper! I have had this photo of my dad for some time, but wasn't sure how I wanted to scrap it.Since it is a black and white photo, I didn't want to overwhelm the photo so the colors of these Authentique papers were great.


To see all the tutorials in the Deconstructed Layout serious check them out here.

paper scoring
I wanted to use this paper, with these accent colors, but I didn't want the pattern on the paper to show. I decided to pleat the paper to distort the pattern.

paper pleating
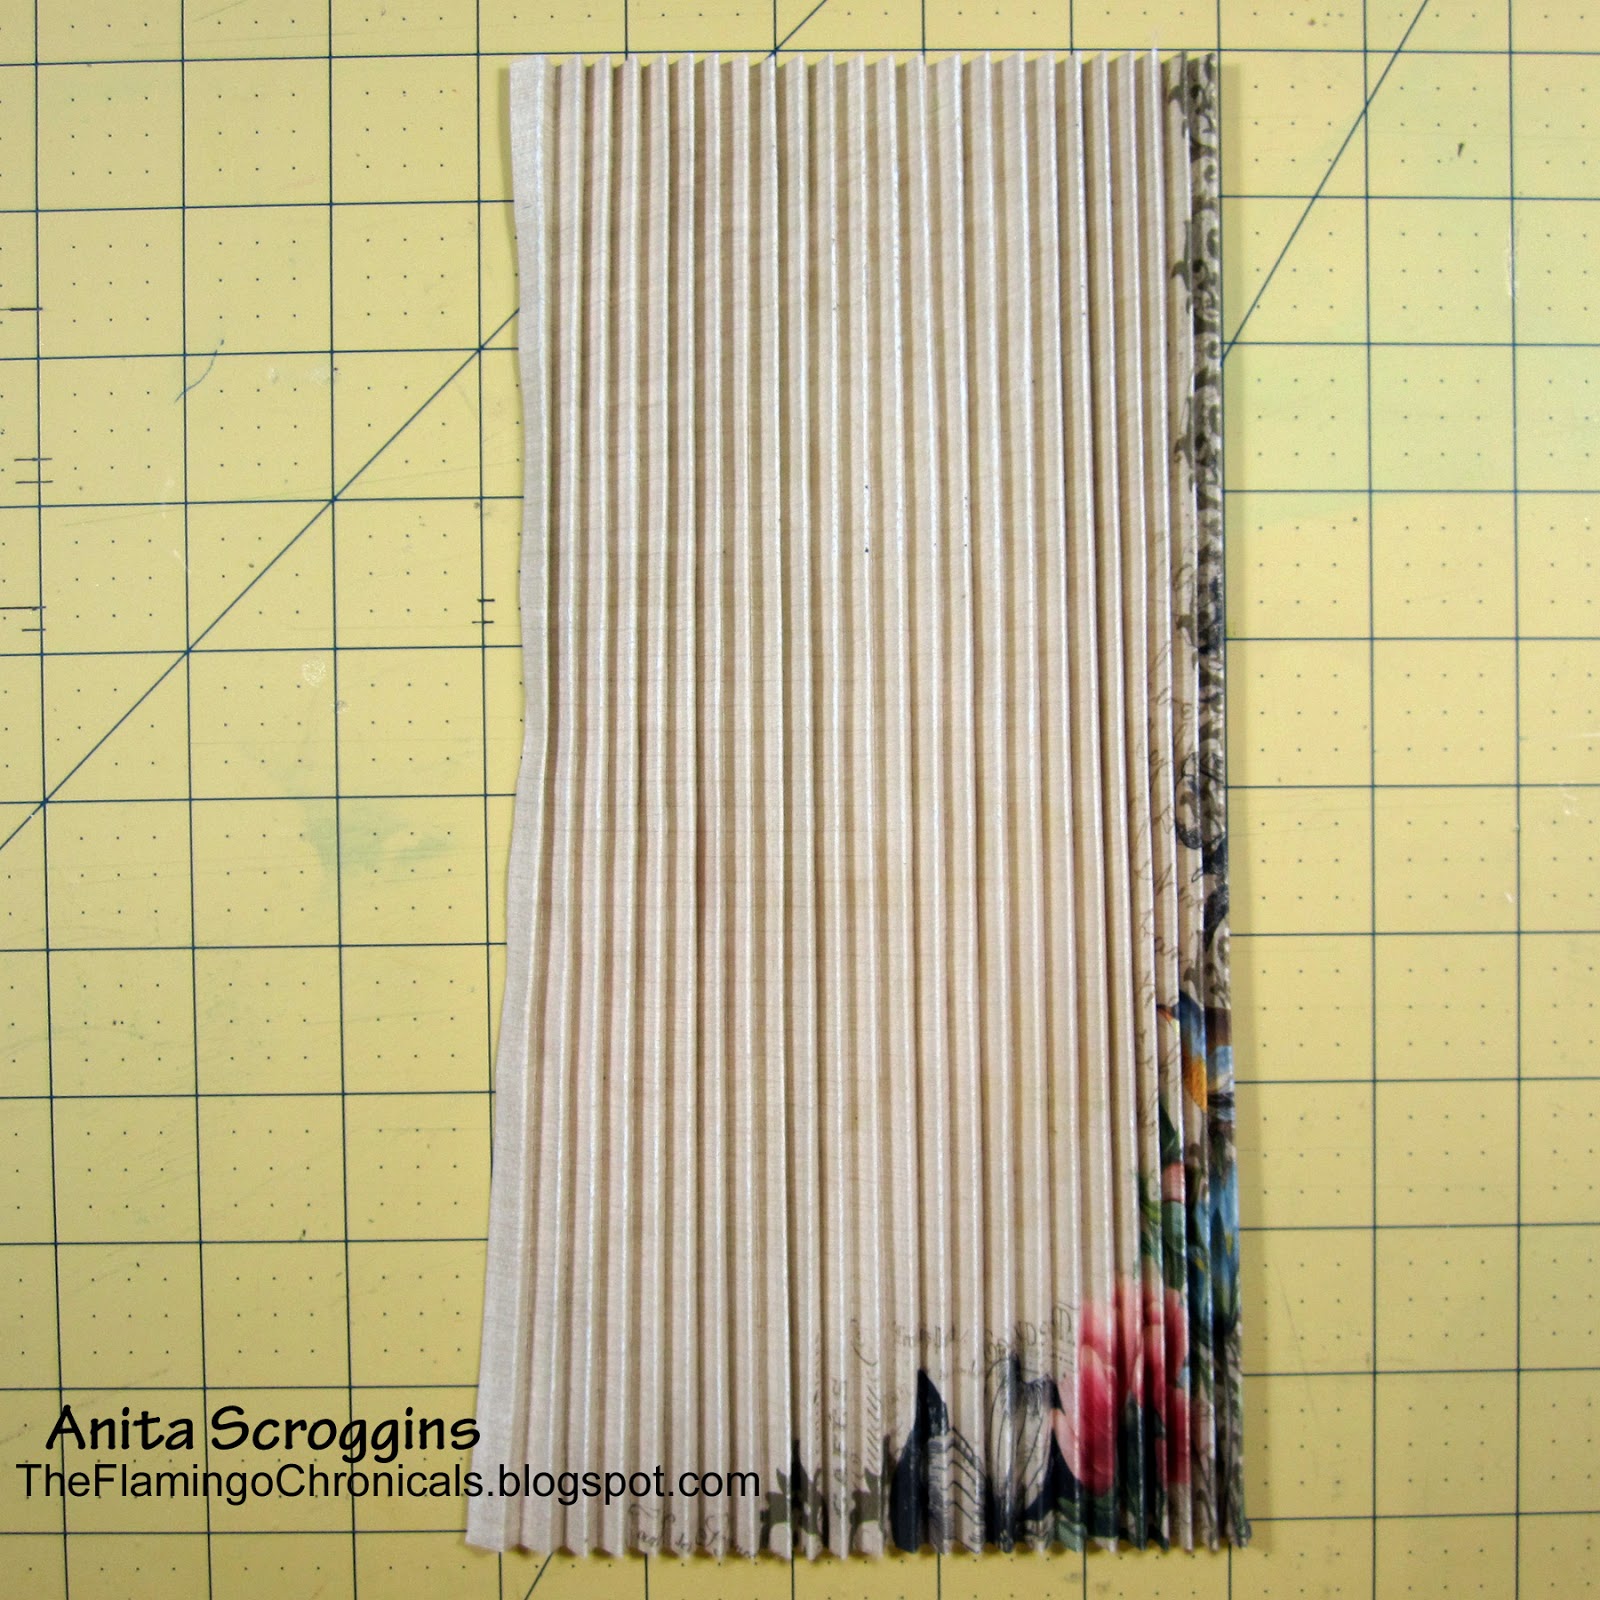
I scored the paper every 1/2", then flipped it over and scored on the 1/4" intervals between the first score marks. So the paper ended up being scored every 1/4", with every other score mark alternating front and back.  Now the fun really begins!
pleated paper
Accordion fold the paper until it is pleated all the way across.
(This is time consuming and takes some practice, I admit. I recommend that you start with some fairly thin paper and make the score marks further apart, maybe every 1/2" instead of every 1/4" to practice. Once you get a feel for it, then work on the paper you want to use on your layout.)

making a photo mat
You will need something extra strong to hold the pleated paper down, so I used Tear-ific Tape from Sparkle N Sprinkle. Any very strong double sided tape will work. 

vintage photo
I adhered the pleated paper onto several other layers of paper, then matted my photo and adhere it on top using more double sided tape. 
chipboard cluster
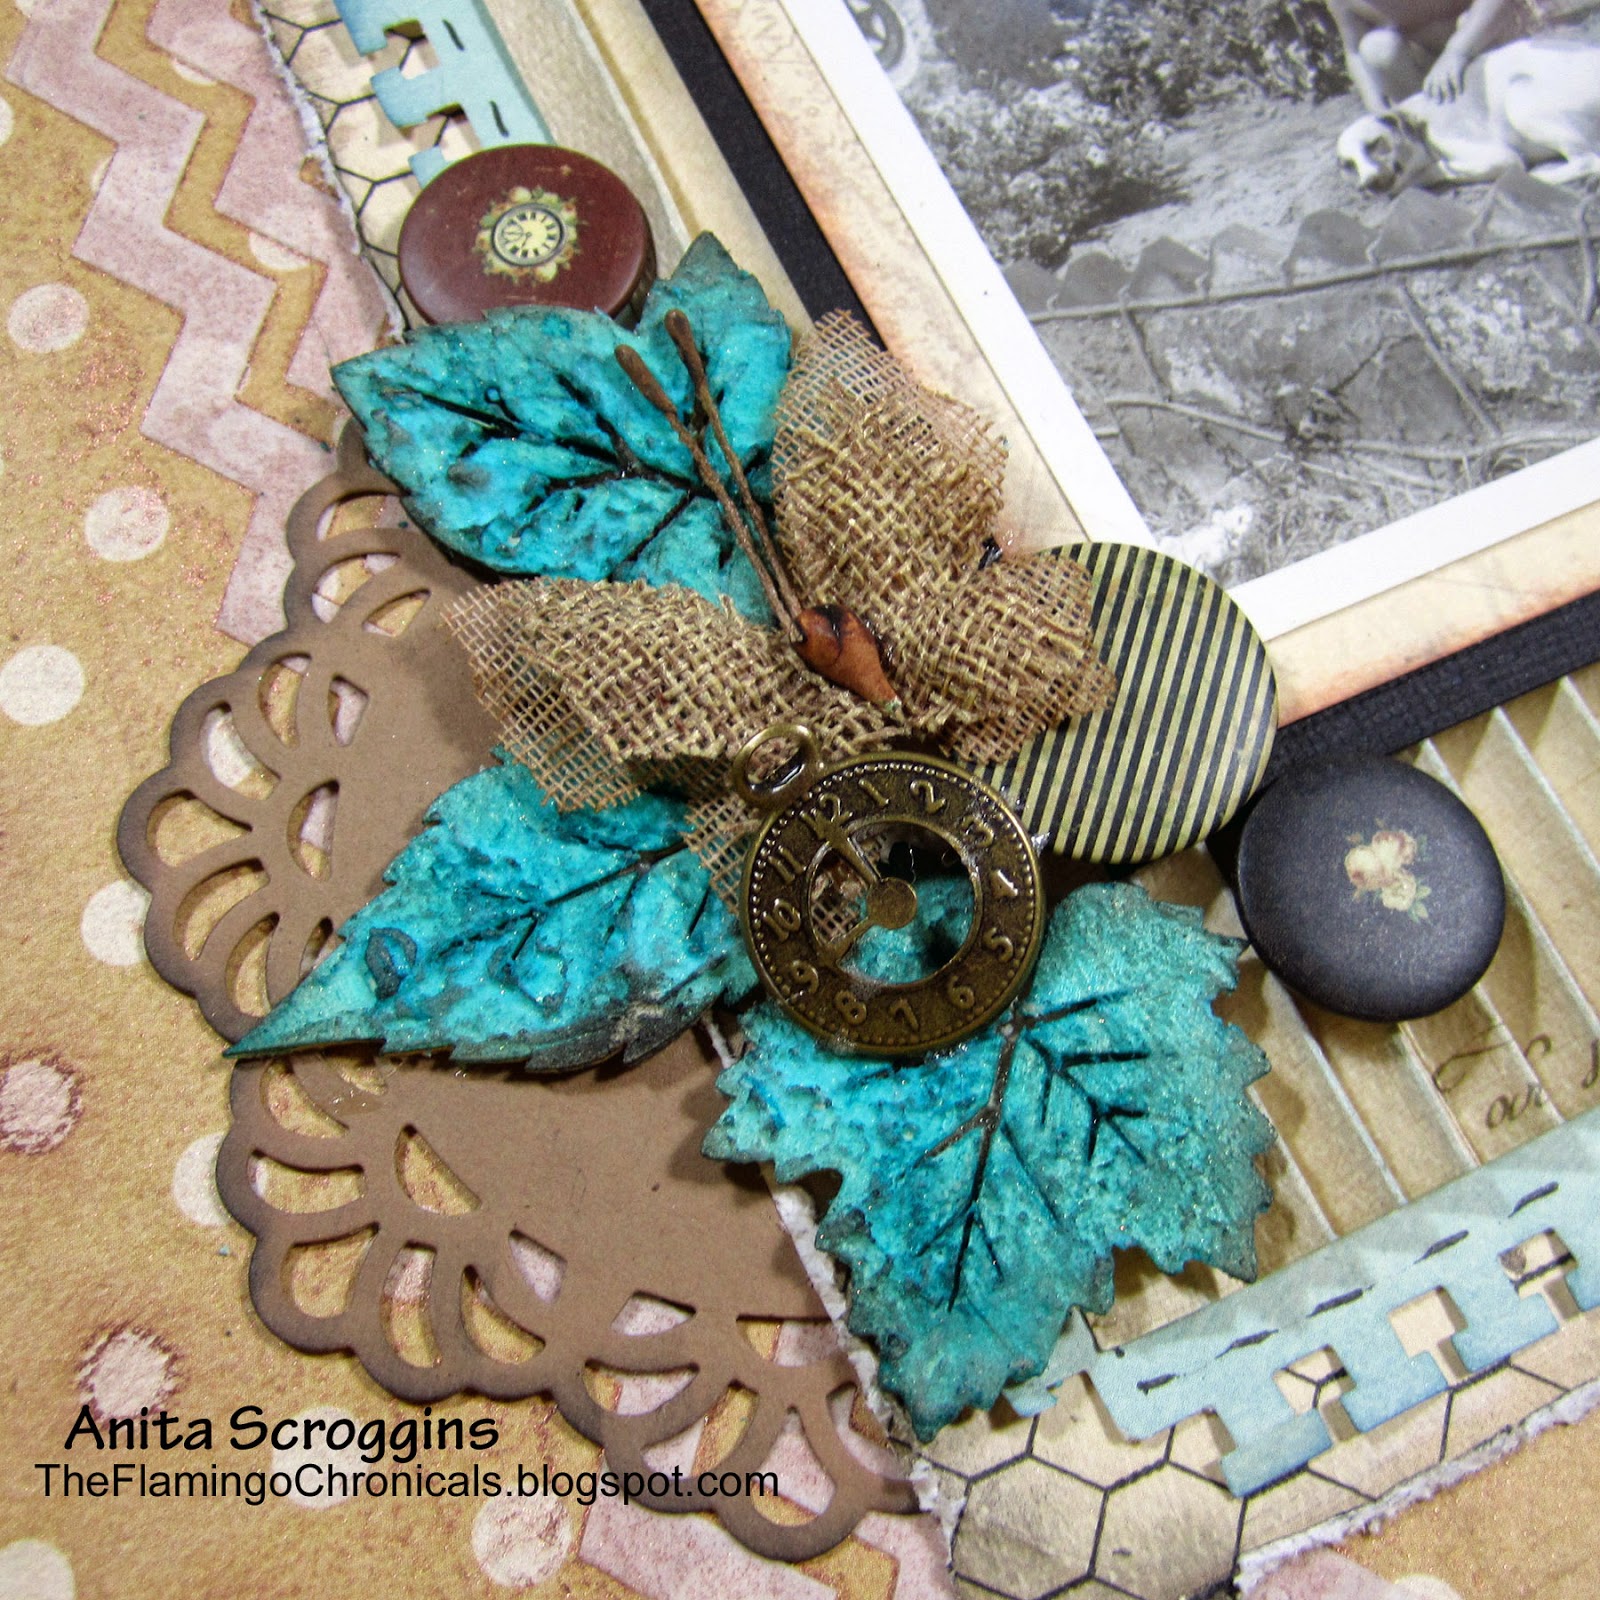
I used a variety of embellishments for my cluster. To color the wood leaves from Prima, I first covered with a layer of Molding Paste, using my paint brush to give it some texture. Once it was dry I used Time Travel Teal from Lindy's Stamp Gang Industrial Chic Magicals Set to color them. 

I hope you give this technique a try! It takes a little practice, but it is a great tool to have in your bag once you get the hang of it.


Christmas Goodies with Sparkle N Sprinkle

Happy Sunday all my blogging friends!
A new week is here and I am enjoying the fabulous cool weather here in 
Dallas. WOW- did we get a cool snap! 

Today I have a new project for Sparkle N Sprinkle to share with you
We love to bake during the holidays at our house, so the new Sweet Holiday #655 Stamp Set is perfect!

I stamped the sentiment and heat embossed with Silver Detail EP, then filled in the outline with a marker.
I stamped the Gingerbread Man with Brown VersaMark ink, then colored with pastel pencils and added black rhinestones for the buttons. I stamped directly on top of my glitter using the new Wonky Lines Background to create my punched border strip.

 I used the Christmas Delight Digi along with my Silhouette Cameo to create my title.

I covered a piece of chipboard with 2 1/2" Tear-ific Tape, then burnished with Goldenrod and Luau Green Glitters.

I am so excited that Sparkle N Sprinkle will now be stocking Mon Ami Gabby products in the store!
I love bling, and these products are fabulous. I always run for their booth at convention ;)

To see more detail on my layout, including the full supply list and directions, please visit

I'm linking up at the following challenges:


 Thanks so much for stopping by today!

Have an amazing week!

Anita


Sparkle N Sprinkle September Reveal


Welcome to Sparkle N Sprinkle's September 1 Reveal.


This month SIX new stamp sets are being introduced.   These sets are 20% off their regular price, until September 3rd.  All the new reveal sets are available on Cling Mounted Rubber and as a digital image. The Magic of the Season, set #653 is the stamp set featured in  This Month's Technique Video.


The sets are:


Autumn Splendor #651   (Digi version - DIGI651)

Farm Sweet Farm #652  (Digi version - DIGI652)

Magic of the Season #653  (Digi version - DIGI653)

Thanksgiving Friends #656  (Digi version - DIGI656)

Bountiful Blessings #658  (Digi version - DIGI658)

Sweet Holiday #655  (Digi version - DIGI659)


I have use the Magic of the Season stamp set for my layout this month

I used the swirly portion of the hat stamp to stamp all around the edge of my page, then I heat embossed with Silver Detail EP.

I also used the new Wonky Plaid Background to stamp a boarder across the center of my page. I applied
 Tear-ific Tape to cardstock and cut the title using my Cameo machine; I burnished it with Gypsy Red GL.

I heat embossed the Want2Scrap Chippies with Cappuccino EP.

I added a bit more sparkle using Tear-ific Tape and Silver Dreams GL.

To see all the details including a full supply list, please check out
my gallery at Sparkle N Sprinkle.


On Sept 3rd,  one Grand Prize Winner will be selected from the comments left on the designers' blogs listed below.  The Grand Prize Winner will receive their choice of:


1) all SIX of the new rubber stamp sets

or 

2) all the new digital stamps and digital stamp sets. 


The new SNS Creative Challenges also begins today, with lots of prizes and recognition badges. 


The winner of the blog hop will be announced on Sept 3 on Facebook, the SNS blog, and on our blogs:


(Tip: if you have a problem with a particular link, try clicking on the person's blog title to send you to their Home page.)


Don't forget to leave a comment with each Designer to be eligible for the Grand Prize.  We love reading your comments and hope we have inspired you as well.  If you absolutely can not leave a comment for some reason, please email icinganne@yahoo.com with your comment and the name of the blog or Designer you are commenting about.

We hope you enjoy the New Reveals as much as we do!
Wonder which Designer contains the Grand Prize this month?


Thank you so much for stopping by today!
I hope you have had an amazing holiday weekend with family and friends. 

Anita


Rodeo Queen Mini Album Class

Hey everyone! Wow- time is zipping by
and I don't know where it is going!

If you have been following my blog for long, you may know that
I had my Tonsils removed the middle of September last year. 
It was a much longer recover than I had anticipated!
But what really knocked me off my feet was that, at the very same time,
my very best friend of 40 years passed away unexpectedly. When I got home from
the surgery center, I had a voicemail saying that she was in the hospital. She 
never left. And I never got to see her or even say good bye because I had just had surgery
and she was ventilated until she died. She had stage 4B Cancer- and we never even knew she
was sick.  I have had a very difficult time getting through this and I am just now getting back
to kinda normal. Almost normal. Some days anyway.
I am glad to be back and hope to be blogging and crafting like I used to!

Anyhoo- Today I want to share a new project with you,
it is a new class at The Crafty Scrapper on Feb 1, 10:30am $40
Please contact the store directly to reserve your spot. And the 
spots are going fast too, so I would call early!

I love the MR Chipboard Memory Binder for this- and I used a Faux Leather technique on the cover. 
Very Westerny (that is a word here in TX you know). I used a Spellbinders die, Tear-ific-Tape
 and Sparkle N Sprinkle glitter to create the frame behind the title. 

The inside of the covers were distressed to look like leather as well. 
I used Bella BLVD papers though out- when I saw these papers at CHA I knew
I had to make a girly western album with them!

How cute is the blue paisley!!! Love it! I created a pocket and tucked
two tags into it for photos and journaling.
I added eyelets to a tag to form an extra page- lots of spaces for
journaling in this cute little album

To finish the album off I added some Maya Road Paper twine and some jute to the spine. 
Frilly, but western at the same time :) 

This little album has 10 pages, 2 pockets and 4 double sided tags!
I was only able to make 15 kits - so if you are wanting one, 
be sure to call early to reserve yours.

Thank so much for stopping by today.

If you are looking for the Sparkle N Sprinkle layout with the slipper- 
well, I got my Sundays mixed up and it doesn't reveal until NEXT Sunday. So sorry.


The Flock Takes Flights - Sparkle N Sprinkle

Hi Everyone,, We are almost to Christmas!! 
Our family is having our Christmas today, because my 
DD2 is moving to Alaska and she leaves on Christmas Day!

My layout today is using Sparkle N Sprinkle products- have you tried 
their Microfine Glitter and Embossing Powders yet???
They are AWESOME!!
I have used Basic Grey papers- they are an assortment of lines here,
some I have had forever! 
For the flowers I used Brushable Glue and covered with Starfire Glitter. I used Flourishes 1 to create 
my pattern on the pink paper here. 

I used Tear-iffic-Tape on several layers of the papers to add 
glittered stripes. Seriously- this tape is one of the best things ever! Simply apply the tape where
you want some sparkle, peel of the protective backing and burnish with glitter. Easy peasy!


Here I used two different widths of Tear-iffic-Tape to create two glittered stripes.
For the ribbon, I started with a plain fabric ribbon and stamped my sentiment
directly onto it. This is a super easy way to get custom ribbons.

Here is a closer look at my heat embossed background. I used Princess Rose EP and
VersaMark ink for this. 

Here is another great way to use Tear-ific-Tape- I applied it to the edge of
my paper strip, used a border punch on it, peeled of the protective backing
and then burnished with glitter. To finish up my layout, I used my machine
to sew around the outside edge, then doodled with a white pen. This layout has a lot of layers
on it, but I can still fit it in a page protector because it is not too bulky.
Bulky has been a problem for me of late ;o)

Here are a couple of quick projects I made this month
My annual Brunch invitations - I wanted to jazz them up a little bit, so I
added a bit of sparkle using Tear-iffic-Tape and Glitter, so easy!

I wanted to dress up a plain Jane candle, so I started by stamping some simple background images
using StazOn inks. I applied 2 1/2" Tear-iffic-Tape to a piece of cardstock, and
border punched both edges. I removed the paper backing, added a piece of
patterned paper down the center (this was tricky, I admit) and then burnished the bare edges
with my glitter.
I used Tear-iffic-Tape and scrap pieces of cardstock, punched my stars,
removed the paper backing and added glitter.


Have you joined in the fun at the Sparkle N Sprinkle Challenge yet?
The deadline is the 25th and, as always, the theme is Anything Goes
use glitter, embossing powder, and/or flocking.
There are some great prizes to be had, so be sure to check it out!!


Here is a list of SNS Supplies I used:

Thanks for stopping by today - have a wonderful week and enjoy your 
time with family and friends! 

Anita

Christmas Layout - SNS

Hi everyone in blogland! 
Are you counting the days until the Black Friday sales? 
I am so happy to report that I am finished with my Christmas shopping!
It is a lot easier now that the kids are grown, I admit. 

I am not a chronological scrapbooker, I scrap whatever photo I feel like picking up.
So these days I am working on some very old photos from when my girls were very little!
 
My papers for this project are from Bo Bunny. 
I also used some Maya Road, Spellbinders, EK Success punch, Prima, and a
bunch of stuff from my stash.

I used my Cricut E2 and Sticker paper to create this embellishment, then burnished with Sonic Silver GL.
My flowers were accented by coating with Brushable Glue and Crystal Ice GL.

 
The chipboard pieces were painted with white acrylic, while wet I sprinkled with Starfire GL.

These small roses, and the others like them on my project are from I Am Roses
they have some awesome flowers!


 For this photo frame and the red punched border along the bottom of the page, I applied Tear-ific-Tape to my cardstock, die cut the image, removed the backing paper and then burnished with my glitter.
Easy peasy! For complete instructions on the project, see my gallery 

I am linking up at the following challenges;
4 Crafty Chics - Snowflakes
 I Am Roses - 2 flowers (the red and white small roses)


SNS Supplies:
Thanks so much for stopping by today to visit!
Have a wonderful week and a fabulous Thanksgiving next week!
Anita

Dream - Sparkle N Sprinkle and Cranberry ramblings

Good morning fellow bloggers!
Who can believe that we are only a couple of weeks away from
Thanksgiving??? Not me for sure. I have not even
bought a Turkey!! I need to get on that.
And some cranberries. I need some cranberries. I checked my freezer and
I am down to one lonely bag of cranberries.
I LOVE CRANBERRIES. 
I eat them all year long. Muffins, Tarts. Scones. mmmmmm, cranberries.
So I always buy a whole case of them in the fall and
freeze them. Does anyone want a fabulous recipe for cranberry
sauce? Not the jelly stuff, but wonderful whole
cranberries with orange? Here you go;

The best Cranberry Sauce ever, I promise
1 lb fresh cranberries

1 fresh orange
1 cup sugar

Wash the cranberries and pick out any bad ones.
Peel the orange, then separate the sections. You want to cut the little pieces
of membrane off each section as best you can.
Chop the orange sections and put them along with any juice in a medium
sized heavy pan. Add the berries and the sugar.
Put over medium heat and stir until the sugar is dissolved.
Turn the heat up to med high, keep cooking until the whole thing
starts to boil and the berries pop open. Boil for 1-2 more minutes, stirring.
You don't need every berry to pop open, so don't stress over it!
I let it cool a few minutes in the pan, then pour it into my serving dish.
It will thicken up as it cools down.Keep it in the fridge.
This is also great poured over brie or creamed cheese.
It will keep for WEEKS in a glass jar in the fridge. Just saying.

Ok, so who wants to see my layout now :)
Or should we just go get lunch. Who is hungry?

My paper is Graphic 45, I used Flourishes Two stamp set for my background stamping around the photo.
To get the lovely layer of sparkle around my photo I applied 1/2" Tear-ific-Tape to my mat, then burnished it with Moon Rise Tinsel Glitter. For the flowers I applied 2 1/2" Tear-ific-Tape to my cardstock then cut with a Sizzix die. I applied different glitters for the top and bottom layers.
For the lattice piece here and the title, I die cut Sticker paper using my Cricut E2, removed the paper backing and applied my glitter. The chipboard stars were heat embossed with Velvet Sparkle EP.
Here is a closer look at the stamping. I used VersaMark and EP then heat embossed. The butterfly was made using the same technique as the flowers.

Here are a list of my supplies:

SNS Supplies:


 For complete instructions please see my gallery

Thanks so much for stopping by today!


Have a wonderful week and
May The Flamingos Be With You!
Anita